
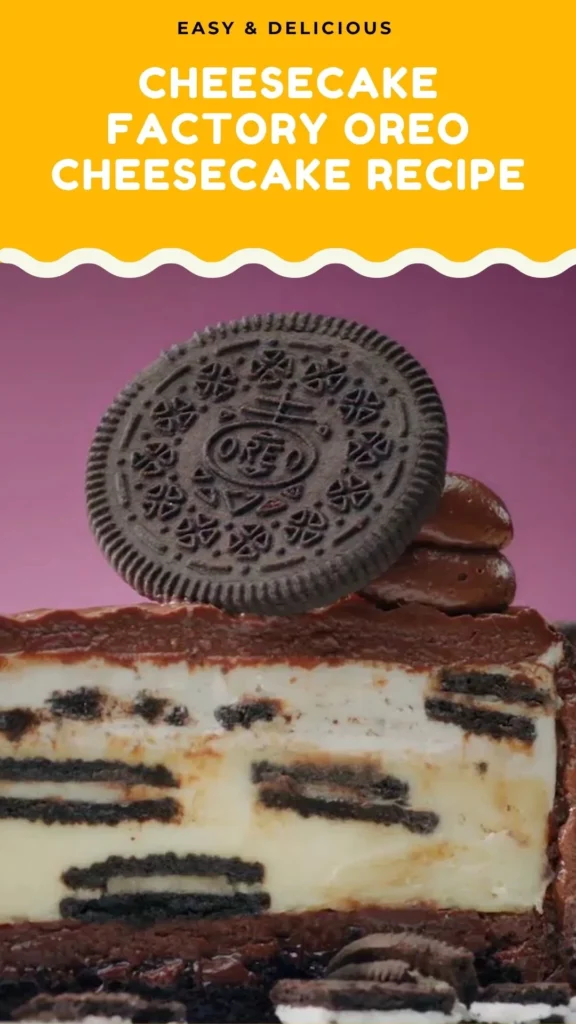
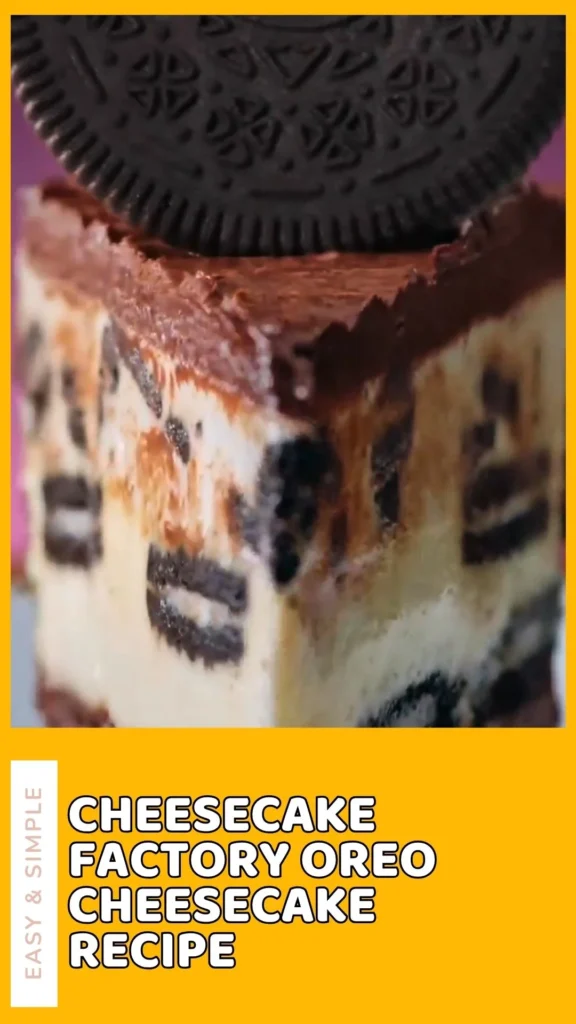
If you’ve ever dreamed of recreating that iconic Cheesecake Factory Oreo cheesecake at home, this comprehensive guide will show you exactly how to make Cheesecake Factory Oreo cheesecake that rivals the original.
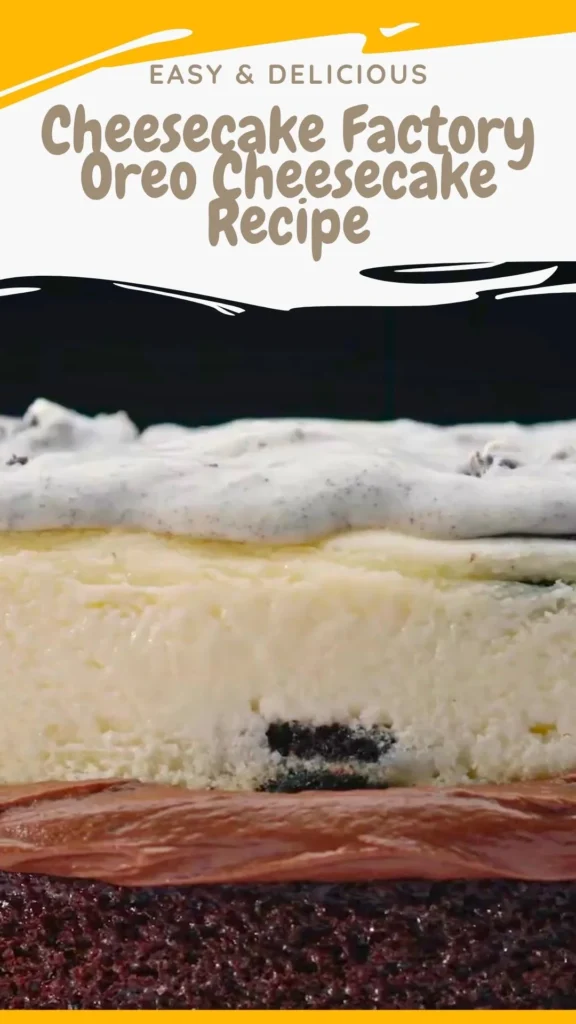
This cheesecake factory oreo cheesecake copycat features three decadent layers: a moist chocolate cake base, silky chocolate ganache, and creamy Oreo-studded cheesecake filling that captures every bit of the restaurant’s legendary dessert.
Whether you’re celebrating a special occasion or simply indulging your sweet tooth, this the Cheesecake Factory Oreo cheesecake recipe delivers bakery-quality results with step-by-step instructions that make the process surprisingly manageable. The combination of rich chocolate, crushed Oreos, and velvety cream cheese creates a showstopping dessert that looks as impressive as it tastes.
What Does It Taste Like?
The Oreo cheesecake Cheesecake Factory experience is pure indulgence from the first forkful. You’ll encounter multiple textural and flavor dimensions: a tender, moist chocolate cake foundation provides a subtle cocoa base, while the glossy chocolate ganache layer adds intense richness and a smooth, fudgy mouthfeel.
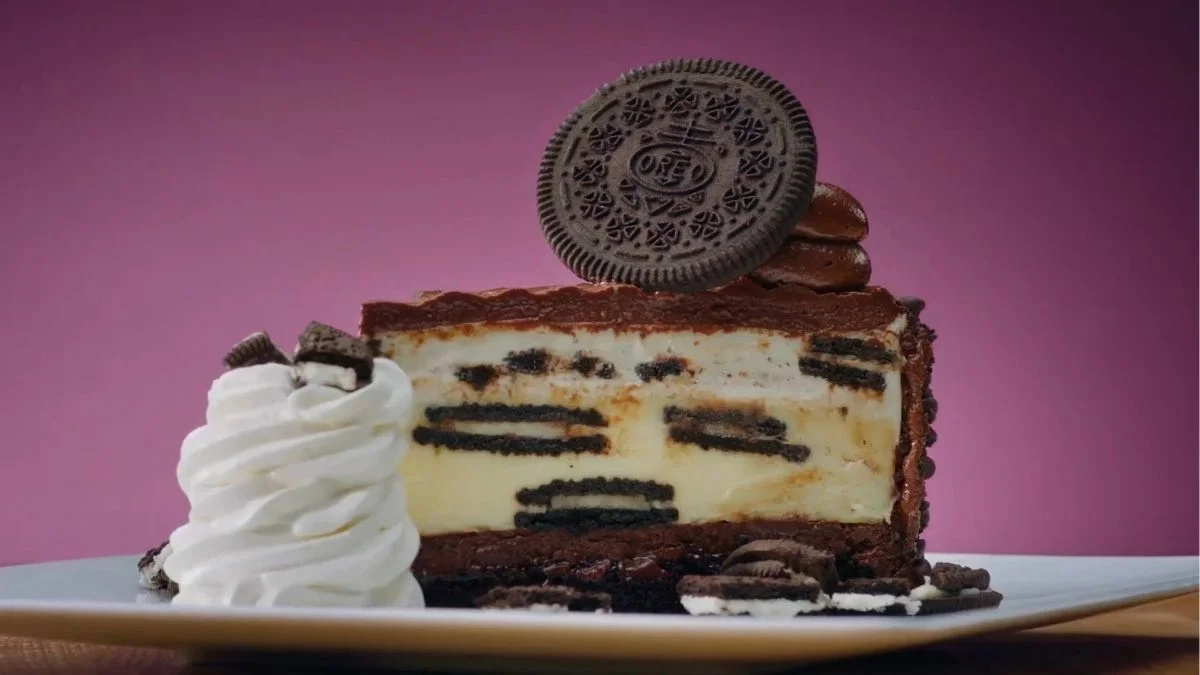
The star of the show-the Oreo cheesecake layer-is impossibly creamy with a tangy cream cheese profile balanced by sweetness and studded with crunchy Oreo cookies that soften slightly during baking. Each bite delivers the nostalgic taste of Oreos amplified by luxurious cheesecake, creating that perfect sweet-salty contrast.
The overall profile is decadent yet balanced, with the chocolate elements preventing the dessert from becoming cloyingly sweet, while the cheesecake’s slight tang cuts through the richness beautifully.
Ingredients and Kitchen Utensils Lists
Ingredients
Layer 1: Chocolate Cake Base
- 55g all-purpose flour
- 65g granulated sugar
- 3 tablespoons cocoa powder
- 1/8 teaspoon baking powder
- 1/2 teaspoon baking soda
- 30ml canola oil
- 57ml milk
- Pinch of vanilla extract
- 1 egg white
- Pinch of instant coffee
- 55ml boiling water
Layer 2: Chocolate Ganache
- 4.4 oz milk chocolate
- 4 oz semi-sweet chocolate
- 95ml heavy whipping cream
Layer 3: Oreo Cheesecake
- 8 oz cream cheese (full-fat, room temperature)
- 75g granulated sugar
- 1 teaspoon vanilla extract
- 3 large eggs (room temperature)
- 3 tablespoons sour cream
- 78ml heavy cream
- 1 package Oreo cookies (approximately 36 cookies)
Kitchen Utensils
- 9-inch springform pan
- Parchment paper
- Non-stick cooking spray
- Large mixing bowls (3-4)
- Electric hand mixer or stand mixer
- Whisk
- Rubber spatula
- Measuring cups and spoons
- Kitchen scale (recommended for accuracy)
- Aluminum foil
- Larger round pan (for water bath)
- Cooling rack
- Microwave-safe bowl or double boiler
- Offset spatula (optional, for smoothing)
Preparation and Cooking Time with Serving
Prep Time: 35 minutes
Baking Time: 58-63 minutes (13 minutes cake + 45-50 minutes cheesecake)
Cooling Time: 4 hours minimum (overnight refrigeration recommended)
Total Time: 5-6 hours (including cooling)
Servings: 12-16 slices
Difficulty Level: Advanced
Recipe Instructions with Steps
Step 1: Prepare the Chocolate Cake Base
Preheat your oven to 350°F. In a medium bowl, whisk together 55g all-purpose flour, 65g granulated sugar, 3 tablespoons cocoa powder, 1/8 teaspoon baking powder, and 1/2 teaspoon baking soda until completely combined with no lumps. In a separate bowl, whisk together 30ml canola oil, 57ml milk, a pinch of vanilla extract, and 1 egg white until smooth. Gradually add the dry ingredients to the wet ingredients in two separate batches, mixing thoroughly after each addition to ensure a smooth batter. Dissolve a pinch of instant coffee in 55ml boiling water, then stir this coffee mixture into the batter-it will become quite runny, which is exactly what you want for this Cheesecake Factory Oreo cheesecake copycat recipe.
Step 2: Bake the Cake Layer
Prepare your 9-inch springform pan by spraying it generously with non-stick cooking spray and lining the bottom with a circle of parchment paper. Pour the thin chocolate cake batter into the prepared pan, using a spatula to ensure it spreads evenly. Place in your preheated 350°F oven and bake for exactly 13 minutes. The cake should be set but still very moist-it won’t rise much and will remain a thin layer. Remove from the oven and allow to cool completely in the pan while you prepare the ganache. This foundation is crucial for authentic Oreo cheesecake Factory flavor.
Step 3: Make the Chocolate Ganache
While the cake layer cools, prepare your chocolate ganache. Chop 4.4 oz milk chocolate and 4 oz semi-sweet chocolate into small, uniform pieces for even melting. Place the chocolate in a microwave-safe bowl and melt in 30-second intervals, stirring between each, until completely smooth (alternatively, use a double boiler). In a separate small saucepan or microwave, heat 95ml heavy whipping cream until it just begins to steam but doesn’t boil. Pour the hot cream over the melted chocolate and whisk vigorously until the mixture is silky, glossy, and completely homogeneous. The ganache should be pourable but thick enough to coat the back of a spoon.
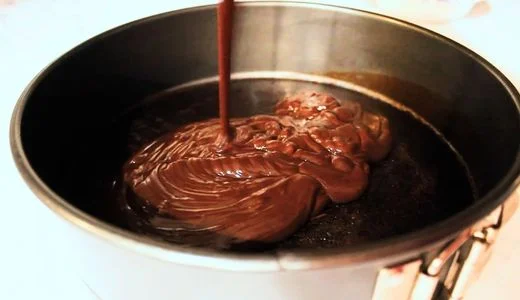
Step 4: Assemble Cake and Ganache Layers
Once your chocolate cake base has cooled to room temperature in the springform pan, pour the prepared chocolate ganache directly over the top. Use an offset spatula or the back of a spoon to spread the ganache evenly across the entire surface, creating a smooth, level layer that reaches the edges. Set the pan aside at room temperature while you prepare the Cheesecake Factory Oreo cheesecake ingredients for the final layer. The ganache will begin to set slightly, creating the perfect foundation for the cheesecake batter.
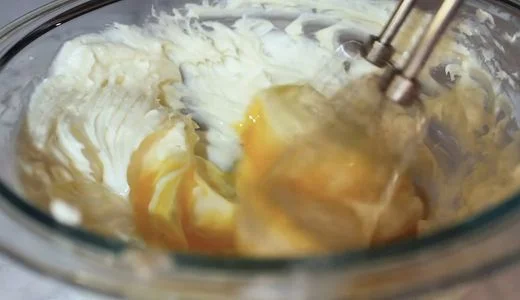
Step 5: Prepare the Oreo Cheesecake Batter
Reduce your oven temperature to 325°F. In a large mixing bowl, beat 8 oz room-temperature cream cheese with 75g granulated sugar using an electric mixer on medium speed for 2-3 minutes until completely smooth, fluffy, and free of lumps-scraping down the sides frequently. Add 1 teaspoon vanilla extract and mix briefly. Add the 3 room-temperature eggs one at a time, mixing on low speed after each addition just until incorporated (overmixing incorporates too much air, which can cause cracks). Gently fold in 3 tablespoons sour cream and 78ml heavy cream using a rubber spatula until the batter is silky and uniform. The room-temperature ingredients are essential for achieving that signature the Cheesecake Factory Oreo cheesecake texture.
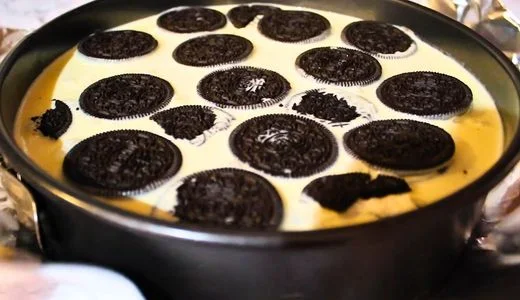
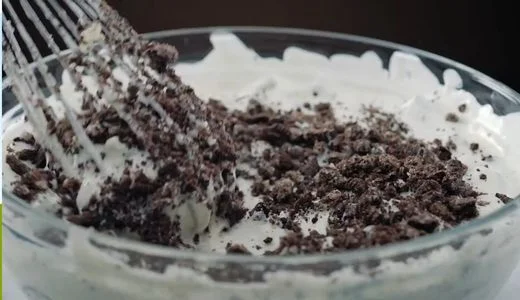
Step 6: Layer the Oreos and Cheesecake
Separate your Oreo cookies into whole cookies and crushed pieces-you’ll need both. Pour approximately half of the prepared cheesecake batter over the ganache layer in the springform pan, smoothing it gently with a spatula. Arrange a layer of whole Oreo cookies on top of this batter, placing them close together but not overlapping-typically 8-10 cookies fit nicely in a single layer. Carefully pour the remaining cheesecake batter over the whole Oreos, using a gentle hand to avoid disturbing their placement. Top with another layer of Oreos-you can use whole cookies arranged decoratively or coarsely crushed Oreos scattered across the surface for that authentic Cheesecake Factory Oreo cheesecake slice appearance.
Step 7: Prepare the Water Bath
Wrap the bottom and sides of your springform pan tightly with heavy-duty aluminum foil, creating at least two layers to prevent any water from seeping into the cheesecake during baking. This step is absolutely critical for achieving the creamy texture characteristic of how to make Cheesecake Factory Oreo cheesecake successfully. Place the wrapped springform pan inside a larger round baking pan or roasting pan. Gently tap the springform pan on the counter 2-3 times to release any air bubbles trapped in the batter.
Step 8: Bake the Cheesecake
Carefully place the nested pans on the center rack of your preheated 325°F oven. Using a pitcher or large measuring cup, pour hot water into the larger pan until it reaches approximately halfway up the sides of the springform pan, creating a water bath (bain-marie). This gentle, moist heat environment prevents cracking and ensures even cooking. Bake for 45-50 minutes-the cheesecake is done when the edges are set and puffed slightly while the center still has a subtle jiggle (about a 2-inch diameter circle). The residual heat will continue cooking the center as it cools.
Step 9: Cool and Chill
Turn off the oven and crack the door open slightly, allowing the cheesecake to cool gradually in the oven for 1 hour. This prevents sudden temperature changes that cause cracking. After an hour, carefully remove the cheesecake from the water bath and remove the aluminum foil. Allow it to cool completely at room temperature on a wire rack for another 2-3 hours. Once at room temperature, cover the pan loosely with plastic wrap and refrigerate for at least 4 hours, though overnight chilling produces the best texture and makes slicing much cleaner for that perfect Cheesecake Factory Oreo cheesecake copycat presentation.
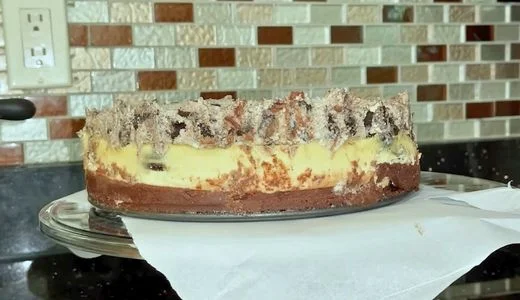
Step 10: Unmold and Serve
When ready to serve your the Cheesecake Factory Oreo cheesecake recipe, run a thin knife around the edge of the springform pan to loosen any spots where the cheesecake may have adhered. Gently release the springform latch and remove the outer ring. For the cleanest slices, use a sharp knife dipped in hot water and wiped dry between each cut. This professional technique ensures those picture-perfect slices that showcase all three beautiful layers.
Customization and Pairing for Serving Ideas
1. Double Stuffed Oreo Variation
Elevate your Cheesecake Factory Oreo cheesecake recipes by using Double Stuf Oreos instead of regular ones. The extra cream filling adds even more of that signature Oreo flavor throughout the cheesecake layer. You can also experiment with different Oreo varieties like Mint Oreos for a refreshing twist, Peanut Butter Oreos for nutty richness, or even Birthday Cake Oreos for a festive version. Simply substitute equal amounts of your chosen variety wherever the recipe calls for regular Oreos.
2. Whipped Cream and Garnish Presentation
Transform your Cheesecake Factory Oreo cheesecake slice into a restaurant-worthy presentation by topping each portion with a generous dollop of freshly whipped cream. Make stabilized whipped cream by beating 1 cup heavy cream with 2 tablespoons powdered sugar and 1/2 teaspoon vanilla until stiff peaks form. Garnish with additional crushed Oreos, chocolate shavings, or a drizzle of chocolate sauce. For extra elegance, pipe the whipped cream using a star tip and place a mini Oreo cookie on top of each slice.
3. Coffee and Beverage Pairings
The rich chocolate and creamy profile of Oreo cheesecake Cheesecake Factory pairs beautifully with coffee-based beverages. Serve alongside a robust espresso, creamy cappuccino, or iced vanilla latte to cut through the dessert’s richness. For non-coffee drinkers, cold whole milk is a nostalgic choice that complements the Oreo flavor perfectly. Adults might enjoy pairing this dessert with a dessert wine like Port, a chocolate stout beer, or even Irish cream liqueur for an indulgent after-dinner experience.
4. Individual Mini Cheesecakes
Adapt this the Cheesecake Factory Oreo cheesecake into portion-controlled mini cheesecakes using a standard muffin tin lined with cupcake liners. Crumble 2 Oreos into the bottom of each liner as the base, add a small spoonful of cheesecake batter, place a half Oreo in the center, top with more batter, and bake at 325°F for 18-20 minutes. These individual servings are perfect for parties, eliminate the need for slicing, and allow guests to enjoy their own personal Cheesecake Factory Oreo cheesecake copycat experience.
5. Gluten-Free Oreo Cheesecake
Create a gluten-free version by using gluten-free Oreos (widely available in most grocery stores) and substituting the all-purpose flour in the chocolate cake base with a 1:1 gluten-free baking flour blend. The rest of the Cheesecake Factory Oreo cheesecake ingredients are naturally gluten-free. This simple adaptation allows you to serve this spectacular dessert to guests with gluten sensitivities without compromising flavor or texture.
6. Ice Cream Cheesecake Hybrid
For a frozen twist, prepare the cheesecake completely as directed, then after chilling overnight, freeze it for at least 4 hours. The result is a semi-frozen dessert with a texture reminiscent of ice cream cake but with the luxurious density of cheesecake. Serve the frozen Oreo cheesecake Factory slices topped with hot fudge sauce for a temperature contrast that’s absolutely divine. Let slices sit at room temperature for 5-10 minutes before serving for the perfect consistency.
7. More to Try
If you enjoyed this Cheesecake Factory Oreo Cheesecake Recipe, you may also love trying other indulgent favorites from our collection. The rich Creamy Carnivore Cheesecake Recipe is perfect for cheesecake lovers who enjoy ultra-smooth, decadent desserts. For something with a fruity twist, the Cheesecake Factory Pineapple Upside Down Cheesecake Recipe delivers a delicious balance of caramelized sweetness and creamy texture.
Tips Section
1. Room Temperature Ingredients Are Non-Negotiable
The single most important factor in achieving the smooth, lump-free texture that defines the Cheesecake Factory Oreo cheesecake recipe is using room-temperature cream cheese and eggs. Cold cream cheese will never fully incorporate, creating lumps that ruin the silky consistency. Remove cream cheese from the refrigerator at least 2 hours before beginning, or microwave it in 10-second bursts until just softened (not melted). Room-temperature eggs blend more easily and create a more stable emulsion. This seemingly small detail makes the difference between amateur and professional results.
2. The Water Bath Prevents Cracks
Cheesecake cracking is the most common complaint among home bakers, but the water bath method virtually eliminates this problem when making Cheesecake Factory Oreo cheesecake recipes. The steam from the water bath creates a humid environment that prevents the top from drying out and cracking, while the gentle, even heat ensures the cheesecake cooks uniformly from edge to center. Ensure your aluminum foil wrapping is completely watertight-even a small leak can create a soggy crust. If you’re nervous about leaks, use a slow cooker liner inside the larger pan as an extra barrier.
3. Don’t Overbake the Cheesecake
Understanding what “done” looks like is crucial for how to make Cheesecake Factory Oreo cheesecake with the perfect texture. At 45-50 minutes, the outer 3 inches of the cheesecake should be set and slightly puffed, while the center 2-3 inch circle should still jiggle noticeably when you gently shake the pan-think of the movement of Jell-O that’s just set. This might seem underbaked, but the residual heat continues cooking the center during the gradual cooling process. An overbaked cheesecake will be dense, dry, and prone to cracking. When in doubt, slightly underbaking is always better than overbaking.
4. The Gradual Cooling Process Matters
Rushing the cooling process is a guaranteed way to create cracks in your Oreo cheesecake Cheesecake Factory. The gradual temperature reduction-from oven with door cracked, to room temperature, to refrigerator-allows the cheesecake to contract slowly and evenly. Sudden temperature changes cause the proteins in the eggs and cream cheese to contract rapidly, creating stress fractures across the surface. Plan your timing so the cheesecake has adequate cooling time; this dessert truly benefits from being made the day before serving.
5. Quality Chocolate Makes a Difference
While you don’t need to buy the most expensive chocolate for the ganache layer, using decent-quality chocolate significantly impacts the final flavor of your Cheesecake Factory Oreo cheesecake copycat. Avoid chocolate chips, which contain stabilizers that prevent smooth melting. Instead, choose bar chocolate-brands like Ghirardelli, Lindt, or even high-quality supermarket brands work beautifully. The combination of milk chocolate and semi-sweet creates a balanced sweetness that complements rather than overwhelms the Oreo cheesecake layer.
6. Proper Mixing Technique Prevents Air Bubbles
When incorporating eggs into your cheesecake batter, mix on the lowest speed possible and only until just combined. Overmixing or using high speed incorporates excessive air, which expands during baking and creates unsightly air pockets or a soufflé-like texture that collapses upon cooling. After adding all ingredients, resist the urge to keep mixing “just to be sure”-once the batter is smooth and uniform, stop immediately. The gentle tapping of the pan before baking releases any trapped air bubbles that did form.
7. Slicing Secrets for Perfect Presentation
Achieving those Instagram-worthy slices requires the right technique. Use a long, sharp knife (not a serrated blade) and dip it in very hot water, then wipe it completely dry with a kitchen towel. Make one clean cut in a single downward motion without sawing back and forth. Wipe the knife clean and repeat the hot water dipping process for each cut. This hot knife melts through the dense cheesecake cleanly, preventing the layers from smearing together. For the neatest slices, cut the Cheesecake Factory Oreo cheesecake slice when it’s very cold, straight from the refrigerator.
Storage and Reheating Guidance
Store your the Cheesecake Factory Oreo cheesecake covered with plastic wrap or in an airtight container in the refrigerator for up to 5 days. The flavors actually improve after the first day as they meld together. This cheesecake also freezes beautifully for up to 2 months-wrap individual slices tightly in plastic wrap, then aluminum foil. Thaw overnight in the refrigerator before serving. No reheating necessary; cheesecake is always served chilled.
Common Queries and FAQs Section
Here, we’ve got you covered with some common questions that people often ask
Q: Can I make this cheesecake without a springform pan?
A: While a springform pan is highly recommended for easy removal and presentation, you can use a regular 9-inch round cake pan lined with parchment paper that extends up the sides and overhangs. After chilling, use the parchment overhang as handles to lift the entire cheesecake out. However, you’ll sacrifice the clean, professional sides that make the Cheesecake Factory Oreo cheesecake copycat so visually impressive.
Q: Why did my cheesecake crack even though I used a water bath?
A: Cracking can occur from several causes: overbaking (the center should still jiggle), opening the oven door during baking (causing temperature fluctuations), cooling too quickly (always use the gradual cooling method), or overmixing the batter (which incorporates too much air). For future attempts with your Cheesecake Factory Oreo cheesecake recipes, focus on gentle handling and patience throughout the cooling process.
Q: Can I use low-fat or reduced-fat cream cheese?
A: Full-fat cream cheese is essential for achieving the authentic texture and richness of Oreo cheesecake Cheesecake Factory. Low-fat varieties contain more moisture and less fat, resulting in a less stable batter that’s more prone to cracking and a texture that’s grainy rather than creamy. The extra calories are absolutely worth it for this special-occasion dessert-it’s what creates that luxurious mouthfeel.
Q: How do I know if my cheesecake is set enough in the center?
A: The perfect doneness indicator for how to make Cheesecake Factory Oreo cheesecake is the “2-inch jiggle test.” At 45-50 minutes, gently shake the pan-the outer edges should be completely set and firm, while a center circle approximately 2-3 inches in diameter should move with a gentle, uniform jiggle similar to set gelatin. It should not look liquid or slosh around. This center will continue cooking and firm up completely during the cooling process.
Q: Can I make this cheesecake in advance?
A: Absolutely! In fact, the Cheesecake Factory Oreo cheesecake actually tastes better when made 1-2 days in advance, as the flavors have time to develop and meld together. The cheesecake needs at least 4 hours of refrigeration anyway, so making it the day before your event is perfect. It stays fresh in the refrigerator for up to 5 days, giving you excellent make-ahead flexibility for entertaining.
Q: What’s the purpose of instant coffee in the chocolate cake layer?
A: The tiny pinch of instant coffee doesn’t make the cake taste like coffee-instead, it acts as a flavor enhancer that intensifies and deepens the chocolate flavor. This is a professional baker’s secret used throughout the baking industry. The coffee brings out the rich, complex notes in cocoa that might otherwise taste flat, creating a more sophisticated chocolate base for your Cheesecake Factory Oreo cheesecake ingredients.
Q: My ganache is too thick to pour-what went wrong?
A: If your ganache has seized or become too thick, it’s likely because the cream wasn’t hot enough when added to the chocolate, or the ganache cooled too much before you poured it. To fix it, gently reheat the ganache in the microwave in 10-second bursts, stirring between each, until it reaches a smooth, pourable consistency. The ganache should be warm (not hot) when poured over the cake layer for the Cheesecake Factory Oreo cheesecake copycat recipe.
Cheesecake Factory Oreo Cheesecake Recipe
Ingredients
Equipment
Method
- Preheat your oven to 350°F. In a medium bowl, whisk together 55g all-purpose flour, 65g granulated sugar, 3 tablespoons cocoa powder, 1/8 teaspoon baking powder, and 1/2 teaspoon baking soda until completely combined with no lumps. In a separate bowl, whisk together 30ml canola oil, 57ml milk, a pinch of vanilla extract, and 1 egg white until smooth. Gradually add the dry ingredients to the wet ingredients in two separate batches, mixing thoroughly after each addition to ensure a smooth batter. Dissolve a pinch of instant coffee in 55ml boiling water, then stir this coffee mixture into the batter-it will become quite runny, which is exactly what you want for this Cheesecake Factory Oreo cheesecake copycat recipe.
- Prepare your 9-inch springform pan by spraying it generously with non-stick cooking spray and lining the bottom with a circle of parchment paper. Pour the thin chocolate cake batter into the prepared pan, using a spatula to ensure it spreads evenly. Place in your preheated 350°F oven and bake for exactly 13 minutes. The cake should be set but still very moist-it won’t rise much and will remain a thin layer. Remove from the oven and allow to cool completely in the pan while you prepare the ganache. This foundation is crucial for authentic Oreo cheesecake Factory flavor.
- While the cake layer cools, prepare your chocolate ganache. Chop 4.4 oz milk chocolate and 4 oz semi-sweet chocolate into small, uniform pieces for even melting. Place the chocolate in a microwave-safe bowl and melt in 30-second intervals, stirring between each, until completely smooth (alternatively, use a double boiler). In a separate small saucepan or microwave, heat 95ml heavy whipping cream until it just begins to steam but doesn’t boil. Pour the hot cream over the melted chocolate and whisk vigorously until the mixture is silky, glossy, and completely homogeneous. The ganache should be pourable but thick enough to coat the back of a spoon.
- Once your chocolate cake base has cooled to room temperature in the springform pan, pour the prepared chocolate ganache directly over the top. Use an offset spatula or the back of a spoon to spread the ganache evenly across the entire surface, creating a smooth, level layer that reaches the edges. Set the pan aside at room temperature while you prepare the Cheesecake Factory Oreo cheesecake ingredients for the final layer. The ganache will begin to set slightly, creating the perfect foundation for the cheesecake batter.
- Reduce your oven temperature to 325°F. In a large mixing bowl, beat 8 oz room-temperature cream cheese with 75g granulated sugar using an electric mixer on medium speed for 2-3 minutes until completely smooth, fluffy, and free of lumps-scraping down the sides frequently. Add 1 teaspoon vanilla extract and mix briefly. Add the 3 room-temperature eggs one at a time, mixing on low speed after each addition just until incorporated (overmixing incorporates too much air, which can cause cracks). Gently fold in 3 tablespoons sour cream and 78ml heavy cream using a rubber spatula until the batter is silky and uniform. The room-temperature ingredients are essential for achieving that signature the Cheesecake Factory Oreo cheesecake texture.
- Separate your Oreo cookies into whole cookies and crushed pieces-you’ll need both. Pour approximately half of the prepared cheesecake batter over the ganache layer in the springform pan, smoothing it gently with a spatula. Arrange a layer of whole Oreo cookies on top of this batter, placing them close together but not overlapping-typically 8-10 cookies fit nicely in a single layer. Carefully pour the remaining cheesecake batter over the whole Oreos, using a gentle hand to avoid disturbing their placement. Top with another layer of Oreos-you can use whole cookies arranged decoratively or coarsely crushed Oreos scattered across the surface for that authentic Cheesecake Factory Oreo cheesecake slice appearance.
- Wrap the bottom and sides of your springform pan tightly with heavy-duty aluminum foil, creating at least two layers to prevent any water from seeping into the cheesecake during baking. This step is absolutely critical for achieving the creamy texture characteristic of how to make Cheesecake Factory Oreo cheesecake successfully. Place the wrapped springform pan inside a larger round baking pan or roasting pan. Gently tap the springform pan on the counter 2-3 times to release any air bubbles trapped in the batter.
- Carefully place the nested pans on the center rack of your preheated 325°F oven. Using a pitcher or large measuring cup, pour hot water into the larger pan until it reaches approximately halfway up the sides of the springform pan, creating a water bath (bain-marie). This gentle, moist heat environment prevents cracking and ensures even cooking. Bake for 45-50 minutes-the cheesecake is done when the edges are set and puffed slightly while the center still has a subtle jiggle (about a 2-inch diameter circle). The residual heat will continue cooking the center as it cools.
- Turn off the oven and crack the door open slightly, allowing the cheesecake to cool gradually in the oven for 1 hour. This prevents sudden temperature changes that cause cracking. After an hour, carefully remove the cheesecake from the water bath and remove the aluminum foil. Allow it to cool completely at room temperature on a wire rack for another 2-3 hours. Once at room temperature, cover the pan loosely with plastic wrap and refrigerate for at least 4 hours, though overnight chilling produces the best texture and makes slicing much cleaner for that perfect Cheesecake Factory Oreo cheesecake copycat presentation.
- When ready to serve your the Cheesecake Factory Oreo cheesecake recipe, run a thin knife around the edge of the springform pan to loosen any spots where the cheesecake may have adhered. Gently release the springform latch and remove the outer ring. For the cleanest slices, use a sharp knife dipped in hot water and wiped dry between each cut. This professional technique ensures those picture-perfect slices that showcase all three beautiful layers.
Video
Notes
This Cheesecake Factory Oreo cheesecake recipe transforms your kitchen into a professional bakery, producing a dessert that rivals-and might even surpass-the restaurant original. While the multi-layered construction requires time and attention to detail, the step-by-step process breaks down into manageable components that even intermediate bakers can master. The combination of moist chocolate cake, glossy ganache, and creamy Oreo-studded cheesecake creates a symphony of textures and flavors that makes every minute of effort worthwhile. Whether you’re celebrating a birthday, holiday, or simply treating yourself to the ultimate Oreo cheesecake Factory experience, this showstopping dessert delivers impressive results that will have everyone asking for seconds-and the recipe. Your kitchen has never produced anything quite this spectacular!
We’d love to hear how this recipe turns out for you! Give it a try, then drop a comment below to share your thoughts and tips with us.
Also, follow along on Pinterest and Youtube for more tasty updates. Your support and thoughts mean the world!