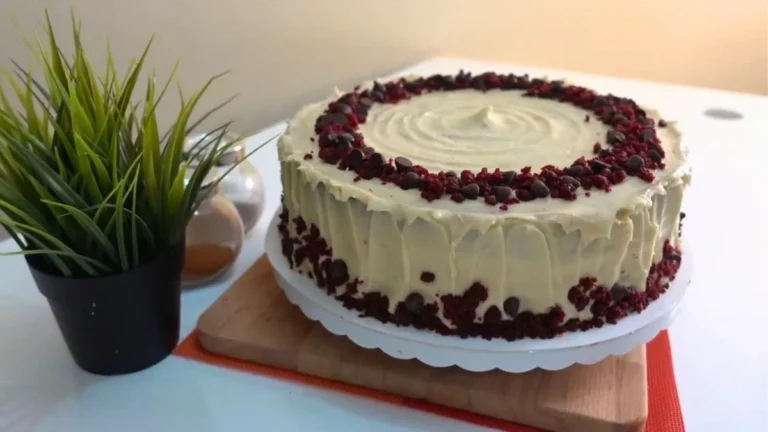
If you’ve ever experienced the showstopping Cheesecake Factory ultimate red velvet cheesecake and dreamed of recreating that iconic dessert at home, you’re about to discover that it’s entirely achievable with the right techniques.
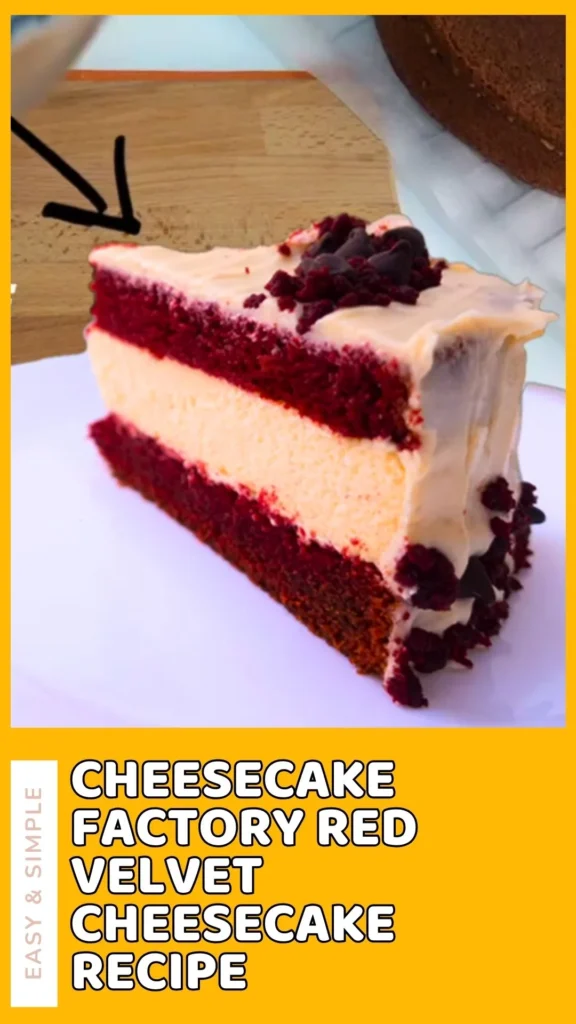
This red velvet cake cheesecake factory recipe combines three heavenly layers: moist, tangy red velvet cake, silky-smooth New York-style cheesecake, and luxurious cream cheese frosting that binds everything together in perfect harmony. The cheesecake factory red velvet cake component features that distinctive cocoa hint and vibrant crimson color, while the cheesecake layer brings rich, creamy decadence.
Whether you’re celebrating a special occasion or simply want to indulge in restaurant-quality dessert craftsmanship, this recipe for red velvet cheesecake from cheesecake factory delivers impressive height, stunning visual appeal, and unforgettable flavor that’ll have everyone asking for seconds.
What Does It Taste Like?
The cheesecake factory ultimate red velvet cheesecake is a symphony of complementary flavors and textures that creates pure dessert magic. Each forkful delivers velvety, dense cheesecake with subtle tanginess from sour cream and cream cheese, sandwiched between two layers of impossibly moist red velvet cake cheesecake factory style cake that’s gently chocolatey with a distinctive buttermilk tang.
The red velvet layers are tender-crumbed and slightly acidic from vinegar and yogurt, providing beautiful contrast to the rich cheesecake’s sweetness. Luxurious cream cheese frosting enrobes everything with fluffy, butter-smooth sweetness that’s perfectly balanced-not cloying.
The cocoa in the cake adds subtle depth without overwhelming chocolate flavor, while vanilla and lemon extracts in the cheesecake create aromatic complexity. It’s indulgent yet surprisingly light on the palate, with the cheesecake factory red velvet combination offering both visual drama and taste bud satisfaction that makes every bite worth the effort.
Ingredients and Kitchen Utensils Lists
Ingredients
For the Cheesecake Layer:
- 24 oz (680g / 3 packages) cream cheese, softened
- 1 cup heavy cream
- 1 cup granulated white sugar
- ⅓ cup all-purpose flour
- 1 cup sour cream
- 1 teaspoon vanilla extract
- 1 teaspoon lemon extract (or lemon juice/zest)
- 3 large eggs
- Butter for greasing
For the Red Velvet Cake Layers:
Dry ingredients:
- 2¾ cups cake flour, sifted
- 3 tablespoons unsweetened cocoa powder
- 1½ teaspoons baking soda
Wet ingredients:
- ¾ cup unsalted butter, softened to room temperature
- 1¾ cups white sugar
- 2 large eggs
- ½ cup vegetable oil
- 1½ teaspoons white vinegar
- 2 teaspoons vanilla extract
- ¾ cup plain yogurt (room temperature)
- 2 tablespoons red gel food coloring (or liquid to achieve vibrant color)
For the Cream Cheese Frosting:
- 12 oz (340g / 1½ packages) cream cheese, room temperature
- ¾ cup unsalted butter, softened to room temperature
- 4 cups powdered sugar, sifted
- 1½ teaspoons vanilla extract
Kitchen Utensils
- Two 10-inch straight-sided round cake pans
- Stand mixer or hand mixer with paddle attachment
- Large mixing bowls (3-4)
- Whisk and rubber spatula
- Sifter or fine-mesh sieve
- Parchment paper
- Serrated bread knife
- Cake leveler (or long serrated knife)
- Offset spatula for frosting
- Wire cooling racks
- Cake board or serving plate
- Toothpicks for testing doneness
- Measuring cups and spoons
- Kitchen scale (recommended for precision)
Preparation and Cooking Time with Serving
Prep Time: 45 minutes
Cheesecake Baking Time: 75-90 minutes
Red Velvet Cake Baking Time: 60 minutes
Cooling and Chilling Time: 5-6 hours
Assembly and Frosting Time: 30 minutes
Total Time: 8-9 hours (including chilling)
Servings: 12-16 generous slices
Difficulty Level: Advanced
Recipe Instructions with Steps
Step 1: Prepare and Bake the Cheesecake Layer
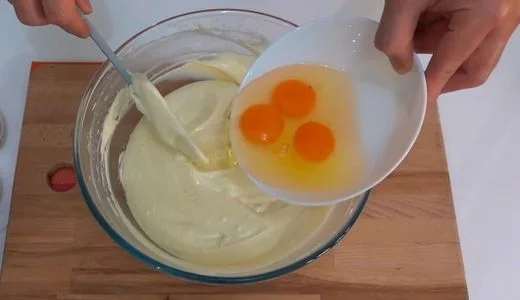
Preheat your oven to 295°F (146°C)-this low temperature ensures a creamy, crack-free cheesecake texture. In a large mixing bowl using a stand mixer with paddle attachment, beat 24 oz softened cream cheese on medium speed for 2-3 minutes until completely smooth with no lumps. Add 1 cup heavy cream, 1 cup granulated sugar, ⅓ cup all-purpose flour, 1 cup sour cream, 1 teaspoon vanilla extract, and 1 teaspoon lemon extract. Beat on medium-low speed until the mixture is silky and uniform, scraping down the bowl sides with a rubber spatula. Add 3 large eggs one at a time, mixing on low speed after each addition just until incorporated-avoid overmixing, which can incorporate air bubbles that cause cracks. Line a 10-inch straight-sided cake pan with parchment paper on the bottom and sides for easy removal, then generously grease with butter. Pour the cheesecake batter into the prepared pan, gently tap on the counter to release air bubbles, and bake for 75-90 minutes until the edges are set but the center still jiggles slightly when gently shaken. The cheesecake factory red velvet cheesecake layer will continue setting as it cools. Turn off the oven, crack the door slightly, and let the cheesecake cool in the oven for 30 minutes to prevent sudden temperature changes. Remove from oven, cool completely to room temperature, then refrigerate for at least 4 hours or overnight until completely firm.
Step 2: Prepare the Red Velvet Cake Batter
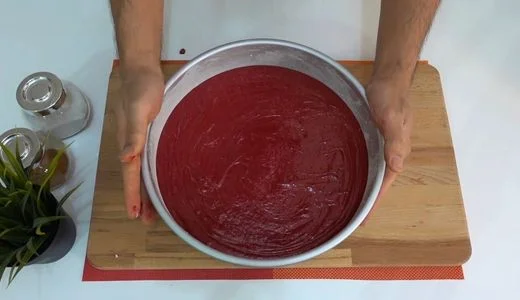
While your cheesecake chills, prepare the red velvet cake cheesecake factory layers. Preheat your oven to 356°F (180°C). In a medium bowl, sift together 2¾ cups cake flour, 3 tablespoons unsweetened cocoa powder, and 1½ teaspoons baking soda. Sifting is crucial for the tender crumb that defines authentic cheesecake factory red velvet cake. Set this dry mixture aside. In your stand mixer bowl with paddle attachment, cream ¾ cup softened unsalted butter and 1¾ cups white sugar on medium-high speed for 3-4 minutes until light, fluffy, and pale in color. Add 2 large eggs one at a time, beating well after each addition and scraping down the bowl. The mixture should look smooth and emulsified. Add ½ cup vegetable oil, 1½ teaspoons white vinegar, 2 teaspoons vanilla extract, and ¾ cup room-temperature plain yogurt. Mix on medium speed until everything is completely combined and the batter looks creamy. With the mixer on low speed, gradually add the sifted dry ingredients in three additions, mixing just until combined after each addition-overmixing develops gluten and creates a tough cake. Scrape down the sides and bottom with your rubber spatula to ensure even mixing. Finally, add 2 tablespoons red gel food coloring (adjust amount based on desired intensity) and mix on low speed just until the batter achieves that signature vibrant red velvet cheesecake factory crimson hue.
Step 3: Bake the Red Velvet Cake Layers
Generously grease two 10-inch straight-sided cake pans with butter, ensuring complete coverage of the bottom and sides. Dust each pan with flour, rotating to coat evenly, then tap out excess flour-this creates a non-stick surface that helps release the delicate cake. Divide the red velvet batter evenly between the two prepared pans, using a kitchen scale for precision if available (approximately 24-26 oz batter per pan). Smooth the tops with an offset spatula, ensuring the batter reaches the edges. Bake at 356°F for approximately 60 minutes, rotating the pans halfway through for even baking. The cakes are done when a toothpick inserted into the center comes out clean or with just a few moist crumbs clinging to it, and the tops spring back lightly when touched. The edges should pull away slightly from the pan sides. Allow the cheesecake factory red velvet cake layers to cool in their pans on wire racks for 30 minutes-this prevents crumbling when you remove them. Run a thin knife around the edges, then carefully invert onto wire racks, remove the pans, and let the cakes cool completely to room temperature, about 1-2 hours.
Step 4: Make the Cream Cheese Frosting
In a clean mixing bowl using a hand mixer or stand mixer with paddle attachment, beat 12 oz room-temperature cream cheese on medium speed for 2 minutes until perfectly smooth and creamy with no lumps. Room temperature is crucial-cold cream cheese will create lumps in your frosting. Add ¾ cup softened unsalted butter and beat on medium speed for another 2 minutes until the mixture is light and fluffy. Gradually add 4 cups sifted powdered sugar, one cup at a time, beating on low speed after each addition to prevent a sugar cloud in your kitchen. Once all sugar is incorporated, add 1½ teaspoons vanilla extract and increase speed to medium-high, beating for 3-4 minutes until the frosting is perfectly smooth, fluffy, and holds stiff peaks. This red velvet cheesecake recipe from cheesecake factory frosting should be spreadable but not runny. If it’s too soft, refrigerate for 15-20 minutes to firm up; if too stiff, let it sit at room temperature for a few minutes or add a teaspoon of heavy cream and beat again.
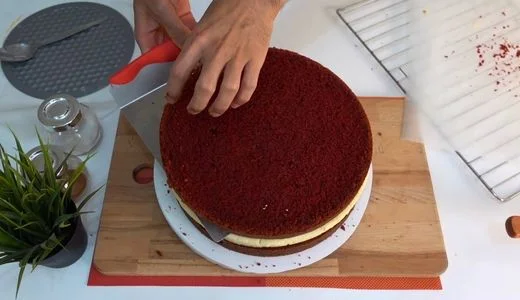
Step 5: Level and Prepare the Cake Layers
Once your red velvet cakes are completely cool, it’s time to create the flat, even layers that define the cheesecake factory ultimate red velvet cheesecake presentation. Place one cake layer on a cutting board. Using a long serrated knife or cake leveler, carefully slice off any domed top to create a completely flat surface-save these delicious crumbs in a bowl for decorating the finished cake. If your cakes baked relatively flat, you may only need minimal trimming. Repeat with the second layer. Now you should have two flat, even red velvet cake cheesecake factory layers ready for assembly.
Step 6: Remove and Prepare the Cheesecake Layer
Carefully remove your thoroughly chilled cheesecake from the refrigerator. Run a thin knife or offset spatula around the inside edge of the pan to loosen the cheesecake from the sides. Place a flat plate or cake board over the top of the pan, then confidently invert the pan and plate together. The cheesecake should release onto the plate. Carefully peel away the parchment paper from all sides and bottom. If your cheesecake has a slightly rounded top from baking, you can gently level it with a long serrated knife for easier stacking, though this isn’t essential for the the cheesecake factory ultimate red velvet cake cheesecake if the dome is minimal.
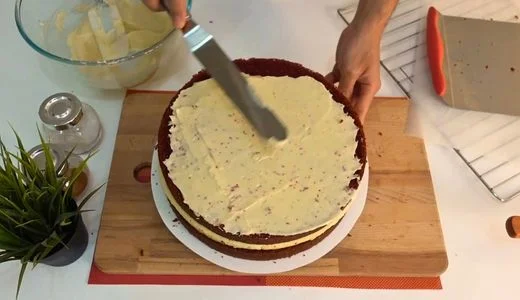
Step 7: Assemble the Three-Layer Masterpiece
Place your serving plate or a sturdy cake board on your work surface. Position one leveled cheesecake factory red velvet cake layer as the base, flat side up. Using an offset spatula, spread a thin layer of cream cheese frosting over the top-this “crumb coat” style layer (about ⅓ cup frosting) helps the cheesecake layer adhere and prevents sliding. Carefully lift the chilled cheesecake layer and center it on top of the frosted red velvet base. The cheesecake should be firm enough to handle without breaking. Spread another thin layer of cream cheese frosting (about ⅓ cup) over the top of the cheesecake layer, working gently to avoid disturbing the delicate cheesecake. Place the second leveled red velvet cake layer on top, flat side down, pressing very gently to secure. You now have your three magnificent layers: red velvet cake, creamy cheesecake, red velvet cake.
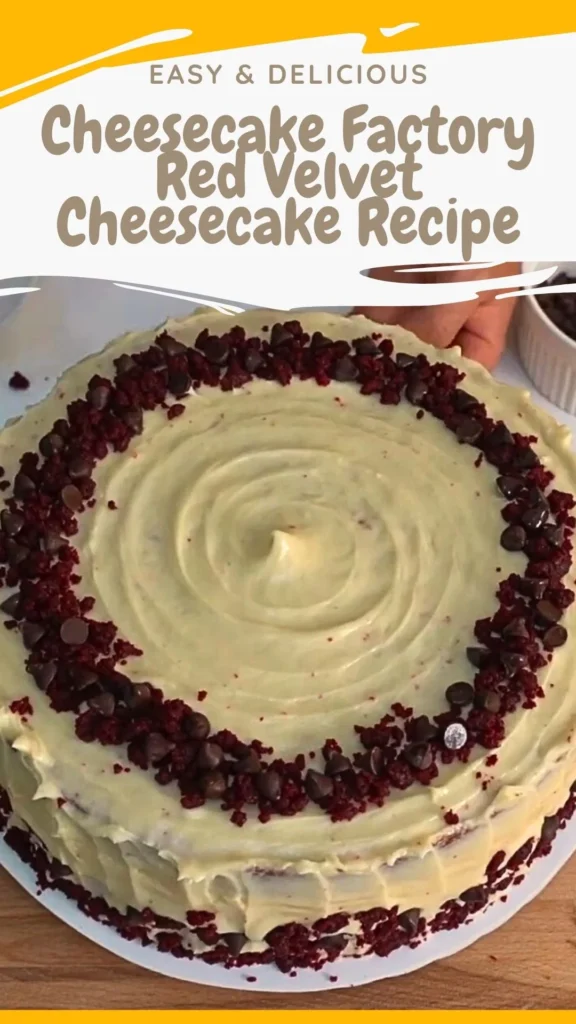
Step 8: Frost and Decorate
Using your offset spatula and remaining cream cheese frosting (approximately 2-2½ cups), apply a thin crumb coat over the entire cake-top and sides. This initial layer traps any loose crumbs and creates a smooth base. Don’t worry if you can see the cake layers through this coat; that’s expected. Refrigerate the crumb-coated red velvet cheesecake cake cheesecake factory recipe creation for 20-30 minutes to firm up the frosting. Once chilled, apply the final, generous layer of cream cheese frosting to the top and sides, using smooth, even strokes with your offset spatula.
For a professional finish, hold the spatula at a slight angle and rotate the cake on a turntable if you have one. The frosting should be thick enough to completely cover all layers. Decorate the top and sides with the reserved red velvet cake crumbs you saved from leveling-press them gently into the frosting on the sides and sprinkle generously over the top for that signature cheesecake factory red velvet cheesecake cake recipe appearance. You can also pipe additional frosting rosettes or add fresh berries if desired.
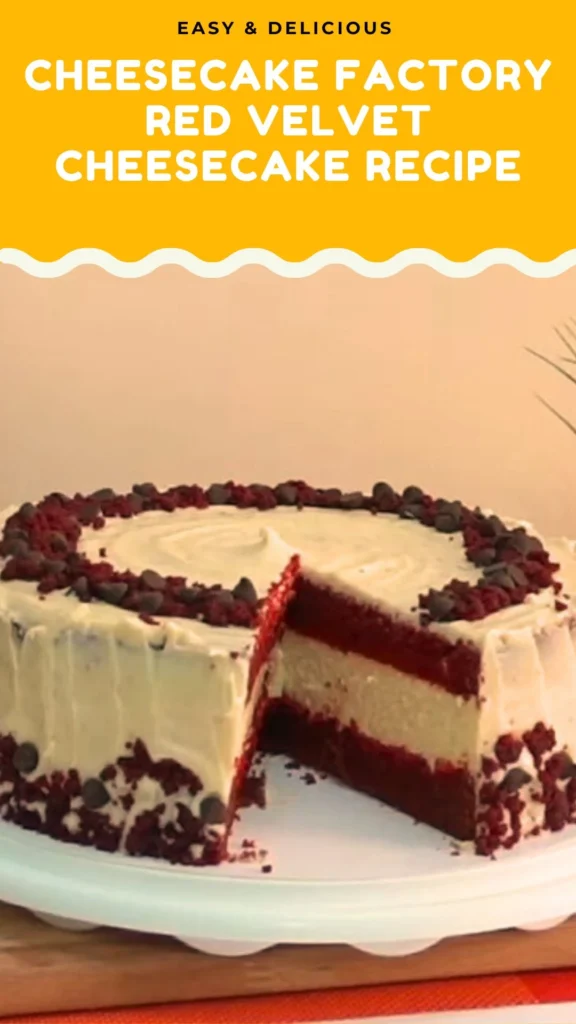
Step 9: Final Chill and Serve
Refrigerate your assembled cheesecake factory recipe for red velvet cheesecake for at least 1 hour before serving to allow all components to settle and the frosting to firm up. This chilling time also makes slicing much cleaner and easier. When ready to serve, use a long, sharp knife dipped in hot water and wiped dry between each cut for picture-perfect slices. Let each slice sit at room temperature for 5-10 minutes before serving for optimal flavor and texture. The contrast between the bright red cake layers and creamy white cheesecake center creates a stunning visual presentation that rivals any restaurant dessert.
Customization and Pairing for Serving Ideas
1. White Chocolate Cream Cheese Variation
Elevate your red velvet cheesecake factory recipe by incorporating melted white chocolate into both the cheesecake layer and the frosting. Add 4 oz of melted and cooled white chocolate to the cheesecake batter after the eggs, and fold 2 oz into the cream cheese frosting. This creates an even more luxurious, sweet dimension that complements the tangy red velvet while adding sophisticated complexity. White chocolate chips pressed into the frosting sides create beautiful visual texture.
2. Chocolate Ganache Drip Design
Transform your cheesecake factory red velvet creation into an Instagram-worthy showstopper by adding a chocolate ganache drip. Make a simple ganache with 4 oz semi-sweet chocolate and ¼ cup heavy cream, cooled to thick but pourable consistency. Drizzle it around the top edge of your frosted cake, allowing it to drip naturally down the sides. The dark chocolate contrast against white frosting and red cake crumbs creates dramatic visual appeal while adding rich chocolate flavor.
3. Fresh Berry Compote Pairing
Balance the richness of this red velvet cake cheesecake factory dessert by serving each slice with a bright, acidic fresh berry compote. Simmer 2 cups mixed berries (strawberries, raspberries, blueberries) with ¼ cup sugar and lemon juice until syrupy. The fruit’s natural tartness cuts through the dense cheesecake and sweet frosting, while the red berry hues echo the cake’s crimson color. This pairing also adds a refreshing element that prevents palate fatigue.
4. Individual Mini Cheesecake Factory Red Velvet Cakes
Adapt this recipe for red velvet cheesecake from cheesecake factory into adorable individual portions by using 4-inch cake pans. Bake mini red velvet layers (reduce time to 25-30 minutes), make individual cheesecakes in ramekins or small springform pans, then assemble miniature three-layer cakes. These personal-sized desserts are perfect for upscale dinner parties, allowing guests to enjoy the full experience without sharing, and portion control becomes effortless.
5. Coffee and Dessert Wine Pairings
Enhance your the cheesecake factory ultimate red velvet cake cheesecake experience with thoughtful beverage pairings. A robust espresso or French press coffee provides bitter contrast that highlights the sweetness, while the coffee’s richness complements the cream cheese components. For wine lovers, a late-harvest Riesling, tawny port, or cream sherry offers sweet, complex notes that don’t compete with the dessert. A glass of cold whole milk remains timelessly perfect for cutting through richness.
6. Salted Caramel Cream Cheese Frosting
Add contemporary flair to your cheesecake factory red velvet cake recipe by incorporating salted caramel into the cream cheese frosting. Mix ½ cup cooled salted caramel sauce into your prepared frosting, adding an extra ¼ cup powdered sugar to maintain proper consistency. The sweet-salty combination adds sophisticated depth, and drizzling additional caramel over the finished cake creates glossy visual appeal. The salt also helps balance the overall sweetness.
7. Red Velvet Cheesecake Trifle Transformation
Repurpose this cheesecake factory ultimate red velvet cheesecake concept into a stunning trifle for easier serving at large gatherings. Cube the red velvet cake layers, break the cheesecake into chunks, and layer in a large glass trifle bowl with cream cheese frosting, whipped cream, and fresh berries. This deconstructed approach maintains all the flavors while creating a more casual, family-style presentation that’s easier to portion and doesn’t require precise assembly skills.
Tips Section
1. Room Temperature Ingredients Are Non-Negotiable
The success of your cheesecake factory red velvet cheesecake hinges on using room-temperature dairy ingredients. Cold cream cheese creates lumps that no amount of mixing can fully eliminate, resulting in grainy cheesecake and frosting. Cold butter won’t cream properly with sugar, leading to dense, heavy cake. Plan ahead by setting cream cheese, butter, eggs, and yogurt on the counter 2-3 hours before baking (or overnight in a cool kitchen). Room temperature means approximately 65-70°F-the butter should leave a slight indent when pressed but not be greasy or melting. This single step dramatically improves texture and ensures all ingredients emulsify properly for that signature restaurant-quality smoothness.
2. Low and Slow Cheesecake Baking Prevents Cracks
The 295°F baking temperature for your red velvet cheesecake recipe from cheesecake factory cheesecake layer isn’t arbitrary-it’s the secret to crack-free perfection. High heat causes rapid expansion and a dramatic temperature difference between the edges and center, resulting in the dreaded surface cracks. Low, gentle heat allows even cooking throughout. Additionally, resist the urge to open the oven door during baking, as temperature fluctuations cause cracks. The cheesecake is done when edges are set but the center still has a 2-3 inch circle that jiggles slightly when gently shaken-it will firm up completely during chilling. Overbaking creates a dry, dense texture instead of the creamy consistency that defines cheesecake factory red velvet.
3. Sifting Dry Ingredients Creates Tender Cake Crumb
The extraordinarily soft, tender texture of red velvet cake cheesecake factory style requires sifting your dry ingredients-never skip this step. Cake flour naturally contains less protein than all-purpose flour, creating a more delicate crumb, but it also clumps during storage. Sifting aerates the flour, removes lumps, and evenly distributes the cocoa powder and baking soda throughout. This ensures uniform leavening and prevents pockets of concentrated cocoa or chemical leavener that create an uneven texture and bitter spots. Sift directly into your mixing bowl or onto parchment paper, then gently spoon into measuring cups rather than scooping directly from the bag, which compacts flour and leads to dry, tough cake.
4. The Vinegar and Yogurt Tang Is Essential
What distinguishes red velvet cheesecake cake cheesecake factory recipe from ordinary chocolate cake is the characteristic tang from acidic ingredients. White vinegar and plain yogurt react with baking soda to create the cake’s distinctive flavor profile and fine, tender crumb. The acid also enhances the red color from food coloring, making it more vibrant and stable during baking. Don’t substitute the yogurt with milk-you’ll lose both moisture and tang. If you absolutely must substitute, use full-fat buttermilk, though yogurt provides superior moisture retention. This acid-base reaction is authentic to traditional red velvet recipes and creates the subtle complexity that prevents the cake from tasting one-dimensional.
5. Proper Cake Cooling Prevents Assembly Disasters
The most common mistake when making recipe for red velvet cheesecake from cheesecake factory is attempting to assemble warm or insufficiently cooled components. Warm cake layers compress under weight, release moisture that makes everything soggy, and cause frosting to melt and slide. Warm cheesecake is too soft to handle and will crack when moved. Always cool red velvet cakes completely to room temperature (1-2 hours on wire racks), and chill the cheesecake until it’s completely firm and cold throughout (minimum 4 hours, preferably overnight). Patient cooling is the difference between a beautiful, stable layer cake and a leaning, soggy mess.
6. Achieving Professional Frosting Smoothness
The pristine, bakery-smooth frosting on the cheesecake factory ultimate red velvet cake cheesecake requires the crumb coat technique and proper tools. After assembling your layers, apply a thin coat of frosting over the entire cake-this traps loose crumbs. Chill for 20-30 minutes until the crumb coat firms up, creating a smooth base for your final frosting layer. Use an offset spatula held at a 45-degree angle, applying gentle, consistent pressure as you smooth. For the sides, hold the spatula perpendicular to the cake and rotate the cake (use a turntable if available) while keeping the spatula stationary. Dip your spatula in hot water and wipe dry between passes for glass-smooth results. The final frosting layer should be generous-approximately ½ inch thick-to completely obscure the layers beneath.
7. Strategic Slicing for Picture-Perfect Portions
Cutting a towering cheesecake factory red velvet cake recipe creation requires technique to avoid messy, compressed slices. Use a long, thin-bladed knife (at least 10 inches) that’s taller than your cake. Fill a tall container with very hot water and fully submerge the knife blade for 30 seconds. Remove, quickly wipe completely dry with a towel, then make one smooth, confident cut straight down through all layers-don’t saw back and forth. Remove the knife, clean it thoroughly, reheat in hot water, dry, and repeat for each cut. The hot knife melts through the frosting and cheesecake cleanly instead of dragging and compressing. For exceptionally clean cuts, chill the assembled cake for at least 2 hours before slicing so all components are uniformly firm.
For more decadent desserts, try our Cheesecake Factory Pineapple Upside Down Cheesecake Recipe or the indulgent Creamy Carnivore Cheesecake . If you’re planning a full meal, pair it with our Cheesecake Factory Nachos or comforting Mission BBQ Mac and Cheese Recipe for the ultimate restaurant-style experience at home.
Storage and Reheating Guidance
Store your cheesecake factory ultimate red velvet cheesecake covered in the refrigerator for up to 5 days. The cheesecake layer requires refrigeration, making this a must-chill dessert. Cover loosely with plastic wrap or place in a cake keeper to prevent the frosting from absorbing refrigerator odors. Bring slices to room temperature for 10-15 minutes before serving for optimal flavor and texture-cold mutes the taste and makes the cake dense. This dessert is not suitable for freezing assembled, as the cheesecake texture degrades significantly upon thawing.
Common Queries and FAQs Section
Here, we’ve got you covered with some common questions that people often ask
Q: Can I make this red velvet cheesecake factory recipe without a stand mixer?
A: Absolutely! While a stand mixer makes the process easier, a hand mixer works perfectly well for every component. The key is ensuring thorough mixing without overbeating-hand mixers actually give you more control to avoid overmixing the cake batter and cheesecake filling. The cream cheese frosting requires a bit more arm strength with a hand mixer, but 4-5 minutes of beating will achieve the same fluffy results.
Q: Why is my cheesecake layer cracking even at low temperature?
A: Cracks in your cheesecake factory red velvet cheesecake layer typically result from three issues: overmixing the batter (which incorporates excess air that expands and cracks), overbaking (bake only until the center jiggles slightly), or rapid temperature changes (let it cool gradually in the turned-off oven with the door cracked). Additionally, ensure your cream cheese is thoroughly softened-cold spots create density differences that crack during baking.
Q: Can I use natural red food coloring instead of artificial dye?
A: Natural alternatives like beet powder or freeze-dried strawberry powder can create a reddish hue in your red velvet cake cheesecake factory layers, but they won’t achieve the signature vibrant crimson color and may add earthy or fruity flavors. If avoiding artificial dyes is important, use natural options but adjust expectations-the color will be more burgundy or brownish-red. You’ll need approximately 3-4 tablespoons of beet powder to achieve noticeable color.
Q: How do I prevent my cake layers from sticking to the pans?
A: Proper pan preparation is crucial for cheesecake factory red velvet success. Generously butter the entire pan surface, including sides, then dust with flour, rotating the pan to coat evenly before tapping out excess. This creates a non-stick barrier. Alternatively, use parchment paper circles on the bottom in addition to butter and flour. Avoid non-stick spray alone, which can create gummy spots. Always cool cakes in pans for 30 minutes before attempting removal-they’re too fragile when hot.
Q: Can I make the components ahead and assemble later?
A: Yes! This red velvet cheesecake recipe from cheesecake factory is excellent for make-ahead preparation. Bake the cheesecake up to 3 days in advance and keep refrigerated. Bake red velvet cake layers 1-2 days ahead, wrap tightly in plastic wrap, and refrigerate. Make frosting 3 days ahead and refrigerate in an airtight container (bring to room temperature and re-whip before using). Assemble the cake the day before serving for best results, allowing flavors to meld while maintaining structural integrity.
Q: Why is my cream cheese frosting too runny or too stiff?
A: Frosting consistency for your the cheesecake factory ultimate red velvet cake cheesecake depends on ingredient temperature and ratios. Runny frosting indicates ingredients were too warm-refrigerate for 15-20 minutes to firm up. Stiff, difficult-to-spread frosting means ingredients were too cold or you added too much powdered sugar-let it sit at room temperature for 10 minutes or add 1-2 teaspoons heavy cream and beat again. Properly made frosting should hold peaks but spread smoothly without tearing the cake.
Q: What’s the best way to transport this tall cake?
A: Transporting a towering cheesecake factory red velvet cake recipe creation requires a sturdy cake box (at least 5 inches tall) and a completely flat surface in your vehicle. Assemble the cake on a sturdy cake board, chill thoroughly for at least 2 hours so everything is firm, then carefully place in a tall cake box. Keep the box on a flat surface in your car (floor behind front seats works well) and drive carefully, avoiding sudden stops. The cheesecake layer makes this cake more fragile than standard layer cakes, so refrigerate immediately upon arrival and let it sit for 30 minutes before slicing.
Q: Can I make this as a single-layer cheesecake without the red velvet cake?
A: While you’d lose the signature red velvet cheesecake factory presentation, you can certainly make just the cheesecake layer as a standalone dessert. Pour the cheesecake batter into a 9-inch springform pan instead of a 10-inch straight-sided pan, and bake at the same 295°F temperature for approximately 60-75 minutes. Chill thoroughly, then top with whipped cream and fresh berries. However, you’d miss the incredible textural contrast and flavor complexity that the red velvet cake layers provide.
Cheesecake Factory Red Velvet Cheesecake Recipe
Ingredients
Equipment
Method
- Preheat your oven to 295°F (146°C)-this low temperature ensures a creamy, crack-free cheesecake texture. In a large mixing bowl using a stand mixer with paddle attachment, beat 24 oz softened cream cheese on medium speed for 2-3 minutes until completely smooth with no lumps. Add 1 cup heavy cream, 1 cup granulated sugar, ⅓ cup all-purpose flour, 1 cup sour cream, 1 teaspoon vanilla extract, and 1 teaspoon lemon extract. Beat on medium-low speed until the mixture is silky and uniform, scraping down the bowl sides with a rubber spatula. Add 3 large eggs one at a time, mixing on low speed after each addition just until incorporated-avoid overmixing, which can incorporate air bubbles that cause cracks. Line a 10-inch straight-sided cake pan with parchment paper on the bottom and sides for easy removal, then generously grease with butter. Pour the cheesecake batter into the prepared pan, gently tap on the counter to release air bubbles, and bake for 75-90 minutes until the edges are set but the center still jiggles slightly when gently shaken. The cheesecake factory red velvet cheesecake layer will continue setting as it cools. Turn off the oven, crack the door slightly, and let the cheesecake cool in the oven for 30 minutes to prevent sudden temperature changes. Remove from oven, cool completely to room temperature, then refrigerate for at least 4 hours or overnight until completely firm.
- While your cheesecake chills, prepare the red velvet cake cheesecake factory layers. Preheat your oven to 356°F (180°C). In a medium bowl, sift together 2¾ cups cake flour, 3 tablespoons unsweetened cocoa powder, and 1½ teaspoons baking soda. Sifting is crucial for the tender crumb that defines authentic cheesecake factory red velvet cake. Set this dry mixture aside. In your stand mixer bowl with paddle attachment, cream ¾ cup softened unsalted butter and 1¾ cups white sugar on medium-high speed for 3-4 minutes until light, fluffy, and pale in color. Add 2 large eggs one at a time, beating well after each addition and scraping down the bowl. The mixture should look smooth and emulsified. Add ½ cup vegetable oil, 1½ teaspoons white vinegar, 2 teaspoons vanilla extract, and ¾ cup room-temperature plain yogurt. Mix on medium speed until everything is completely combined and the batter looks creamy. With the mixer on low speed, gradually add the sifted dry ingredients in three additions, mixing just until combined after each addition-overmixing develops gluten and creates a tough cake. Scrape down the sides and bottom with your rubber spatula to ensure even mixing. Finally, add 2 tablespoons red gel food coloring (adjust amount based on desired intensity) and mix on low speed just until the batter achieves that signature vibrant red velvet cheesecake factory crimson hue.
- Generously grease two 10-inch straight-sided cake pans with butter, ensuring complete coverage of the bottom and sides. Dust each pan with flour, rotating to coat evenly, then tap out excess flour-this creates a non-stick surface that helps release the delicate cake. Divide the red velvet batter evenly between the two prepared pans, using a kitchen scale for precision if available (approximately 24-26 oz batter per pan). Smooth the tops with an offset spatula, ensuring the batter reaches the edges. Bake at 356°F for approximately 60 minutes, rotating the pans halfway through for even baking. The cakes are done when a toothpick inserted into the center comes out clean or with just a few moist crumbs clinging to it, and the tops spring back lightly when touched. The edges should pull away slightly from the pan sides. Allow the cheesecake factory red velvet cake layers to cool in their pans on wire racks for 30 minutes-this prevents crumbling when you remove them. Run a thin knife around the edges, then carefully invert onto wire racks, remove the pans, and let the cakes cool completely to room temperature, about 1-2 hours.
- In a clean mixing bowl using a hand mixer or stand mixer with paddle attachment, beat 12 oz room-temperature cream cheese on medium speed for 2 minutes until perfectly smooth and creamy with no lumps. Room temperature is crucial-cold cream cheese will create lumps in your frosting. Add ¾ cup softened unsalted butter and beat on medium speed for another 2 minutes until the mixture is light and fluffy. Gradually add 4 cups sifted powdered sugar, one cup at a time, beating on low speed after each addition to prevent a sugar cloud in your kitchen. Once all sugar is incorporated, add 1½ teaspoons vanilla extract and increase speed to medium-high, beating for 3-4 minutes until the frosting is perfectly smooth, fluffy, and holds stiff peaks. This red velvet cheesecake recipe from cheesecake factory frosting should be spreadable but not runny. If it’s too soft, refrigerate for 15-20 minutes to firm up; if too stiff, let it sit at room temperature for a few minutes or add a teaspoon of heavy cream and beat again.
- Once your red velvet cakes are completely cool, it’s time to create the flat, even layers that define the cheesecake factory ultimate red velvet cheesecake presentation. Place one cake layer on a cutting board. Using a long serrated knife or cake leveler, carefully slice off any domed top to create a completely flat surface-save these delicious crumbs in a bowl for decorating the finished cake. If your cakes baked relatively flat, you may only need minimal trimming. Repeat with the second layer. Now you should have two flat, even red velvet cake cheesecake factory layers ready for assembly.
- Carefully remove your thoroughly chilled cheesecake from the refrigerator. Run a thin knife or offset spatula around the inside edge of the pan to loosen the cheesecake from the sides. Place a flat plate or cake board over the top of the pan, then confidently invert the pan and plate together. The cheesecake should release onto the plate. Carefully peel away the parchment paper from all sides and bottom. If your cheesecake has a slightly rounded top from baking, you can gently level it with a long serrated knife for easier stacking, though this isn’t essential for the the cheesecake factory ultimate red velvet cake cheesecake if the dome is minimal.
- Place your serving plate or a sturdy cake board on your work surface. Position one leveled cheesecake factory red velvet cake layer as the base, flat side up. Using an offset spatula, spread a thin layer of cream cheese frosting over the top-this “crumb coat” style layer (about ⅓ cup frosting) helps the cheesecake layer adhere and prevents sliding. Carefully lift the chilled cheesecake layer and center it on top of the frosted red velvet base. The cheesecake should be firm enough to handle without breaking. Spread another thin layer of cream cheese frosting (about ⅓ cup) over the top of the cheesecake layer, working gently to avoid disturbing the delicate cheesecake. Place the second leveled red velvet cake layer on top, flat side down, pressing very gently to secure. You now have your three magnificent layers: red velvet cake, creamy cheesecake, red velvet cake.
- Using your offset spatula and remaining cream cheese frosting (approximately 2-2½ cups), apply a thin crumb coat over the entire cake-top and sides. This initial layer traps any loose crumbs and creates a smooth base. Don’t worry if you can see the cake layers through this coat; that’s expected. Refrigerate the crumb-coated red velvet cheesecake cake cheesecake factory recipe creation for 20-30 minutes to firm up the frosting. Once chilled, apply the final, generous layer of cream cheese frosting to the top and sides, using smooth, even strokes with your offset spatula. For a professional finish, hold the spatula at a slight angle and rotate the cake on a turntable if you have one. The frosting should be thick enough to completely cover all layers. Decorate the top and sides with the reserved red velvet cake crumbs you saved from leveling-press them gently into the frosting on the sides and sprinkle generously over the top for that signature cheesecake factory red velvet cheesecake cake recipe appearance. You can also pipe additional frosting rosettes or add fresh berries if desired.
- Refrigerate your assembled cheesecake factory recipe for red velvet cheesecake for at least 1 hour before serving to allow all components to settle and the frosting to firm up. This chilling time also makes slicing much cleaner and easier. When ready to serve, use a long, sharp knife dipped in hot water and wiped dry between each cut for picture-perfect slices. Let each slice sit at room temperature for 5-10 minutes before serving for optimal flavor and texture. The contrast between the bright red cake layers and creamy white cheesecake center creates a stunning visual presentation that rivals any restaurant dessert.
Video
Notes
This Cheesecake Factory red velvet cheesecake recipe represents the pinnacle of layer cake achievement-a true showstopper that combines multiple advanced baking techniques into one unforgettable dessert. While the process requires time, patience, and careful attention to detail, the result is a restaurant-quality masterpiece that rivals anything you’d pay premium prices for at the actual Cheesecake Factory.
The combination of moist, tangy red velvet cake cheesecake factory layers, silky New York-style cheesecake, and luxurious cream cheese frosting creates textural and flavor harmony that’s simply irresistible. Whether you’re celebrating a milestone birthday, anniversary, or simply want to challenge your baking skills with an impressive creation, this cheesecake factory ultimate red velvet cheesecake delivers both visual drama and extraordinary taste. Happy baking-prepare for rave reviews!
We’d love to hear how this recipe turns out for you! Give it a try, then drop a comment below to share your thoughts and tips with us.
Also, follow along on Pinterest and Youtube for more tasty updates. Your support and thoughts mean the world!
This looks like a total showstopper! honestly feels like a bakery masterpiece I’d love to try at home 😍
Thank you so much! So happy it feels bakery-worthy and inspires you to try at home 😊