
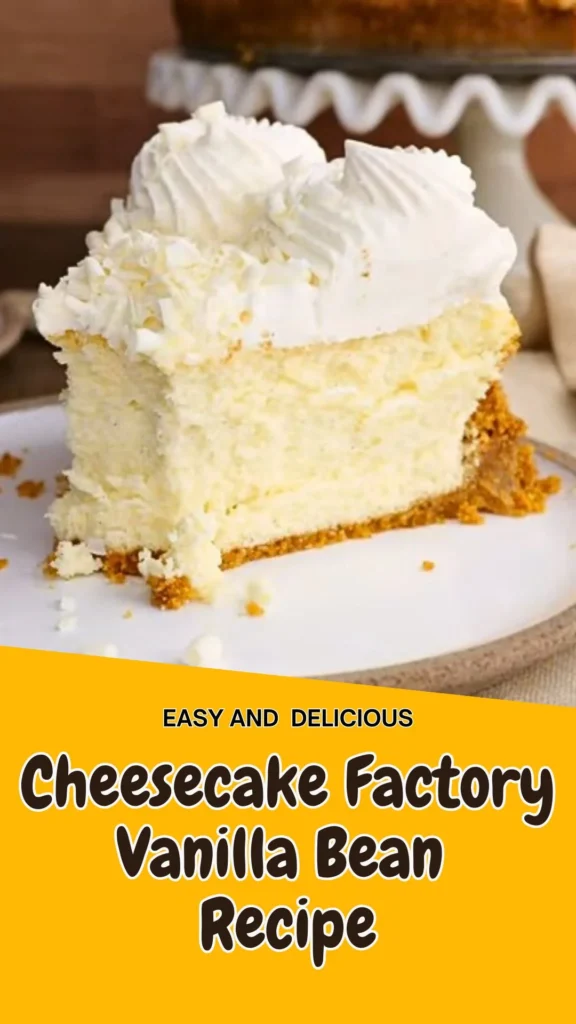
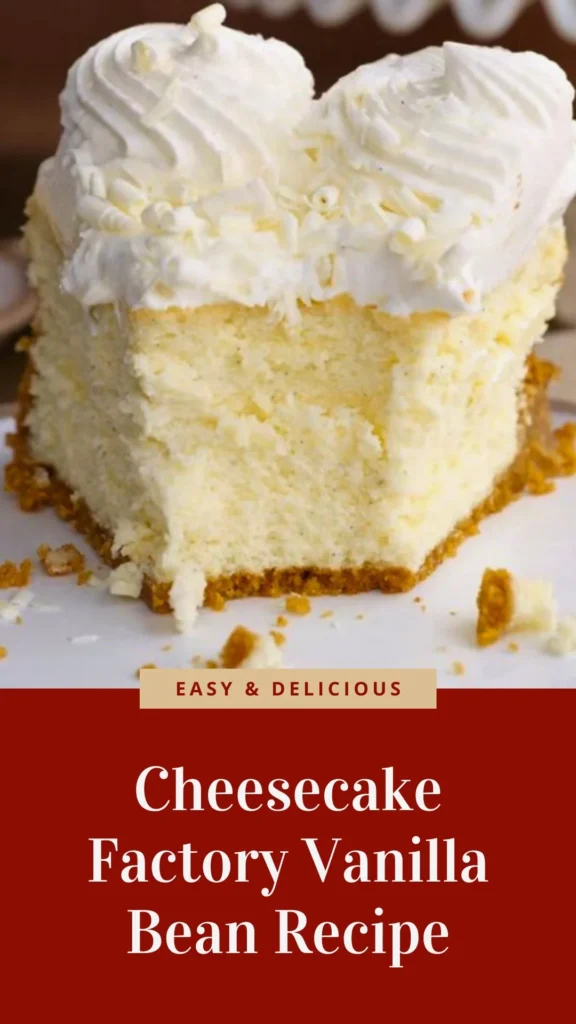
If you’ve ever been mesmerized by the Cheesecake Factory vanilla bean cheesecake with its signature creamy texture, delicate vanilla flavor, and elegant whipped cream border, you’re about to discover the secret to recreating this iconic dessert at home.
This copycat Cheesecake Factory vanilla bean cheesecake recipe captures everything that makes the original so beloved: a buttery vanilla graham cracker crust, silky-smooth filling studded with real vanilla bean seeds, and cloud-like whipped topping that melts on your tongue.
While the Cheesecake Factory vanilla bean dessert might seem intimidating to replicate, this detailed guide breaks down each step into manageable techniques that even novice bakers can master. The result? A restaurant-quality cheesecake that rivals anything you’d pay premium prices for, made right in your own kitchen.
What Does It Taste Like?
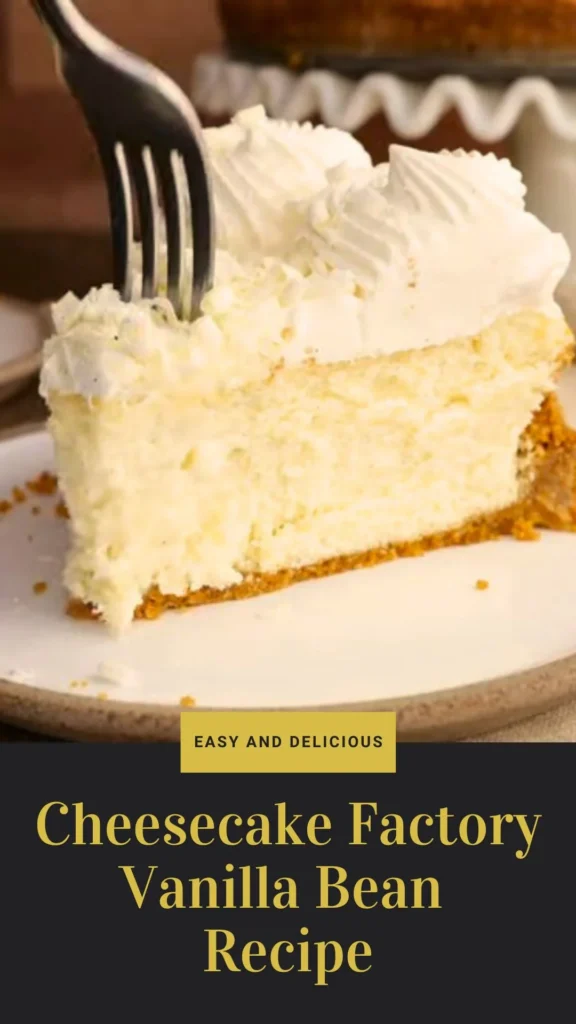
The Cheesecake Factory vanilla bean cheesecake delivers an extraordinarily pure, sophisticated vanilla experience that transcends ordinary cheesecake. The first bite reveals a dense yet impossibly creamy texture that practically dissolves on your palate, followed by waves of rich, buttery vanilla from both extract and real vanilla bean seeds-those tiny black specks that signal genuine quality.
The graham cracker crust provides a sweet, slightly toasted contrast with its own hint of vanilla warmth. The sour cream and heavy cream in the filling create a luxurious tang that balances the sweetness perfectly, preventing any cloying heaviness.
Crowned with vanilla bean whipped cream that’s both airy and indulgent, this vanilla bean Cheesecake Factory masterpiece tastes like elegance itself-pure, clean, and utterly addictive with complex vanilla notes that linger beautifully after each forkful.
Smooth, rich, and perfectly sweet, this Cheesecake Factory Vanilla Bean Recipe is a timeless dessert favorite. For more indulgence, try our Creamy Carnivore Cheesecake Recipe or Cheesecake Factory Pineapple Upside Down Cheesecake Recipe for delicious variety.
Ingredients and Kitchen Utensils Lists
Ingredients
For the vanilla graham cracker crust:
- 1 ½ cups graham cracker crumbs
- 6 tablespoons butter, melted
- 2 tablespoons brown sugar
- 1 teaspoon vanilla extract
For the cheesecake filling:
- 32 ounces cream cheese (4 blocks), softened to room temperature
- 1 cup granulated sugar
- 4 large eggs
- 1 cup sour cream
- ½ cup heavy whipping cream
- 1 vanilla bean pod, seeds scraped
- 1 tablespoon vanilla extract
- 2 tablespoons corn starch
For the vanilla bean whipped topping:
- 1 ½ cups heavy whipping cream, cold
- ½ cup powdered sugar
- 1 vanilla bean pod, seeds scraped
- 1 teaspoon vanilla extract
- White chocolate shavings for garnish (optional)
Kitchen Utensils
- 9-inch springform pan
- Heavy-duty aluminum foil
- Large roasting pan (for water bath)
- Stand mixer or hand mixer
- Large mixing bowls (2-3)
- Rubber spatula
- Sharp knife (for vanilla bean)
- Measuring cups and spoons
- Cooling rack
- Piping bag with decorative tip (optional)
- Offset spatula
- Refrigerator thermometer (optional)
Preparation and Cooking Time with Serving
Prep Time: 30 minutes
Cook Time: 75-90 minutes
Cooling Time: 2 hours (in oven and countertop)
Chilling Time: 6 hours to overnight
Total Time: 9-12 hours
Servings: 12-16 slices
Difficulty Level: Intermediate to Advanced
Recipe Instructions with Steps
Step 1: Prepare the Vanilla Graham Cracker Crust
Begin your Cheesecake Factory vanilla bean cheesecake recipe by creating the foundation. In a medium bowl, combine 1 ½ cups graham cracker crumbs, 6 tablespoons melted butter, 2 tablespoons brown sugar, and 1 teaspoon vanilla extract. Mix thoroughly with a fork until the texture resembles wet sand and the mixture holds together when pressed. The butter should coat every crumb evenly, and the brown sugar adds a subtle caramel note that enhances the vanilla profile. Take your 9-inch springform pan and wrap the entire outside bottom and sides with two layers of heavy-duty aluminum foil, ensuring a watertight seal to prevent leaks during the water bath baking process.
Step 2: Press and Shape the Crust
Pour the graham cracker mixture into your prepared springform pan. Using the bottom of a measuring cup or your fingers, firmly press the crumb mixture into the bottom of the pan, creating an even layer with no gaps or thin spots. Continue pressing the mixture halfway up the sides of the pan, creating walls that will cradle your Cheesecake Factory vanilla bean filling. The crust should feel compact and solid, not loose or crumbly. Place the pan in the refrigerator to chill while you prepare the filling-this helps the crust set and prevents it from mixing into the batter.

Step 3: Prepare the Vanilla Beans
Using a sharp paring knife, carefully split two vanilla bean pods lengthwise. Hold each pod flat against your cutting board and use the back of your knife to scrape out the tiny black seeds inside-these precious specks contain concentrated vanilla flavor and create those signature dark flecks in the Cheesecake Factory vanilla bean cheesecake. Reserve the seeds from one pod for the filling and the other for the whipped topping. Don’t discard the scraped pods; they can be stored in sugar to create vanilla sugar for future baking projects.
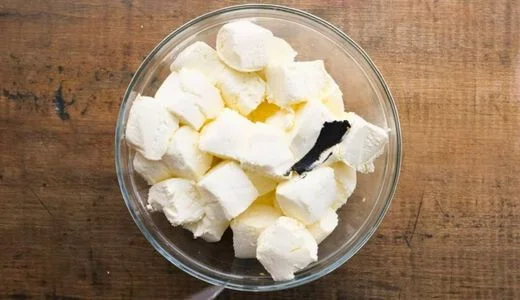
Step 4: Cream the Cheese and Vanilla
In the bowl of your stand mixer fitted with the paddle attachment (or using a hand mixer with a large bowl), beat the softened 32 ounces of cream cheese on medium speed for 2-3 minutes until completely smooth, fluffy, and free of lumps. Scrape down the sides of the bowl frequently. Add the scraped seeds from one vanilla bean pod and continue beating until the seeds are evenly distributed throughout the cream cheese, creating beautiful vanilla specks. The cream cheese must be at room temperature-cold cream cheese will create lumps that never fully smooth out, compromising the silky texture of your copycat Cheesecake Factory vanilla bean cheesecake.
Step 5: Add Sugar and Eggs
With the mixer on medium-low speed, gradually add 1 cup of granulated sugar to the cream cheese mixture, beating until completely incorporated and the mixture appears light and airy. Add the 4 large eggs one at a time, mixing on low speed just until each egg disappears into the batter before adding the next. Critical tip: don’t overmix after adding eggs, as excessive air incorporation can cause cracks during baking. Scrape the bowl between each addition to ensure even mixing. The batter should look smooth, glossy, and homogeneous.
Step 6: Incorporate Dairy and Stabilizers
To the cream cheese mixture, add 1 cup sour cream, ½ cup heavy whipping cream, 1 tablespoon vanilla extract, and 2 tablespoons corn starch. Mix on low speed just until these ingredients are fully incorporated and no streaks remain. The sour cream provides characteristic tang and moisture, the heavy cream adds luxurious richness, and the corn starch acts as a stabilizer to help prevent cracks and create that trademark vanilla bean Cheesecake Factory dense-yet-creamy texture. Don’t overmix-you want a smooth batter without excessive air bubbles.
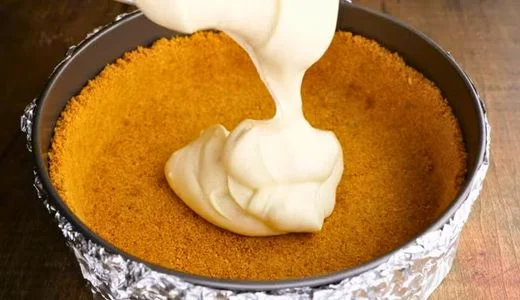
Step 7: Assemble for Water Bath Baking
Preheat your oven to 325°F. Remove your chilled crust from the refrigerator and place the foil-wrapped springform pan inside a larger roasting pan. Pour the cheesecake filling into the crust, using a rubber spatula to spread it evenly and smooth the top. Gently tap the pan on the counter a few times to release any trapped air bubbles. Place the roasting pan with the springform pan inside on the middle oven rack, then carefully pour hot (not boiling) water into the outer roasting pan until it reaches about 1 inch up the sides of the springform pan. This water bath creates gentle, even heat that prevents cracking and ensures creamy texture.
Step 8: Bake with Precision
Bake your Cheesecake Factory vanilla bean cheesecake recipe at 325°F for 75-90 minutes. The cheesecake is done when the edges are set and slightly puffed, but the center still has a 2-3 inch circle that jiggles slightly when gently shaken-it should move like firm jello, not liquid. The internal temperature should reach 150-155°F on an instant-read thermometer inserted into the center. Don’t overbake; the cheesecake continues cooking during the cooling process. A slightly underdone center is preferable to an overbaked, cracked surface.
Step 9: Cool Gradually to Prevent Cracks
When the baking time is complete, turn off the oven but leave the cheesecake inside with the door cracked open about 4 inches (prop it with a wooden spoon if needed). Let the cheesecake cool in this environment for 1 hour-this gradual temperature change prevents the dramatic contraction that causes cracks. After 1 hour, remove the cheesecake from the oven and water bath, remove the foil, and let it cool on a wire rack at room temperature for another hour until completely cooled. Run a thin knife around the edge of the pan to loosen the cheesecake from the sides before the final chill.
Step 10: Chill Thoroughly
Once your the Cheesecake Factory vanilla bean creation has cooled to room temperature, cover it loosely with plastic wrap (don’t let the wrap touch the surface) and refrigerate for at least 6 hours, though overnight (8-12 hours) is ideal. This extended chilling time allows the flavors to meld, the texture to firm up to that perfect sliceable consistency, and ensures clean cuts when serving. Resist the temptation to cut it early-patience yields perfection.
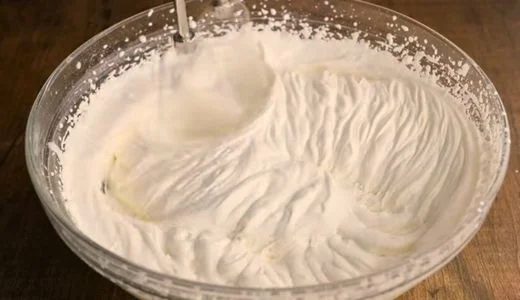
Step 11: Prepare Vanilla Bean Whipped Topping
When ready to finish your cheesecake, place a large metal mixing bowl and whisk attachment in the freezer for 15 minutes to chill. Pour 1 ½ cups cold heavy whipping cream into the chilled bowl. Add ½ cup powdered sugar, the seeds scraped from the second vanilla bean pod, and 1 teaspoon vanilla extract. Beat on medium speed, gradually increasing to high, until stiff peaks form-this takes 3-4 minutes. The whipped cream should hold its shape firmly when the beaters are lifted, creating peaks that stand upright without drooping.
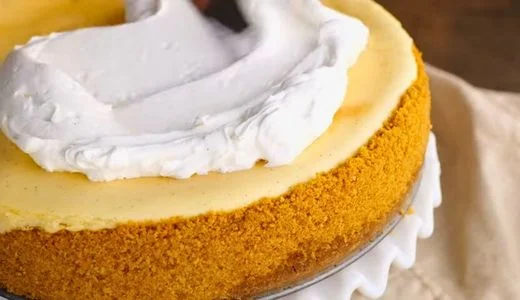
Step 12: Decorate and Garnish
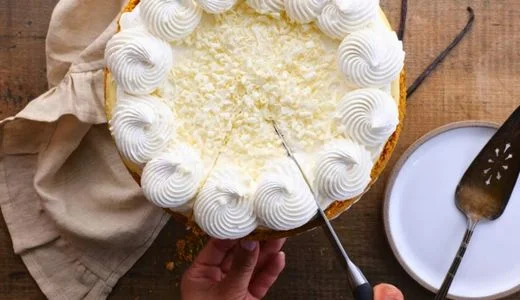
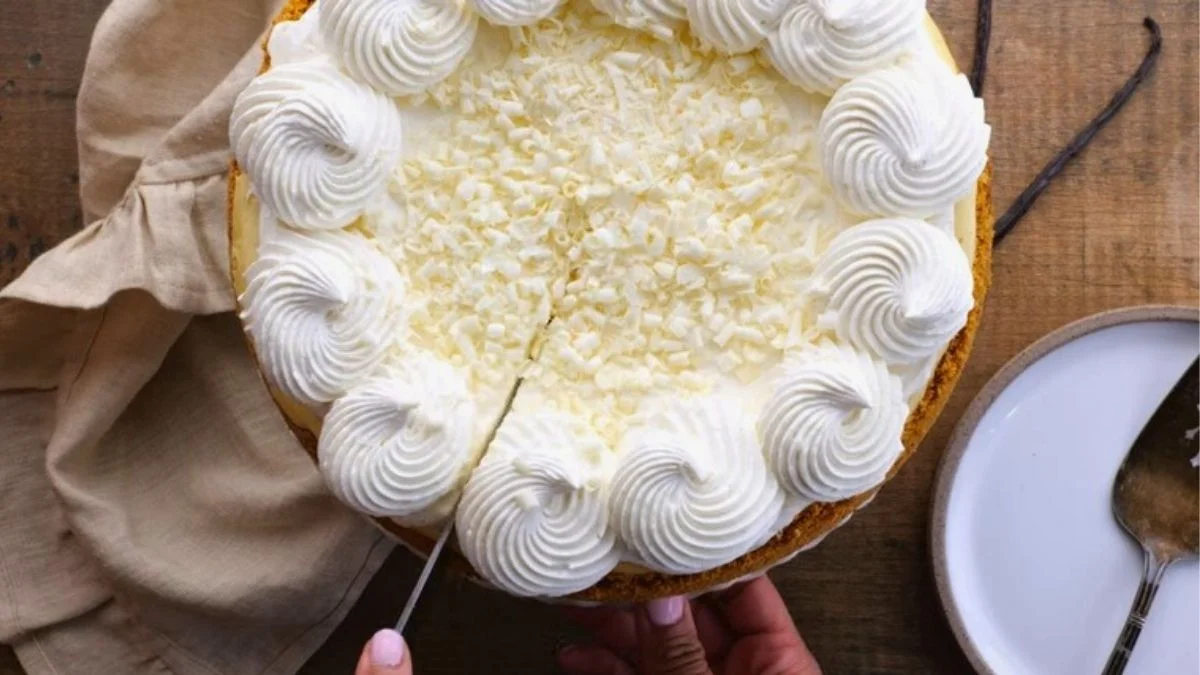
Carefully release the springform pan sides and transfer your chilled Cheesecake Factory vanilla bean cheesecake to a serving platter. Using an offset spatula, spread a thin, even layer of vanilla bean whipped cream over the entire top surface of the cheesecake, creating a smooth canvas. Fill a piping bag fitted with a large star tip with the remaining whipped cream and pipe decorative rosettes or swirls around the outer edge of the cheesecake, mimicking the restaurant’s signature presentation. If desired, use a vegetable peeler to create delicate white chocolate shavings and sprinkle them over the whipped cream for an elegant finishing touch.
Customization and Pairing for Serving Ideas
1. Berry Compote Crown
Transform your vanilla bean Cheesecake Factory masterpiece with a vibrant mixed berry compote. Simmer 2 cups fresh or frozen berries (strawberries, blueberries, raspberries) with ¼ cup sugar and 1 tablespoon lemon juice until thickened, then cool completely. Spoon this jewel-toned topping over individual slices or create a stunning half-and-half presentation with berries covering one side and whipped cream on the other. The fruit’s tartness cuts through the rich cream cheese beautifully, adding both visual drama and flavor complexity.
2. Salted Caramel Drizzle Luxury
Elevate your copycat Cheesecake Factory vanilla bean cheesecake with homemade salted caramel sauce. The sweet-salty contrast enhances the vanilla’s complexity while adding sophisticated visual appeal. Drizzle warm caramel over the whipped cream just before serving, or create an artistic plating by drizzling caramel on individual dessert plates before placing each slice. The combination of vanilla bean and caramel creates a flavor profile reminiscent of crème brûlée.
3. Coffee and Dessert Wine Pairing
Serve your Cheesecake Factory vanilla bean creation alongside carefully chosen beverages that enhance the vanilla experience. Freshly brewed espresso or a rich French press coffee provides bitter notes that balance the sweetness. For special occasions, pair with a dessert wine like late-harvest Riesling, Sauternes, or even a creamy Irish coffee. The wine’s honeyed sweetness and acidity complement the cheesecake’s richness without overwhelming its delicate vanilla character.
4. Chocolate Lover’s Dream
While purists adore the clean vanilla flavor, chocolate enthusiasts can create a stunning contrast by adding chocolate elements. Press chocolate cookie crumbs into the bottom of each serving plate before placing a slice, create chocolate curls for garnish instead of white chocolate, or serve with a side of warm chocolate ganache for dipping. The bittersweet chocolate provides depth without masking the vanilla bean’s elegance.
5. Individual Mini Versions
Adapt this Cheesecake Factory vanilla bean cheesecake recipe into elegant individual servings using a muffin tin lined with cupcake papers or 4-inch springform pans. Reduce baking time to 25-30 minutes and create perfectly portioned desserts ideal for dinner parties. Top each mini cheesecake with a single piped rosette of whipped cream and a fresh raspberry or vanilla bean pod segment for restaurant-worthy presentation that simplifies serving.
6. Seasonal Fruit Variations
Customize your the Cheesecake Factory vanilla bean cheesecake throughout the year with seasonal fruit accompaniments. In summer, serve with macerated peaches or fresh mango slices. Autumn calls for spiced apple compote or poached pears. Winter brings candied citrus peel or pomegranate arils, while spring showcases fresh strawberries or rhubarb sauce. These seasonal rotations keep the dessert exciting while highlighting the versatile vanilla foundation.
7. Gluten-Free Crust Alternative
Create a gluten-free version by substituting the graham crackers with gluten-free graham crackers or crushed gluten-free vanilla wafers, maintaining the same proportions. Alternatively, use finely ground almond flour mixed with melted butter, sugar, and vanilla for a nutty, gluten-free base that complements the vanilla filling beautifully. This adaptation allows everyone to enjoy your vanilla bean Cheesecake Factory creation regardless of dietary restrictions.
Tips Section
1. Room Temperature Ingredients Are Non-Negotiable
The single most critical factor in achieving the silky, lump-free texture of the Cheesecake Factory vanilla bean cheesecake is using room temperature cream cheese, eggs, and sour cream. Remove these ingredients from the refrigerator 2-3 hours before starting, or quick-soften cream cheese by cutting it into cubes and microwaving in 10-second intervals. Cold ingredients don’t blend smoothly, creating lumpy batter no amount of mixing can fix. Test cream cheese by pressing it with your finger-it should indent easily without feeling cold or greasy.
2. Master the Water Bath Technique
The water bath (bain-marie) is essential for preventing cracks and achieving creamy texture in your Cheesecake Factory vanilla bean cheesecake recipe. The moisture from the steam prevents the top from drying out while the gentle, even heat prevents the edges from overcooking before the center sets. Ensure your foil wrap is completely watertight by using two layers and crimping tightly around the pan sides. If water seeps into your crust, it becomes soggy and unsalvageable. For extra insurance, place the foil-wrapped pan inside a large oven bag before adding to the water bath.
3. Don’t Overmix After Adding Eggs
While you want smooth, well-blended cream cheese and sugar, excessive mixing after adding eggs incorporates too much air into the batter. This air expands during baking and contracts during cooling, creating cracks and a less dense texture. Mix eggs on the lowest speed just until each one disappears into the batter-usually 10-15 seconds per egg. Use a rubber spatula to scrape down the bowl rather than extended mixing time. This restraint yields the characteristically dense yet creamy texture of authentic copycat Cheesecake Factory vanilla bean cheesecake.
4. Invest in Quality Vanilla Beans
Since vanilla is the star ingredient in vanilla bean Cheesecake Factory desserts, don’t compromise on quality. Madagascar Bourbon vanilla beans offer classic, sweet vanilla flavor with creamy notes, while Tahitian beans provide floral, fruity complexity. The beans should be plump, moist, and fragrant-dry, brittle beans indicate age and diminished flavor. If fresh vanilla beans are cost-prohibitive, combine vanilla bean paste (which contains seeds) with quality pure vanilla extract. Avoid imitation vanilla, which tastes harsh and artificial in delicate cheesecakes.
5. The Jiggle Test Determines Doneness
Knowing when to remove your Cheesecake Factory vanilla bean creation from the oven requires understanding the jiggle test. The outer 2-3 inches should be completely set and firm when gently shaken, while the center 2-3 inch circle should jiggle like firm Jell-O-not liquid, but definitely not solid. An instant-read thermometer provides certainty: 150-155°F in the center is perfect. The cheesecake continues cooking from residual heat during the gradual cool-down, so removing it while slightly underdone in the center prevents overcooking and ensures creamy, not rubbery, texture.
6. Patience During Cooling Prevents Disasters
Rushing the cooling process is the fastest way to create a cracked, sunken disaster. The gradual temperature change from oven to room temperature to refrigerator allows the cheesecake to contract slowly and evenly. Sudden temperature shocks cause rapid contraction that creates cracks. Follow this timeline religiously: 1 hour in turned-off oven with door cracked, 1 hour on countertop, then minimum 6 hours (preferably overnight) in the refrigerator. This patience is rewarded with the flawless, crack-free surface that characterizes the Cheesecake Factory vanilla bean cheesecake.
7. Perfect Slicing Technique for Clean Cuts
Achieving those pristine, bakery-perfect slices requires technique and the right tools. Use a long, thin-bladed knife (not serrated) and have a tall glass of very hot water nearby. Before each cut, dip the knife blade in the hot water and wipe it completely dry with a clean towel. Make one smooth, confident cut straight down through the cheesecake, then pull the knife straight up without dragging it through the slice. Clean and reheat the knife before every single cut. This method prevents the dense, creamy filling from sticking to the blade and creating messy, dragged cuts. For extra elegance, warm the knife and wipe the plate clean of any smudges before serving.
Storage and Reheating Guidance
Store your Cheesecake Factory vanilla bean cheesecake covered in the refrigerator for up to 5 days. Cover tightly with plastic wrap or store in an airtight container to prevent the cheesecake from absorbing refrigerator odors. Cheesecake can be frozen for up to 2 months-freeze whole or in individual slices wrapped tightly in plastic wrap then foil, and thaw overnight in the refrigerator before serving. Cheesecake is always served cold and never requires reheating.
Common Queries and FAQs Section
Here, we’ve got you covered with some common questions that people often ask
Q: Why did my cheesecake crack even though I followed the recipe?
A: Cracks in Cheesecake Factory vanilla bean cheesecake recipe attempts typically result from rapid temperature changes, overbaking, or overmixing. Ensure you’re using a proper water bath, not opening the oven door during baking, cooling gradually in the turned-off oven, and mixing gently after adding eggs. Even with perfect technique, minor surface cracks don’t affect flavor and will be hidden under whipped cream topping.
Q: Can I make this cheesecake without a springform pan?
A: While a springform pan is strongly recommended for the Cheesecake Factory vanilla bean cheesecake, you can use a regular 9-inch cake pan lined with parchment paper with long overhanging sides to lift the cheesecake out. However, removing it cleanly is challenging, and you may sacrifice presentation. Mini cheesecakes in muffin tins are an easier alternative to springform pans.
Q: My cheesecake is too soft and won’t slice cleanly.What went wrong?
A: A soft, unsliceable copycat Cheesecake Factory vanilla bean cheesecake indicates insufficient baking or chilling time. The center should reach 150-155°F during baking, and the cheesecake must chill for minimum 6 hours (overnight is better) to firm to sliceable consistency. If you cut too early, return it to the refrigerator for several more hours. Some underbaking can be salvaged with extended chilling.
Q: Can I substitute low-fat or Greek yogurt for full-fat ingredients?
A: The authentic Cheesecake Factory vanilla bean experience requires full-fat cream cheese, sour cream, and heavy whipping cream for its characteristic dense, luxurious texture. Low-fat substitutions create grainy texture, excessive liquid, and potential curdling. If you must reduce fat, use 1/3-less-fat cream cheese (Neufchâtel), but don’t substitute the sour cream or heavy cream. Results will differ from the restaurant version.
Q: How do I prevent a soggy crust in the water bath?
A: Ensure your springform pan is wrapped with two layers of heavy-duty aluminum foil, crimped tightly around all sides and bottom edges. Test the seal by filling the wrapped pan with water over your sink-if water leaks out, rewrap more carefully. Some bakers place the foil-wrapped pan inside a large oven bag for additional protection. A properly sealed pan will never develop a soggy crust during water bath baking.
Q: Can I flavor the cheesecake with other extracts besides vanilla?
A: While this recipe celebrates pure vanilla bean Cheesecake Factory flavor, you can experiment with almond extract (reduce to 1 teaspoon), lemon extract, or even coffee liqueur. However, these create different flavor profiles entirely-they’re not copycat versions of the restaurant’s vanilla bean cheesecake. For truest replication, stick with vanilla bean seeds and quality vanilla extract.
Q: Why does the recipe call for both vanilla extract and vanilla bean?
A: The Cheesecake Factory vanilla bean cheesecake uses both for layered vanilla complexity and visual appeal. Vanilla beans provide concentrated, complex vanilla flavor and those signature black specks that signal quality and authenticity. Vanilla extract adds additional depth and reinforces the vanilla throughout. Using both creates a more pronounced, sophisticated vanilla experience than either ingredient alone could achieve.
Cheesecake Factory Vanilla Bean Recipe
Ingredients
Equipment
Method
- Begin your Cheesecake Factory vanilla bean cheesecake recipe by creating the foundation. In a medium bowl, combine 1 ½ cups graham cracker crumbs, 6 tablespoons melted butter, 2 tablespoons brown sugar, and 1 teaspoon vanilla extract. Mix thoroughly with a fork until the texture resembles wet sand and the mixture holds together when pressed. The butter should coat every crumb evenly, and the brown sugar adds a subtle caramel note that enhances the vanilla profile. Take your 9-inch springform pan and wrap the entire outside bottom and sides with two layers of heavy-duty aluminum foil, ensuring a watertight seal to prevent leaks during the water bath baking process.
- Pour the graham cracker mixture into your prepared springform pan. Using the bottom of a measuring cup or your fingers, firmly press the crumb mixture into the bottom of the pan, creating an even layer with no gaps or thin spots. Continue pressing the mixture halfway up the sides of the pan, creating walls that will cradle your Cheesecake Factory vanilla bean filling. The crust should feel compact and solid, not loose or crumbly. Place the pan in the refrigerator to chill while you prepare the filling-this helps the crust set and prevents it from mixing into the batter.
- Using a sharp paring knife, carefully split two vanilla bean pods lengthwise. Hold each pod flat against your cutting board and use the back of your knife to scrape out the tiny black seeds inside-these precious specks contain concentrated vanilla flavor and create those signature dark flecks in the Cheesecake Factory vanilla bean cheesecake. Reserve the seeds from one pod for the filling and the other for the whipped topping. Don’t discard the scraped pods; they can be stored in sugar to create vanilla sugar for future baking projects.
- In the bowl of your stand mixer fitted with the paddle attachment (or using a hand mixer with a large bowl), beat the softened 32 ounces of cream cheese on medium speed for 2-3 minutes until completely smooth, fluffy, and free of lumps. Scrape down the sides of the bowl frequently. Add the scraped seeds from one vanilla bean pod and continue beating until the seeds are evenly distributed throughout the cream cheese, creating beautiful vanilla specks. The cream cheese must be at room temperature-cold cream cheese will create lumps that never fully smooth out, compromising the silky texture of your copycat Cheesecake Factory vanilla bean cheesecake.
- With the mixer on medium-low speed, gradually add 1 cup of granulated sugar to the cream cheese mixture, beating until completely incorporated and the mixture appears light and airy. Add the 4 large eggs one at a time, mixing on low speed just until each egg disappears into the batter before adding the next. Critical tip: don’t overmix after adding eggs, as excessive air incorporation can cause cracks during baking. Scrape the bowl between each addition to ensure even mixing. The batter should look smooth, glossy, and homogeneous.
- To the cream cheese mixture, add 1 cup sour cream, ½ cup heavy whipping cream, 1 tablespoon vanilla extract, and 2 tablespoons corn starch. Mix on low speed just until these ingredients are fully incorporated and no streaks remain. The sour cream provides characteristic tang and moisture, the heavy cream adds luxurious richness, and the corn starch acts as a stabilizer to help prevent cracks and create that trademark vanilla bean Cheesecake Factory dense-yet-creamy texture. Don’t overmix-you want a smooth batter without excessive air bubbles.
- Preheat your oven to 325°F. Remove your chilled crust from the refrigerator and place the foil-wrapped springform pan inside a larger roasting pan. Pour the cheesecake filling into the crust, using a rubber spatula to spread it evenly and smooth the top. Gently tap the pan on the counter a few times to release any trapped air bubbles. Place the roasting pan with the springform pan inside on the middle oven rack, then carefully pour hot (not boiling) water into the outer roasting pan until it reaches about 1 inch up the sides of the springform pan. This water bath creates gentle, even heat that prevents cracking and ensures creamy texture.
- Bake your Cheesecake Factory vanilla bean cheesecake recipe at 325°F for 75-90 minutes. The cheesecake is done when the edges are set and slightly puffed, but the center still has a 2-3 inch circle that jiggles slightly when gently shaken-it should move like firm jello, not liquid. The internal temperature should reach 150-155°F on an instant-read thermometer inserted into the center. Don’t overbake; the cheesecake continues cooking during the cooling process. A slightly underdone center is preferable to an overbaked, cracked surface.
- When the baking time is complete, turn off the oven but leave the cheesecake inside with the door cracked open about 4 inches (prop it with a wooden spoon if needed). Let the cheesecake cool in this environment for 1 hour-this gradual temperature change prevents the dramatic contraction that causes cracks. After 1 hour, remove the cheesecake from the oven and water bath, remove the foil, and let it cool on a wire rack at room temperature for another hour until completely cooled. Run a thin knife around the edge of the pan to loosen the cheesecake from the sides before the final chill.
- Once your the Cheesecake Factory vanilla bean creation has cooled to room temperature, cover it loosely with plastic wrap (don’t let the wrap touch the surface) and refrigerate for at least 6 hours, though overnight (8-12 hours) is ideal. This extended chilling time allows the flavors to meld, the texture to firm up to that perfect sliceable consistency, and ensures clean cuts when serving. Resist the temptation to cut it early-patience yields perfection.
- When ready to finish your cheesecake, place a large metal mixing bowl and whisk attachment in the freezer for 15 minutes to chill. Pour 1 ½ cups cold heavy whipping cream into the chilled bowl. Add ½ cup powdered sugar, the seeds scraped from the second vanilla bean pod, and 1 teaspoon vanilla extract. Beat on medium speed, gradually increasing to high, until stiff peaks form-this takes 3-4 minutes. The whipped cream should hold its shape firmly when the beaters are lifted, creating peaks that stand upright without drooping.
- Carefully release the springform pan sides and transfer your chilled Cheesecake Factory vanilla bean cheesecake to a serving platter. Using an offset spatula, spread a thin, even layer of vanilla bean whipped cream over the entire top surface of the cheesecake, creating a smooth canvas. Fill a piping bag fitted with a large star tip with the remaining whipped cream and pipe decorative rosettes or swirls around the outer edge of the cheesecake, mimicking the restaurant’s signature presentation. If desired, use a vegetable peeler to create delicate white chocolate shavings and sprinkle them over the whipped cream for an elegant finishing touch.
Video
Notes
Creating an authentic Cheesecake Factory vanilla bean cheesecake recipe at home is an investment of time and care that delivers extraordinary rewards. This luxurious dessert showcases how simple, quality ingredients-cream cheese, vanilla beans, eggs, and cream-can transform into something truly spectacular when treated with proper technique and patience. The combination of buttery vanilla graham crust, impossibly creamy filling studded with real vanilla bean seeds, and cloud-like whipped topping creates an elegant dessert worthy of any celebration. Whether you’re serving this copycat Cheesecake Factory vanilla bean cheesecake for a special occasion or simply indulging your love of exceptional desserts, the result is a showstopping centerpiece that rivals anything from the restaurant itself. With these detailed instructions and expert tips, you’re equipped to master this iconic dessert and create lasting memories around your table.
We’d love to hear how this recipe turns out for you! Give it a try, then drop a comment below to share your thoughts and tips with us.
Also, follow along on Pinterest and Youtube for more tasty updates. Your support and thoughts mean the world!
Thanks for the recipe