
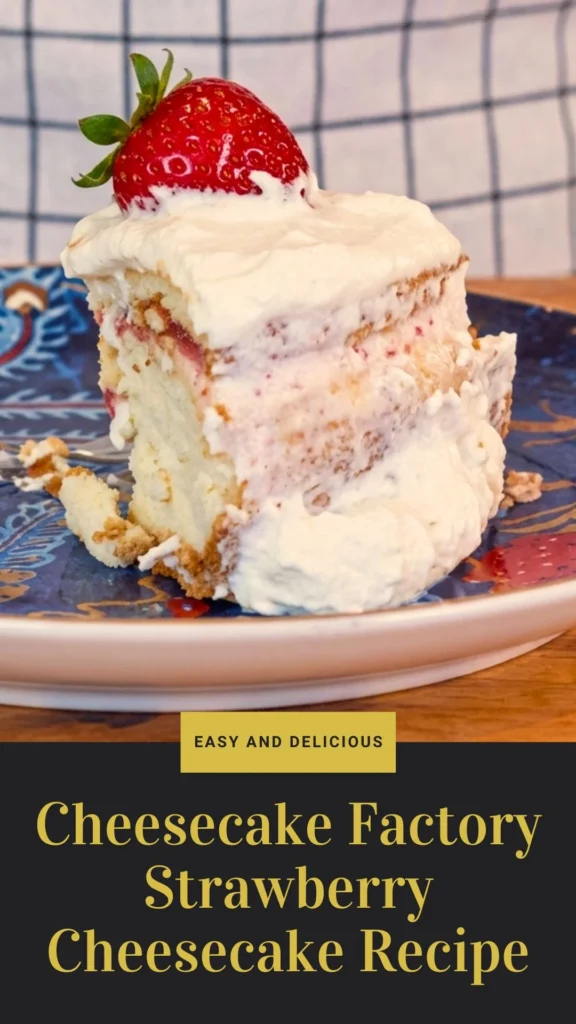
Recreating the iconic Cheesecake Factory strawberry cheesecake at home might seem intimidating, but this copycat Cheesecake Factory strawberry cheesecake recipe breaks down every step to help you achieve that signature ultra-creamy texture and glossy strawberry topping.
The Cheesecake Factory strawberry cheesecake has been a beloved menu staple for decades, featuring a unique graham cracker and vanilla wafer crust, impossibly smooth cream cheese filling, and fresh strawberries suspended in a jewel-like glaze.
Whether you’re making a full Cheesecake Factory strawberry cheesecake whole for a celebration or dreaming of a 6 inch Cheesecake Factory strawberry cheesecake for intimate gatherings, this comprehensive guide covers everything you need to know. With proper technique and patience, you’ll create a dessert that rivals the restaurant original and becomes your go-to showstopper for any special occasion.
What Does It Taste Like?
The Cheesecake Factory strawberry cheesecake delivers an unforgettable symphony of textures and flavors that’s become legendary among dessert enthusiasts. The first bite reveals an exceptionally dense yet silky-smooth cream cheese filling that practically melts on your tongue-far richer and creamier than typical homemade cheesecakes.
The subtle tang from cream cheese and sour cream perfectly balances the sweetness, while vanilla extract adds warmth and depth. The hybrid crust combining graham crackers and Nilla wafers provides a unique flavor foundation-slightly sweeter and more complex than traditional graham-only crusts, with a satisfying buttery crunch.
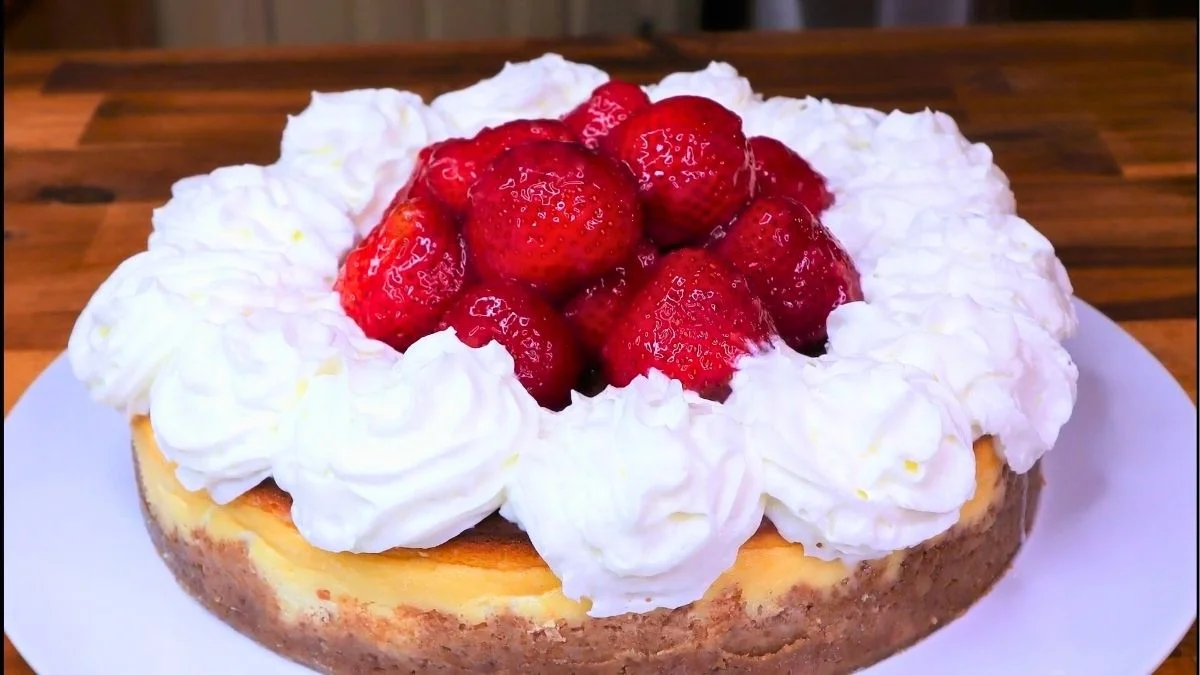
The crowning glory is the Cheesecake Factory strawberry cheesecake topping recipe-fresh strawberries enrobed in a glossy, lightly sweetened glaze that tastes vibrantly fruity without being overly sugary. Fresh whipped cream adds an airy, luxurious finishing touch that cuts through the richness, making each forkful feel indulgent yet surprisingly balanced.
Ingredients and Kitchen Utensils Lists
Ingredients
For the crust:
- 10 large graham crackers
- 30 Nilla wafers (vanilla wafer cookies)
- 2 tablespoons granulated white sugar
- 1½ sticks (¾ cup) unsalted butter, melted
- Cooking spray
For the cheesecake filling:
- 40 ounces (five 8-ounce packages) Philadelphia cream cheese, room temperature
- ½ cup sour cream
- 1½ cups granulated white sugar
- 2 tablespoons cornstarch
- 4 teaspoons vanilla extract
- 5 large eggs
For the glazed strawberry topping:
- ½ quart (about 2 cups / 1 pound) fresh strawberries for purée
- 1 pound fresh whole strawberries for topping
- 1½ teaspoons fresh lemon juice
- 1½ tablespoons cornstarch
- ½ cup granulated white sugar
- ½ cup water
For serving/decoration:
- Fresh whipped cream (homemade or store-bought)
Kitchen Utensils
- 10-inch springform pan (essential)
- Heavy-duty aluminum foil
- Food processor
- Stand mixer or hand mixer with whisk attachment
- Large mixing bowls (2-3)
- Rubber spatula
- Measuring cups and spoons
- Large roasting pan or cast-iron skillet (for water bath)
- Kettle or pot (for boiling water)
- Medium saucepan
- Whisk
- Sharp knife
- Offset spatula (optional, for smoothing)
- Piping bag with star tip (for whipped cream decoration)
Preparation and Cooking Time with Serving
Prep Time: 30 minutes
Baking Time: 70 minutes (15 minutes at 425°F + 55 minutes at 350°F)
Cooling Time: 4-6 hours (in oven and refrigerator)
Total Time: 6-7 hours (including cooling)
Servings: 12-16 slices
Difficulty Level: Advanced
Recipe Instructions with Steps
Step 1: Prepare the Springform Pan
Begin by wrapping the outside of your 10-inch springform pan completely with heavy-duty aluminum foil. This waterproofing step is absolutely critical for preventing water from seeping into your Cheesecake Factory strawberry cheesecake during the water bath baking process. Wrap at least two layers of foil tightly around the bottom and up the sides, crimping and pressing firmly to create a watertight seal. Once wrapped, generously spray the inside of the pan with cooking spray, coating the bottom and sides thoroughly to ensure easy release later. Set the prepared pan aside while you make the crust.
Step 2: Make the Hybrid Crust
Place 10 large graham crackers in your food processor and pulse 4-5 times until coarsely broken into large pieces. Add all 30 Nilla wafers and 2 tablespoons granulated sugar to the processor. Pulse in short bursts until the mixture becomes fine, even crumbs with no large pieces remaining-this should take about 10-15 pulses. Transfer these aromatic crumbs to a large bowl and pour in the melted butter. Using a fork or your hands, stir and toss until every crumb is evenly moistened and the mixture resembles wet sand. This unique crust combination is what gives the copycat Cheesecake Factory strawberry cheesecake its distinctive sweet, buttery foundation.
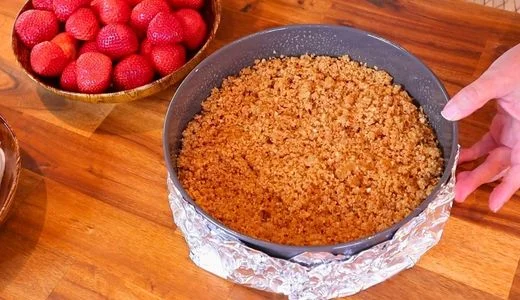
Step 3: Form and Set the Crust
Pour the buttery crumb mixture into your prepared springform pan. Using your fingers, press the mixture firmly and evenly across the bottom of the pan, then continue pressing it up the sides about halfway (approximately 1.5-2 inches high) to create a crust wall. Use the flat bottom of a drinking glass or measuring cup to pack the bottom crust tightly and create a smooth, compact surface. The crust should feel firm and hold together well. Place the entire pan in the freezer for at least 15-20 minutes while you prepare the filling-this helps the crust set and prevents it from mixing with the filling when poured.
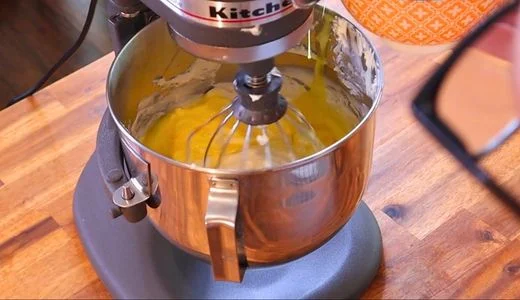
Step 4: Prepare the Cream Cheese Filling
Remove your cream cheese from the refrigerator at least 1-2 hours before starting (room temperature cream cheese is essential for a smooth, lump-free filling). In the bowl of a stand mixer fitted with the whisk attachment-or using a large bowl and hand mixer-beat the five packages of softened cream cheese and ½ cup sour cream together on low speed for 2-3 minutes until completely smooth and well blended with no lumps visible. Scrape down the sides of the bowl with a rubber spatula.
Step 5: Add Sugar, Cornstarch, and Flavorings
Add 1½ cups granulated sugar, 2 tablespoons cornstarch, and 4 teaspoons vanilla extract to the cream cheese mixture. Beat on low-medium speed until fully incorporated and the mixture appears silky and homogeneous, about 2 minutes. The cornstarch is a secret ingredient that helps stabilize the filling and prevents cracking-don’t skip it! Scrape down the bowl again to ensure everything is evenly mixed. This is the foundation of your authentic Cheesecake Factory strawberry cheesecake recipe.
Step 6: Incorporate the Eggs
Crack all 5 large eggs into a separate bowl and lightly beat them together with a fork just to break up the yolks. With your mixer running on the lowest speed, slowly drizzle the beaten eggs into the cream cheese mixture in a thin, steady stream. Mix just until the eggs are fully incorporated and you can no longer see yellow streaks-this should take only 30-60 seconds. Avoid overmixing at this stage, as incorporating too much air will cause bubbles and potential cracking. The filling should be thick, smooth, and luxuriously creamy.
Step 7: Fill the Pan and Remove Air Bubbles
Remove your crust from the freezer. Pour the cheesecake filling gently into the center of the crust, allowing it to spread naturally outward. Use a rubber spatula to smooth the top into an even layer, working from the center toward the edges. Here’s a crucial step: lift the entire pan about 2-3 inches above your counter and firmly drop it straight down. Repeat this pounding motion 8-10 times-you’ll see air bubbles rising to the surface and popping. This process ensures your Cheesecake Factory strawberry cheesecake whole has that signature ultra-smooth, dense texture without air pockets.
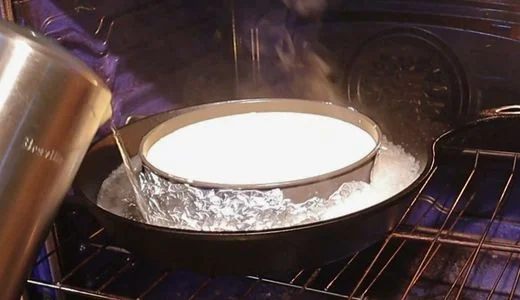
Step 8: Set Up the Water Bath
Preheat your oven to 425°F (standard bake or convection bake setting). While the oven heats, bring a full kettle or large pot of water to a rolling boil. Place your filled springform pan inside a larger roasting pan or deep cast-iron skillet-the outer pan should be at least 2 inches larger than your springform pan on all sides. Position this setup on your oven rack (middle position), then carefully pour the boiling water into the outer pan until it reaches approximately one-third up the sides of the springform pan. The water bath creates gentle, even heat that prevents cracking and ensures creamy consistency throughout.
Step 9: Bake at High Then Low Temperature
Place the water bath setup in your preheated 425°F oven and bake uncovered for exactly 15 minutes. This initial high heat sets the edges. After 15 minutes, without opening the oven door, reduce the temperature to 350°F and continue baking for an additional 55 minutes. Resist the temptation to peek-opening the door causes temperature fluctuations that can crack your the Cheesecake Factory strawberry cheesecake. After the full 70 minutes of baking, check for doneness: the edges should be set and slightly puffed, while the center should still have a gentle wobble about the size of a tennis ball when you shake the pan.
Step 10: Cool Slowly in the Oven
This step is critical for preventing cracks and achieving the perfect texture. Turn off the oven completely and crack the oven door open about 4-6 inches-prop it open with a folded dish towel. Leave the cheesecake in this cooling oven for 1-2 hours as it gradually comes to room temperature. This slow cooling prevents the dramatic temperature shock that causes most cheesecake cracks. After this initial oven cooling, carefully remove the cheesecake from the water bath and remove the aluminum foil. Let it sit at room temperature on a cooling rack for another 30-60 minutes before refrigerating.
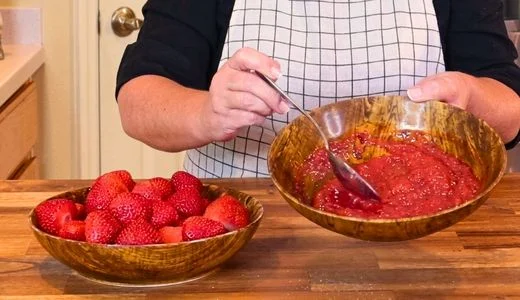
Step 11: Make the Strawberry Glaze
While your cheesecake cools or chills, prepare the signature Cheesecake Factory strawberry cheesecake topping recipe. Rinse and hull approximately 1 pound (½ quart) of fresh strawberries. Place them in your food processor and pulse until you have a smooth purée with small bits of fruit visible. Add 1½ teaspoons fresh lemon juice, 1½ tablespoons cornstarch, ½ cup granulated sugar, and ½ cup water to the strawberry purée. Pulse another 5-10 times until everything is well combined and the mixture is smooth.
Step 12: Cook and Thicken the Glaze
Transfer the strawberry mixture to a medium saucepan. Place over medium heat and whisk constantly as the mixture heats. Within 3-5 minutes, you’ll notice it beginning to thicken. Continue cooking and stirring until the glaze becomes syrupy and thick-it should coat the back of a spoon and have a consistency similar to thick Jell-O or jam. This usually takes 6-8 minutes total. The glaze will continue thickening as it cools, so don’t overcook it. Remove from heat, transfer to a bowl, and refrigerate until completely chilled (at least 2 hours).
Step 13: Chill the Cheesecake Completely
Once your cheesecake has cooled to room temperature, cover it loosely with plastic wrap (don’t let the wrap touch the surface) and refrigerate for at least 4 hours, though overnight is ideal. This extended chilling time allows the cheesecake to fully set, develop its flavors, and achieve that signature dense, sliceable texture. Cold cheesecake is also much easier to remove from the springform pan and decorate. This patience is what separates a good cheesecake from an exceptional copycat Cheesecake Factory strawberry cheesecake.
Step 14: Release from Pan and Prepare for Topping
When your cheesecake is thoroughly chilled and you’re ready to decorate, run a thin knife or offset spatula around the inside edge of the springform pan to loosen any stuck areas. Carefully unlatch and remove the springform ring, lifting it straight up. If your cheesecake stuck to the metal base, gently slide a large, thin knife or offset spatula between the crust and the metal base to loosen it, then transfer to your serving plate. For the cleanest presentation, leave the cheesecake on the metal base if it won’t release easily.
Step 15: Glaze and Decorate with Strawberries
Rinse, hull, and pat dry the remaining 1 pound of fresh whole strawberries. Depending on size, you can leave small berries whole or halve larger ones. Place the strawberries in a bowl and add several spoonfuls of your chilled strawberry glaze. Gently toss to coat each berry evenly with the shiny glaze-they should look glossy and jewel-like. Arrange the glazed strawberries artfully in the center of your cheesecake, creating a beautiful mounded presentation. Some should overlap slightly to create height and visual interest.
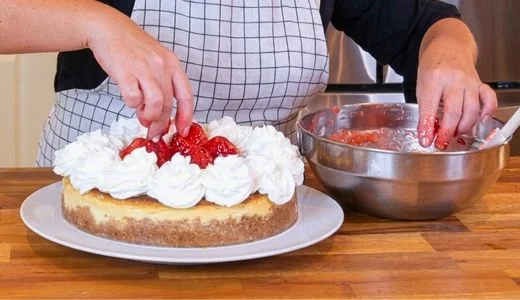
Step 16: Finish with Whipped Cream and Serve
Using a piping bag fitted with a large star tip (or simply using a spoon), pipe or dollop fresh whipped cream around the outer edge of the cheesecake, creating a decorative border between the strawberries and the crust. This classic presentation mirrors the restaurant’s signature look. For the cleanest slices, dip a sharp knife in hot water, wipe it dry, then cut straight down through the cheesecake. Clean and reheat the knife between each slice. Serve your Cheesecake Factory strawberry cheesecake cold, and watch as everyone marvels at your homemade masterpiece!
Customization and Pairing for Serving Ideas
1. 6-Inch Cheesecake Factory Strawberry Cheesecake for Smaller Gatherings
Transform this recipe into a 6 inch Cheesecake Factory strawberry cheesecake perfect for intimate celebrations or small families. Reduce all ingredients by half: use 5 graham crackers, 15 Nilla wafers, 20 ounces cream cheese (2.5 packages), and half the amounts for all other filling ingredients. Your baking time will decrease significantly-bake at 425°F for 10 minutes, then 350°F for 35-40 minutes. The smaller size makes this approachable for beginner bakers and prevents waste when you’re not feeding a crowd. You’ll get 6-8 generous slices from this scaled-down version.
2. Cheesecake Factory Strawberry Cheesecake Bar Format
Create convenient Cheesecake Factory strawberry cheesecake bar portions by baking in a 9×13-inch baking dish instead of a springform pan. Line the pan with parchment paper for easy removal. Press the same crust mixture across the bottom only (no sides), use the same filling quantity, and bake in a water bath at 325°F for 45-55 minutes. Once chilled, cut into neat squares or rectangles, top each piece with glazed strawberries and a dollop of whipped cream. This format is ideal for potlucks, bake sales, or serving large crowds where individual plating is impractical.
3. Mixed Berry Variation
While strawberry is classic, create a stunning mixed berry version by combining strawberries with fresh raspberries, blueberries, and blackberries. Prepare the glaze using half strawberries and half mixed berries for a complex, jewel-toned topping. This variation adds visual drama with multiple colors and introduces additional flavor dimensions-the tartness of raspberries and blackberries beautifully balances the sweet cream cheese filling. Arrange the various glazed berries in concentric circles or a free-form artistic pattern for an Instagram-worthy presentation.
4. Beverage Pairings
Elevate your the Cheesecake Factory strawberry cheesecake experience with thoughtful beverage pairings. Coffee is the classic choice-the slight bitterness of a medium roast or espresso cuts through the richness beautifully. For wine lovers, a sweet Moscato d’Asti or sparkling Prosecco complements the strawberries while cleansing the palate between bites. Dessert wines like late harvest Riesling or Port provide luxurious pairing options for special occasions. For non-alcoholic options, fresh-brewed iced tea, strawberry lemonade, or even a strawberry-infused sparkling water echoes the fruit flavors harmoniously.
5. Chocolate Drizzle Enhancement
Add restaurant-level drama by drizzling melted white or dark chocolate over your finished Cheesecake Factory strawberry cheesecake whole. Melt 4 ounces of good-quality chocolate with 1 tablespoon coconut oil until smooth, then transfer to a small zip-top bag. Snip a tiny corner and drizzle back and forth across the strawberries and whipped cream in decorative patterns. White chocolate creates elegant contrast against the red berries, while dark chocolate adds sophisticated bitterness that complements the sweet filling. This addition transforms an already impressive dessert into a show-stopping centerpiece.
6. Make-It-Your-Own Topping Bar
For casual gatherings or birthday parties, serve your cheesecake with a DIY topping station. Provide the classic glazed strawberries alongside additional options: fresh berry compote, chocolate sauce, caramel drizzle, crushed cookies, toasted nuts, and various flavored whipped creams. Slice the cheesecake plainly and let guests customize their portions. This interactive approach is especially popular with children and allows everyone to create their perfect slice while accommodating different taste preferences and dietary needs.
7. Seasonal Strawberry Alternatives
While the Cheesecake Factory strawberry cheesecake topping recipe shines with peak-season strawberries (late spring through early summer), you can adapt this recipe year-round. In fall, substitute with apple compote and caramel drizzle. Winter calls for pomegranate seeds and cranberry glaze. Summer welcomes peaches or cherries. The versatile cream cheese base and hybrid crust work beautifully with virtually any fruit topping, allowing you to enjoy this show-stopping dessert throughout the year while taking advantage of whatever fruits are at their flavorful peak in your region.If you love indulgent treats, try our Creamy Carnivore Cheesecake Recipe or the tropical Cheesecake Factory Pineapple Upside Down Cheesecake Recipe for more delicious dessert inspiration.
Tips Section
1. The Room Temperature Imperative
The single most important factor in achieving the ultra-smooth, lump-free texture of an authentic Cheesecake Factory strawberry cheesecake recipe is using properly softened cream cheese. Remove all five packages from the refrigerator at least 2-3 hours before mixing-they should feel soft to the touch, not cold or firm. Cold cream cheese will never fully incorporate and will leave lumps in your filling no matter how long you mix. If you forgot to soften your cream cheese, unwrap the blocks, cut them into 1-inch cubes, and let them sit at room temperature for 30-45 minutes. Never microwave cream cheese to soften it, as this creates hot spots and changes the texture.
2. Preventing Cracks Through Multiple Techniques
Cracks are the nemesis of beautiful cheesecake, but several techniques work together to prevent them. First, the water bath provides gentle, even heat and maintains moisture in the oven. Second, the gradual temperature reduction (starting at 425°F then dropping to 350°F) prevents the edges from overcooking while the center sets. Third, and most crucial, is the slow oven cooling with the door propped open-never remove a hot cheesecake into cold air. Fourth, avoid overmixing the batter, especially after adding eggs, which incorporates excess air that expands during baking and contracts during cooling (causing cracks). Finally, don’t overbake-the center should still wobble when done.
3. Mastering the Water Bath Without Leaks
Even with careful foil wrapping, water sometimes finds its way into springform pans. For foolproof waterproofing, use the double-wrap method: wrap your pan in two complete layers of heavy-duty aluminum foil, pressing firmly to seal. Alternatively, place your foil-wrapped springform pan inside a slightly larger cake pan before adding it to the water bath-this second barrier catches any potential drips. Some bakers prefer using a slow cooker liner bag: place your springform pan in the bag, seal it at the top above the pan rim, then proceed with the water bath. The silicone bag creates an impenetrable barrier against moisture.
4. Fresh Strawberry Selection and Preparation
The quality of your strawberries dramatically impacts the final result of your copycat Cheesecake Factory strawberry cheesecake. Choose berries that are uniformly red (avoid those with white or green shoulders), fragrant, and firm but not hard. Medium-sized berries work better for the whole glazed topping than oversized ones, which can topple over. For the purée portion, slightly softer, very ripe strawberries actually work well since they’ll be processed anyway. Always hull strawberries after washing, not before, to prevent water absorption. Pat them completely dry before glazing to ensure the glaze adheres properly rather than sliding off.
5. Achieving the Perfect Glaze Consistency
The Cheesecake Factory strawberry cheesecake topping recipe requires a glaze that’s thick enough to cling to strawberries but fluid enough to look glossy and jewel-like, not gloppy. The key indicator is the spoon test: dip a metal spoon in the hot glaze, lift it out, and run your finger across the back-if the line holds without the glaze running back together immediately, it’s ready. Remember that cornstarch-thickened glazes continue to thicken as they cool, so err on the side of slightly thinner while hot. If your cooled glaze becomes too thick, whisk in water one teaspoon at a time until it reaches the perfect coating consistency.
6. Cutting Perfect, Photogenic Slices
Professional-looking slices require the right technique and tools. Use a long, thin-bladed knife (not a serrated knife, which tears the filling). Fill a tall glass or pitcher with very hot water. Dip the knife blade in the hot water for 10-15 seconds, then wipe it completely dry with a clean towel. Make one complete cut straight down through the cheesecake without any sawing motion. Lift the knife straight out, rinse off any filling, and repeat the hot water dip before the next cut. This process might seem tedious for a Cheesecake Factory strawberry cheesecake whole, but it’s what creates those clean, bakery-perfect slices with smooth sides and no dragged filling.
7. Storage and Make-Ahead Strategy
One of the best features of this the Cheesecake Factory strawberry cheesecake is that it actually improves with time and can be made completely ahead. The cheesecake base (without strawberry topping) stores beautifully in the refrigerator for up to 5 days, tightly covered with plastic wrap. The flavors meld and deepen, and the texture becomes even creamier. Make and refrigerate the strawberry glaze separately for up to 3 days. Add the glazed strawberries and whipped cream decoration only a few hours before serving for the freshest presentation. You can also freeze unfrosted cheesecake for up to 2 months-wrap tightly in plastic wrap, then aluminum foil. Thaw overnight in the refrigerator before decorating and serving.
Storage and Reheating Guidance
Store Cheesecake Factory strawberry cheesecake covered in the refrigerator for up to 5 days-the cheesecake actually improves over the first 2-3 days as flavors develop. Cover loosely with plastic wrap or store in an airtight container to prevent absorbing refrigerator odors. Cheesecake should never be reheated; serve it cold directly from the refrigerator for best texture and food safety.
Common Queries and FAQs Section
Q: Can I make Cheesecake Factory strawberry cheesecake without a water bath?
A: While technically possible, baking without a water bath significantly increases your risk of cracks, uneven cooking, and a drier texture. The water bath is what creates the gentle, humid environment that produces the signature ultra-creamy consistency. If you absolutely must skip it, reduce your oven temperature to 300°F, place a shallow pan of water on the rack below your cheesecake, and extend baking time by 15-20 minutes.
Q: Why does my cheesecake have a weird eggy taste?
A: An eggy flavor in your Cheesecake Factory strawberry cheesecake recipe typically results from overbaking. When cheesecake bakes too long or at too high a temperature, the egg proteins overcoagulate and develop that sulfurous, eggy taste and smell. Always remove cheesecake when the center still wobbles-it continues cooking during the cooling process. Using room temperature ingredients and avoiding overmixing also helps create a smooth, non-eggy flavor profile.
Q: Can I substitute low-fat or whipped cream cheese?
A: For authentic results, always use full-fat, brick-style Philadelphia cream cheese (or equivalent quality brand). Low-fat cream cheese contains more moisture and less fat, resulting in a thinner filling that won’t set properly and lacks the rich, creamy texture of the copycat Cheesecake Factory strawberry cheesecake. Whipped cream cheese contains incorporated air and will create an entirely different texture. These substitutions fundamentally change the recipe chemistry and aren’t recommended.
Q: How do I make the whipped cream decoration stable so it doesn’t deflate?
A: For stable whipped cream that holds its shape for hours, use heavy whipping cream (not half-and-half or light cream) with at least 36% milk fat. Chill your bowl and whisk attachment in the freezer for 15 minutes before whipping. Add 2 tablespoons powdered sugar and ½ teaspoon vanilla extract per cup of cream. For even more stability, add 1 teaspoon unflavored gelatin (bloomed in 1 tablespoon cold water) to the cream while whipping. This creates bakery-style stabilized whipped cream that won’t weep or deflate on your Cheesecake Factory strawberry cheesecake whole.
Q: What’s the purpose of the Nilla wafers in the crust?
A: The combination of graham crackers and vanilla wafer cookies creates the distinctive crust that sets the Cheesecake Factory strawberry cheesecake apart from other recipes. The Nilla wafers add extra sweetness, a more complex vanilla flavor, and a slightly different texture than graham crackers alone. This hybrid crust has become part of the signature recipe. If you can’t find Nilla wafers, you can use all graham crackers, but the result will taste slightly different from the restaurant version.
Q: Can I use frozen strawberries instead of fresh?
A: Fresh strawberries are strongly recommended for the topping presentation and the best flavor in the Cheesecake Factory strawberry cheesecake topping recipe. However, you can use frozen strawberries for the glaze/purée portion if fresh aren’t available-thaw them completely and drain excess liquid before processing. Never use frozen berries for the whole glazed topping, as they become mushy when thawed and won’t hold their shape. The visual impact and texture require fresh, firm strawberries.
Q: My cheesecake sank in the middle after cooling-what happened?
A: A sunken center typically indicates overbaking or too much air incorporated during mixing. When cheesecake overbakes, the proteins tighten and expel moisture, then collapse as they cool. Alternatively, overmixing (especially after adding eggs) incorporates excess air that expands during baking, then deflates during cooling. Always mix on low speed, stop as soon as eggs are incorporated, and remove the cheesecake when the center still has a tennis-ball-sized wobble.
Q: How far in advance can I make this cheesecake?
A: The cheesecake base can be made 2-3 days ahead and stored covered in the refrigerator-it actually tastes better after resting. The strawberry glaze can be made up to 3 days ahead and refrigerated separately. However, only glaze the fresh strawberries and add the whipped cream decoration 2-4 hours before serving for the best presentation. This makes the Cheesecake Factory strawberry cheesecake an excellent make-ahead dessert for entertaining, as most work is done in advance.
Cheesecake Factory Strawberry Cheesecake Recipe
Ingredients
Equipment
Method
- Begin by wrapping the outside of your 10-inch springform pan completely with heavy-duty aluminum foil. This waterproofing step is absolutely critical for preventing water from seeping into your Cheesecake Factory strawberry cheesecake during the water bath baking process. Wrap at least two layers of foil tightly around the bottom and up the sides, crimping and pressing firmly to create a watertight seal. Once wrapped, generously spray the inside of the pan with cooking spray, coating the bottom and sides thoroughly to ensure easy release later. Set the prepared pan aside while you make the crust.
- Place 10 large graham crackers in your food processor and pulse 4-5 times until coarsely broken into large pieces. Add all 30 Nilla wafers and 2 tablespoons granulated sugar to the processor. Pulse in short bursts until the mixture becomes fine, even crumbs with no large pieces remaining-this should take about 10-15 pulses. Transfer these aromatic crumbs to a large bowl and pour in the melted butter. Using a fork or your hands, stir and toss until every crumb is evenly moistened and the mixture resembles wet sand. This unique crust combination is what gives the copycat Cheesecake Factory strawberry cheesecake its distinctive sweet, buttery foundation.
- Pour the buttery crumb mixture into your prepared springform pan. Using your fingers, press the mixture firmly and evenly across the bottom of the pan, then continue pressing it up the sides about halfway (approximately 1.5-2 inches high) to create a crust wall. Use the flat bottom of a drinking glass or measuring cup to pack the bottom crust tightly and create a smooth, compact surface. The crust should feel firm and hold together well. Place the entire pan in the freezer for at least 15-20 minutes while you prepare the filling-this helps the crust set and prevents it from mixing with the filling when poured.
- Remove your cream cheese from the refrigerator at least 1-2 hours before starting (room temperature cream cheese is essential for a smooth, lump-free filling). In the bowl of a stand mixer fitted with the whisk attachment-or using a large bowl and hand mixer-beat the five packages of softened cream cheese and ½ cup sour cream together on low speed for 2-3 minutes until completely smooth and well blended with no lumps visible. Scrape down the sides of the bowl with a rubber spatula.
- Add 1½ cups granulated sugar, 2 tablespoons cornstarch, and 4 teaspoons vanilla extract to the cream cheese mixture. Beat on low-medium speed until fully incorporated and the mixture appears silky and homogeneous, about 2 minutes. The cornstarch is a secret ingredient that helps stabilize the filling and prevents cracking-don’t skip it! Scrape down the bowl again to ensure everything is evenly mixed. This is the foundation of your authentic Cheesecake Factory strawberry cheesecake recipe.
- Crack all 5 large eggs into a separate bowl and lightly beat them together with a fork just to break up the yolks. With your mixer running on the lowest speed, slowly drizzle the beaten eggs into the cream cheese mixture in a thin, steady stream. Mix just until the eggs are fully incorporated and you can no longer see yellow streaks-this should take only 30-60 seconds. Avoid overmixing at this stage, as incorporating too much air will cause bubbles and potential cracking. The filling should be thick, smooth, and luxuriously creamy.
- Remove your crust from the freezer. Pour the cheesecake filling gently into the center of the crust, allowing it to spread naturally outward. Use a rubber spatula to smooth the top into an even layer, working from the center toward the edges. Here’s a crucial step: lift the entire pan about 2-3 inches above your counter and firmly drop it straight down. Repeat this pounding motion 8-10 times-you’ll see air bubbles rising to the surface and popping. This process ensures your Cheesecake Factory strawberry cheesecake whole has that signature ultra-smooth, dense texture without air pockets.
- Preheat your oven to 425°F (standard bake or convection bake setting). While the oven heats, bring a full kettle or large pot of water to a rolling boil. Place your filled springform pan inside a larger roasting pan or deep cast-iron skillet-the outer pan should be at least 2 inches larger than your springform pan on all sides. Position this setup on your oven rack (middle position), then carefully pour the boiling water into the outer pan until it reaches approximately one-third up the sides of the springform pan. The water bath creates gentle, even heat that prevents cracking and ensures creamy consistency throughout.
- Place the water bath setup in your preheated 425°F oven and bake uncovered for exactly 15 minutes. This initial high heat sets the edges. After 15 minutes, without opening the oven door, reduce the temperature to 350°F and continue baking for an additional 55 minutes. Resist the temptation to peek-opening the door causes temperature fluctuations that can crack your the Cheesecake Factory strawberry cheesecake. After the full 70 minutes of baking, check for doneness: the edges should be set and slightly puffed, while the center should still have a gentle wobble about the size of a tennis ball when you shake the pan.
- This step is critical for preventing cracks and achieving the perfect texture. Turn off the oven completely and crack the oven door open about 4-6 inches-prop it open with a folded dish towel. Leave the cheesecake in this cooling oven for 1-2 hours as it gradually comes to room temperature. This slow cooling prevents the dramatic temperature shock that causes most cheesecake cracks. After this initial oven cooling, carefully remove the cheesecake from the water bath and remove the aluminum foil. Let it sit at room temperature on a cooling rack for another 30-60 minutes before refrigerating.
- While your cheesecake cools or chills, prepare the signature Cheesecake Factory strawberry cheesecake topping recipe. Rinse and hull approximately 1 pound (½ quart) of fresh strawberries. Place them in your food processor and pulse until you have a smooth purée with small bits of fruit visible. Add 1½ teaspoons fresh lemon juice, 1½ tablespoons cornstarch, ½ cup granulated sugar, and ½ cup water to the strawberry purée. Pulse another 5-10 times until everything is well combined and the mixture is smooth.
- Transfer the strawberry mixture to a medium saucepan. Place over medium heat and whisk constantly as the mixture heats. Within 3-5 minutes, you’ll notice it beginning to thicken. Continue cooking and stirring until the glaze becomes syrupy and thick-it should coat the back of a spoon and have a consistency similar to thick Jell-O or jam. This usually takes 6-8 minutes total. The glaze will continue thickening as it cools, so don’t overcook it. Remove from heat, transfer to a bowl, and refrigerate until completely chilled (at least 2 hours).
- Once your cheesecake has cooled to room temperature, cover it loosely with plastic wrap (don’t let the wrap touch the surface) and refrigerate for at least 4 hours, though overnight is ideal. This extended chilling time allows the cheesecake to fully set, develop its flavors, and achieve that signature dense, sliceable texture. Cold cheesecake is also much easier to remove from the springform pan and decorate. This patience is what separates a good cheesecake from an exceptional copycat Cheesecake Factory strawberry cheesecake.
- When your cheesecake is thoroughly chilled and you’re ready to decorate, run a thin knife or offset spatula around the inside edge of the springform pan to loosen any stuck areas. Carefully unlatch and remove the springform ring, lifting it straight up. If your cheesecake stuck to the metal base, gently slide a large, thin knife or offset spatula between the crust and the metal base to loosen it, then transfer to your serving plate. For the cleanest presentation, leave the cheesecake on the metal base if it won’t release easily.
- Rinse, hull, and pat dry the remaining 1 pound of fresh whole strawberries. Depending on size, you can leave small berries whole or halve larger ones. Place the strawberries in a bowl and add several spoonfuls of your chilled strawberry glaze. Gently toss to coat each berry evenly with the shiny glaze-they should look glossy and jewel-like. Arrange the glazed strawberries artfully in the center of your cheesecake, creating a beautiful mounded presentation. Some should overlap slightly to create height and visual interest.
- Using a piping bag fitted with a large star tip (or simply using a spoon), pipe or dollop fresh whipped cream around the outer edge of the cheesecake, creating a decorative border between the strawberries and the crust. This classic presentation mirrors the restaurant’s signature look. For the cleanest slices, dip a sharp knife in hot water, wipe it dry, then cut straight down through the cheesecake. Clean and reheat the knife between each slice. Serve your Cheesecake Factory strawberry cheesecake cold, and watch as everyone marvels at your homemade masterpiece!
Video
Notes
Mastering this Cheesecake Factory strawberry cheesecake recipe transforms you from home baker to dessert artisan, capable of recreating one of America’s most beloved restaurant desserts. While the process requires time, patience, and attention to detail, the spectacular results-that impossibly creamy filling, unique hybrid crust, and jewel-like strawberry crown-make every step worthwhile. Whether you’re making a full Cheesecake Factory strawberry cheesecake whole for a celebration, experimenting with the Cheesecake Factory strawberry cheesecake bar format for easier serving, or scaling down to a 6 inch Cheesecake Factory strawberry cheesecake for intimate gatherings, you now have all the knowledge and techniques to succeed. This copycat Cheesecake Factory strawberry cheesecake will become your signature dessert, impressing family and friends while saving you the restaurant price. The pride of creating this show-stopping masterpiece from scratch is the sweetest reward of all!
We’d love to hear how this recipe turns out for you! Give it a try, then drop a comment below to share your thoughts and tips with us.
Also, follow along on Pinterest and Youtube for more tasty updates. Your support and thoughts mean the world!