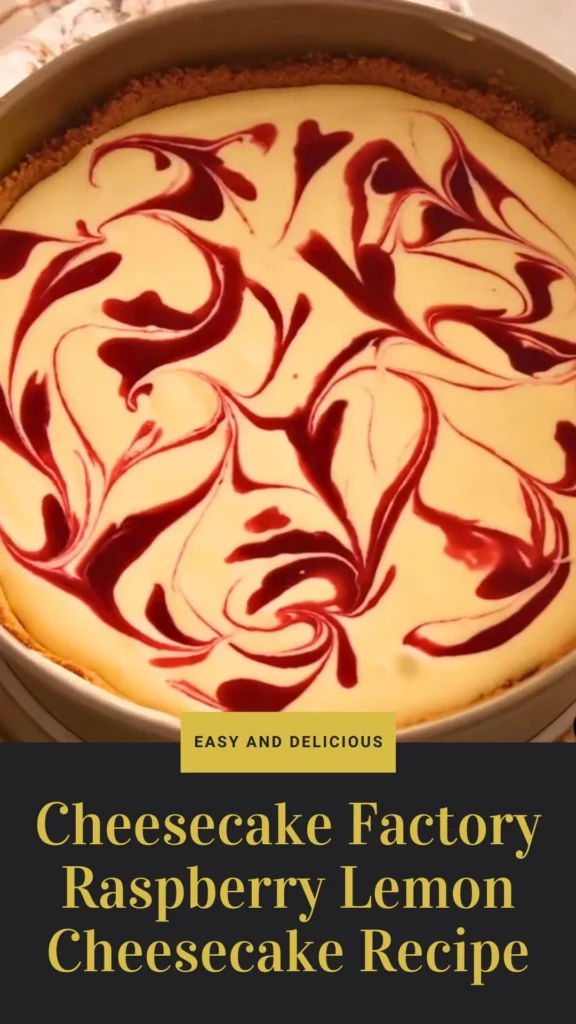
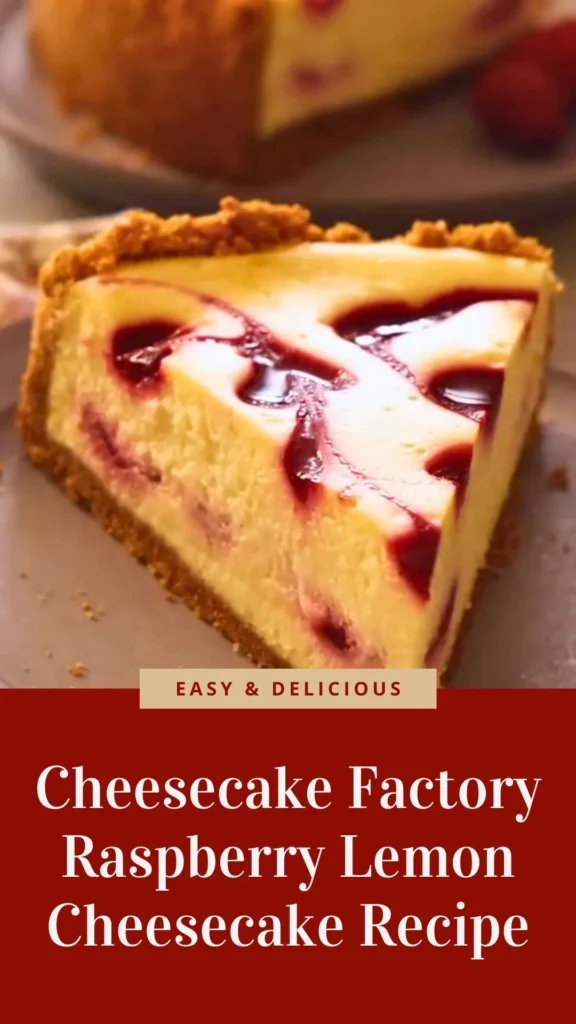
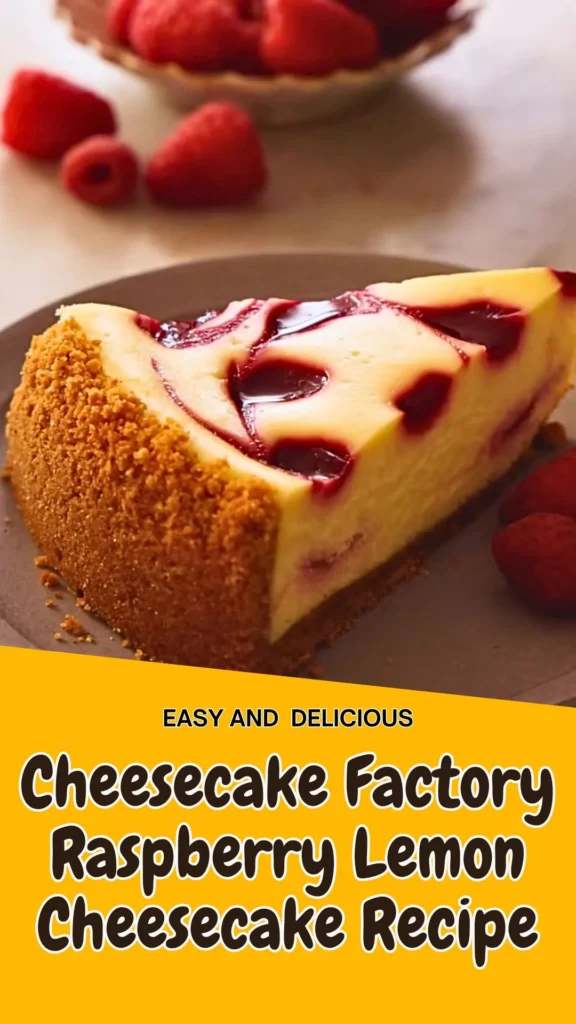
Recreating the iconic Cheesecake Factory raspberry lemon cheesecake at home might seem intimidating, but this detailed guide transforms that restaurant favorite into an achievable masterpiece for your own kitchen.
The lemon raspberry cheesecake factory experience combines velvety cream cheese filling, bright citrus notes, and jewel-toned raspberry swirls that create both visual drama and incredible flavor complexity.
This raspberry lemon cheesecake cheesecake factory style dessert features a buttery graham cracker crust, silky smooth filling infused with vanilla and lemon, and a vibrant homemade raspberry sauce that marbles throughout. Whether you’re celebrating a special occasion or simply craving that signature lemon raspberry cheesecake from cheesecake factory, this comprehensive recipe delivers professional-quality results with patience and precision.
What Does It Taste Like?
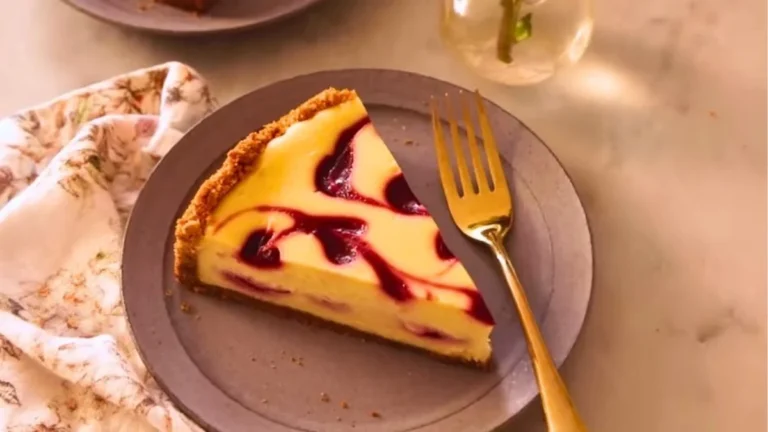
The Cheesecake Factory raspberry lemon cheesecake delivers an extraordinary balance of rich, tangy, and fruity flavors that dance across your palate. Each forkful reveals ultra-creamy, dense cheesecake with subtle lemon brightness cutting through the richness of cream cheese and sour cream.
The texture is impossibly smooth and luxurious, melting on your tongue without any graininess. Ribbons of tart-sweet raspberry sauce provide bursts of intense berry flavor and beautiful contrast against the pale filling.
The buttery graham cracker crust adds a satisfying crunch and slightly sweet base that grounds the dessert. The raspberry lemon cheesecake factory experience is neither overwhelmingly sweet nor too tart-it’s perfectly calibrated sophistication in every slice.
Ingredients and Kitchen Utensils Lists
Ingredients
For the raspberry sauce:
- 18 oz (approximately 1 lb) fresh or frozen raspberries
- 1/3 cup (66 g) granulated sugar
- 1 tablespoon fresh lemon juice
- 1 tablespoon water
- 2 teaspoons cornstarch
For the graham cracker crust:
- 1½ cups (180 g) graham cracker crumbs
- ¼ cup (50 g) granulated sugar
- 6-7 tablespoons unsalted butter, melted
For the cheesecake filling:
- 3 (8 oz) blocks cream cheese, very soft (room temperature)
- 1 cup (200 g) granulated sugar
- ½ cup (120 g) sour cream
- ¼ teaspoon salt
- 2 teaspoons vanilla extract
- 3 large eggs, room temperature
Kitchen Utensils
- 9-inch springform pan
- Stand mixer with paddle attachment (or hand mixer)
- Medium saucepan
- Fine-mesh sieve/strainer
- Rubber spatula
- Flat-bottomed cup or glass (for pressing crust)
- Small bowl (for cornstarch slurry)
- Wooden skewer or toothpick (for swirling)
- Mixing bowls (various sizes)
- Measuring cups and spoons
- Cooling rack
- Plastic wrap or aluminum foil (for storage)
Preparation and Cooking Time with Serving
Prep Time: 30 minutes
Bake Time: 45-50 minutes
Cooling Time: 8+ hours (including refrigeration)
Total Time: Approximately 9-10 hours
Servings: 12-16 slices
Difficulty Level: Intermediate to Advanced
Recipe Instructions with Steps
Step 1: Prepare the Raspberry Sauce
Begin your Cheesecake Factory raspberry lemon cheesecake by making the signature raspberry sauce. In a medium saucepan, combine 18 oz of fresh or frozen raspberries (no need to thaw if frozen), 1/3 cup granulated sugar, and 1 tablespoon fresh lemon juice. Place over medium heat and cook for 8-10 minutes, stirring frequently with a wooden spoon or spatula. As the mixture heats, gently break up the berries with your spoon to release their juices and create a chunky compote. The sugar will dissolve and the berries will begin to break down into a vibrant, fragrant sauce.
Step 2: Thicken the Raspberry Sauce
In a small bowl, whisk together 1 tablespoon water and 2 teaspoons cornstarch until completely smooth with no lumps-this is your thickening slurry. Lower the heat under your raspberry mixture to medium-low, then slowly stir in the cornstarch slurry, mixing constantly to prevent clumping. Return the heat to medium and cook for an additional 1-2 minutes, stirring continuously, until the sauce noticeably thickens and becomes glossy. The consistency should coat the back of a spoon.
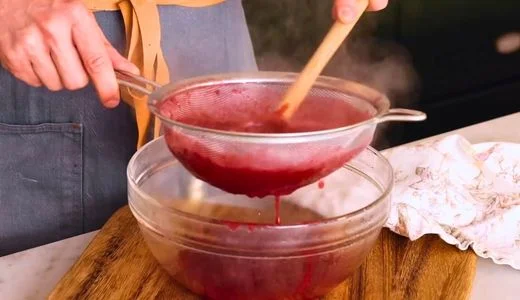
Step 3: Strain and Cool the Sauce
Immediately remove the saucepan from heat and pour the raspberry sauce through a fine-mesh sieve set over a clean bowl. Use a spatula or spoon to press the mixture through the sieve, extracting all the smooth sauce while leaving the seeds behind. This straining step is essential for the silky texture characteristic of lemon raspberry cheesecake factory desserts. Discard the seeds and set the strained sauce aside to cool completely to room temperature, which typically takes 30-45 minutes. You can speed this process by placing the bowl in the refrigerator.
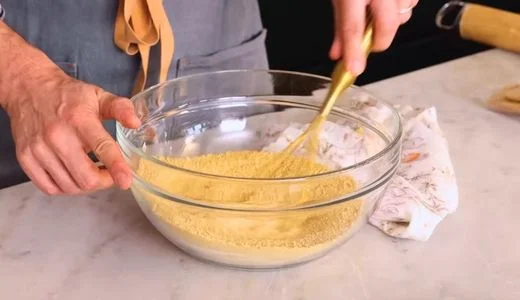
Step 4: Make the Graham Cracker Crust
Preheat your oven to 350°F and position a rack in the center. Lightly grease the bottom and sides of a 9-inch springform pan with butter or non-stick spray. In a medium bowl, combine 1½ cups graham cracker crumbs and ¼ cup granulated sugar, mixing until evenly distributed. Pour in 6 tablespoons of melted unsalted butter and stir thoroughly with a fork or spatula. The mixture should resemble damp sand and hold together when pressed. If it seems too dry and crumbly, add the 7th tablespoon of melted butter and mix again.
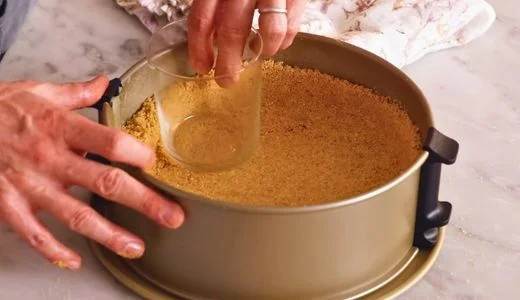
Step 5: Press and Bake the Crust
Transfer the graham cracker mixture to your prepared springform pan. Using the flat bottom of a measuring cup or glass, firmly press the crumb mixture into an even layer across the bottom of the pan and approximately 1½ to 2 inches up the sides, creating a sturdy shell for your raspberry lemon cheesecake Cheesecake Factory filling. Apply even pressure to ensure there are no thin spots or gaps. Place the pan in your preheated 350°F oven and bake for 10-12 minutes until the crust becomes fragrant and slightly darkened in color. Remove from the oven and set aside to cool completely on a wire rack while you prepare the filling.
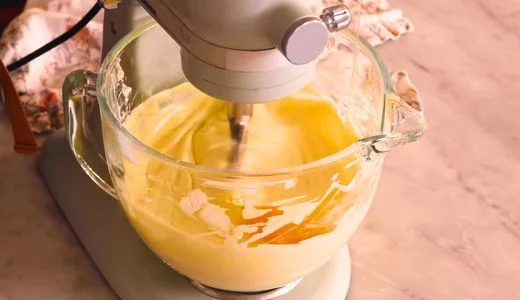
Step 6: Prepare the Cream Cheese Base
Ensure your cream cheese is very soft-it should be at room temperature for at least 1 hour, or you can microwave each block for 10-15 seconds to soften slightly. In the bowl of a stand mixer fitted with the paddle attachment, combine the three 8-oz blocks of cream cheese and 1 cup granulated sugar. Beat on medium-low speed for approximately 2 minutes, scraping down the sides and bottom of the bowl halfway through. The mixture should be completely smooth, fluffy, and lump-free. This gentle mixing prevents incorporating too much air, which can cause cracks during baking.
Step 7: Add Sour Cream and Flavorings
To your cream cheese mixture, add ½ cup sour cream, ¼ teaspoon salt, and 2 teaspoons vanilla extract. Mix on low speed just until these ingredients are fully incorporated and the batter is silky smooth, scraping the bowl as needed. The sour cream adds tanginess and creates the signature dense, creamy texture of lemon raspberry cheesecake from Cheesecake Factory, while the salt enhances all the flavors without making the dessert taste salty.
Step 8: Incorporate the Eggs Carefully
Add the 3 room-temperature eggs one at a time, mixing on the lowest speed after each addition. Allow each egg to fully incorporate before adding the next-this should take about 20-30 seconds per egg. After all eggs are added, scrape down the sides and bottom of the bowl one final time, and give the batter a few gentle stirs with a spatula to ensure no pockets of unmixed cream cheese remain. Be careful not to overmix at this stage, as excessive beating incorporates air bubbles that can cause cracks and an uneven texture.
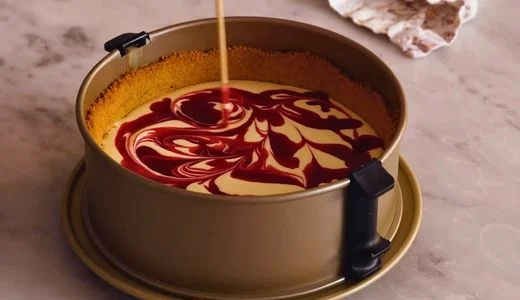
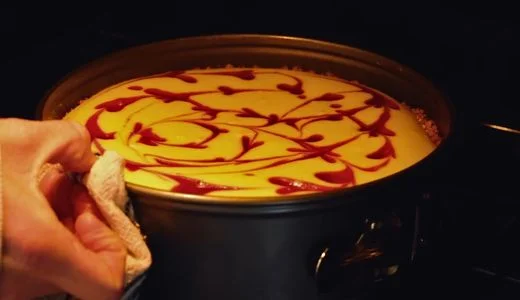
Step 9: Create the First Marbled Layer
Pour exactly half of your prepared cheesecake batter into the cooled graham cracker crust, spreading it gently to create an even layer. Using a spoon or squeeze bottle, drizzle ¼ cup of your cooled raspberry sauce over the surface in a random pattern-don’t worry about being too precise. Take a wooden skewer, toothpick, or the tip of a knife and gently drag it through the raspberry dollops in swirling motions, creating beautiful marbled patterns. Don’t over-swirl; 5-6 gentle strokes create the most dramatic visual effect for your Cheesecake Factory raspberry lemon cheesecake.
Step 10: Add the Second Layer
Very carefully pour the remaining cheesecake batter over your first marbled layer. To prevent disturbing the swirls below, start pouring at the edges of the pan and work your way toward the center, allowing the batter to naturally spread. Use an offset spatula or the back of a spoon to gently smooth the top into an even layer. The batter should reach nearly to the top of your crust.
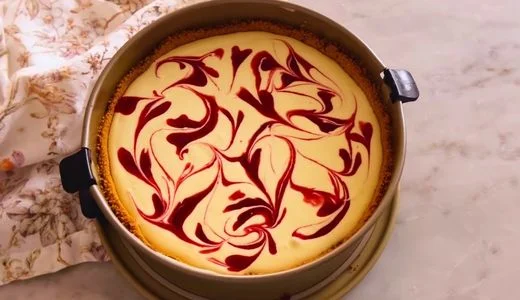
Step 11: Create the Top Marble Design
Dollop small amounts of raspberry sauce (use slightly less than ¼ cup total) onto the top surface of your cheesecake in random spots-aim for 6-8 small dollops. Using your skewer or toothpick, drag gentle lines through the raspberry dollops to create elegant swirls and marbled patterns on the top. This decorative touch is part of what makes the raspberry lemon cheesecake factory presentation so stunning. Reserve the remaining raspberry sauce for serving.
Step 12: Two-Temperature Baking Method
Place your assembled cheesecake in the preheated 350°F oven and bake for exactly 15 minutes-this initial higher temperature sets the crust and edges. After 15 minutes, reduce the oven temperature to 300°F without opening the door, and continue baking for an additional 30-35 minutes. The cheesecake is done when the edges are set and slightly puffed, but the center still has a slight jiggle when you gently shake the pan (about a 2-inch diameter circle in the very center). The residual heat will continue cooking the center during the cooling process.
Step 13: The Critical Cooling Process
This gradual cooling method is absolutely crucial for preventing cracks in your lemon raspberry cheesecake Cheesecake Factory masterpiece. When baking time is complete, turn off the oven but leave the cheesecake inside with the door completely closed for 1 full hour. After this hour, open the oven door and carefully remove the cheesecake, placing it on a wire rack to sit at room temperature for another hour. This gradual temperature transition prevents the rapid contraction that causes surface cracks. Finally, cover the cheesecake loosely with plastic wrap or foil and refrigerate for at least 6 hours, though overnight (8-12 hours) is ideal for the filling to fully set.
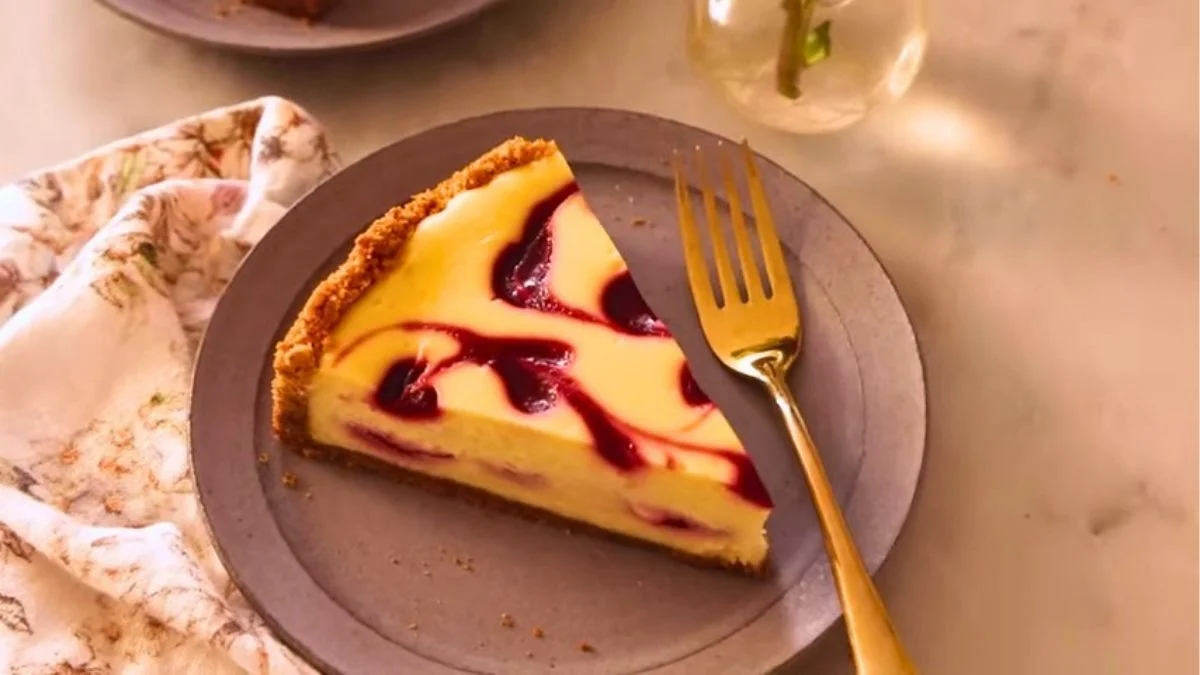
Step 14: Unmold and Serve
When completely chilled and set, run a thin knife or offset spatula around the inside edge of the springform pan to loosen the cheesecake. Carefully release and remove the springform ring. Transfer your Cheesecake Factory raspberry lemon cheesecake to a serving plate. Slice with a sharp knife dipped in hot water and wiped clean between cuts for the cleanest slices. Drizzle each slice with the reserved raspberry sauce just before serving for that authentic restaurant presentation.
Customization and Pairing for Serving Ideas
1. Lemon Intensity Adjustment
While this recipe features subtle lemon notes from the raspberry sauce, you can amplify the citrus dimension for a more pronounced lemon raspberry cheesecake factory experience. Add 1-2 teaspoons of fresh lemon zest to the cream cheese filling along with the vanilla extract, and increase the lemon juice in the raspberry sauce to 2 tablespoons. For even brighter citrus flavor, incorporate ½ teaspoon of lemon extract into the filling. This creates a more assertive lemon-forward profile that beautifully complements the sweet-tart raspberries.
2. White Chocolate Raspberry Variation
Transform your raspberry lemon cheesecake Cheesecake Factory into a decadent white chocolate version by melting 4 oz of high-quality white chocolate and allowing it to cool slightly before beating it into the cream cheese mixture. The white chocolate adds luxurious sweetness and pairs extraordinarily well with raspberries. You can also drizzle melted white chocolate over the finished cheesecake in a decorative pattern for an elegant presentation that looks professionally crafted.
3. Berry Medley Enhancement
While raspberries are traditional, creating a mixed berry sauce adds complexity and visual interest. Use 12 oz raspberries combined with 6 oz blackberries or blueberries when making your sauce, following the same cooking and straining method. The combination creates deeper, more nuanced fruit flavors with layers of tartness and sweetness. This variation is particularly stunning when you can see different colored berry swirls marbled throughout the creamy filling.
4. More Cheesecake Factory Desserts to Explore
If you enjoyed this Cheesecake Factory Raspberry Lemon Cheesecake Recipe, you might also love trying a few other desserts from our collection. The rich and indulgent Creamy Carnivore Cheesecake Recipe is perfect for anyone who enjoys ultra-smooth cheesecake with deep, satisfying flavor. For a fruity twist, the Cheesecake Factory Pineapple Upside Down Cheesecake Recipe offers a beautiful balance of caramelized pineapple and creamy cheesecake. And if you enjoy classic starters before dessert, our Cheesecake Factory Nachos Recipe is a great appetizer to serve before finishing your meal with cheesecake.
5. Fresh Berry Garnish
Elevate individual slices by garnishing with fresh raspberries, a small sprig of fresh mint, and a light dusting of powdered sugar just before serving. For special occasions, arrange fresh raspberries in a decorative pattern on top of the entire cheesecake before refrigerating, creating a jewel-like crown. You can also add candied lemon peel curls or edible flowers like pansies or violas for a truly show-stopping presentation worthy of a high-end restaurant.
6. No-Bake Crust Alternative
If you want to eliminate oven time for the crust, create a no-bake version by increasing the butter to 8 tablespoons and adding 2 tablespoons of honey to the graham cracker mixture. Press firmly into the pan and refrigerate for at least 1 hour before adding the filling. While the texture will be slightly different from the traditional baked crust, it still provides the essential buttery, crunchy foundation for your lemon raspberry cheesecake from Cheesecake Factory.
7. Individual Mini Cheesecakes
Transform this recipe into elegant individual portions perfect for dinner parties by using a 12-cup muffin tin lined with paper liners. Divide the crust mixture among the cups (about 2 tablespoons each), press firmly, and bake at 350°F for 6-8 minutes. Fill each cup about ¾ full with batter, add a small swirl of raspberry sauce, and bake at 325°F for 18-22 minutes. The cooling process is faster-30 minutes at room temperature, then 3-4 hours refrigerated. These mini raspberry lemon cheesecake factory treats are perfect for portion control and serving at events.
Tips Section
1. Temperature Is Everything for Smooth Filling
The most critical factor in achieving the silky, lump-free texture of authentic Cheesecake Factory raspberry lemon cheesecake is ingredient temperature. All dairy components-cream cheese, eggs, and sour cream-must be at room temperature before mixing. Cold cream cheese will never fully incorporate, leaving lumps no amount of mixing can eliminate. Remove cream cheese from the refrigerator at least 2 hours before starting, or carefully microwave each block for 10-15 seconds to soften. Room-temperature eggs blend seamlessly without requiring overmixing, which incorporates unwanted air bubbles that cause cracks and uneven texture.
2. The Secret to Crack-Free Perfection
Cracks in cheesecake typically result from three issues: overbaking, overmixing, or rapid temperature changes. The two-temperature baking method (starting at 350°F, then reducing to 300°F) and the gradual three-stage cooling process are specifically designed to prevent cracking. Never skip the 1-hour oven rest with the door closed or the 1-hour countertop cooling period. These steps allow the lemon raspberry cheesecake factory filling to gradually adjust to temperature changes without the dramatic contraction that causes surface fissures. A water bath can also prevent cracks, but isn’t necessary if you follow the cooling protocol precisely.
3. Achieving the Perfect Jiggle
Knowing when your raspberry lemon cheesecake Cheesecake Factory is properly baked requires understanding the “jiggle test.” After the full baking time, gently shake the pan-the outer 2-3 inches should be completely set and firm, while a circle about 2-3 inches in diameter in the very center should wobble slightly, similar to Jell-O. This seems underbaked, but remember that carryover cooking during the cooling process will finish setting that center. Overbaking creates a dry, cracked cheesecake with grainy texture. When in doubt, slightly underbake rather than overbake.
4. Raspberry Sauce Consistency Control
The cornstarch slurry is essential for achieving the glossy, pourable consistency that swirls beautifully through your cheesecake filling. If your raspberry sauce becomes too thick after cooling, simply whisk in water or lemon juice one teaspoon at a time until you reach the desired consistency-it should be thick enough to coat a spoon but still flow when tilted. If it’s too thin, return it to the saucepan with an additional ½ teaspoon cornstarch mixed with 1 teaspoon water, and simmer for another minute. The sauce will thicken further as it cools, so err on the slightly thinner side when hot.
5. Preventing Soggy Crust Bottom
A common issue with lemon raspberry cheesecake from Cheesecake Factory attempts is a soggy bottom crust. Several techniques prevent this: First, ensure your crust is completely cooled before adding the filling-any residual heat creates condensation. Second, bake the crust until it’s slightly darker than you think necessary; the extra time drives out moisture and creates a protective barrier. Third, you can brush the cooled crust with a thin layer of melted white chocolate or egg white before adding filling, creating a waterproof seal. Finally, avoid over-filling the pan, which can cause batter to seep underneath and saturate the crust.
6. Mixing Technique for Lump-Free Batter
Professional bakers know that the paddle attachment on a stand mixer works far better than the whisk for cheesecake because it minimizes air incorporation while effectively breaking down cream cheese. Mix on the lowest speed that still moves the ingredients-usually medium-low or speed 2-3 on most mixers. Stop frequently to scrape down not just the bowl sides, but also the bottom and the paddle attachment itself, where unmixed cream cheese loves to hide. After adding eggs, mix only until just combined; 10-15 seconds per egg is sufficient. This gentle approach creates the dense, creamy texture that defines Cheesecake Factory raspberry lemon cheesecake.
7. Slicing Like a Professional
The presentation of your raspberry lemon cheesecake factory masterpiece depends significantly on clean, beautiful slices. Always use a sharp, thin-bladed knife-never a serrated knife, which tears the delicate filling. Before each cut, dip the knife in very hot water, then wipe it completely dry with a clean towel. Make one smooth, decisive cut straight down through the cheesecake, then lift the knife straight up without dragging it through the slice. Wipe the blade clean and repeat the hot water dip for each subsequent cut. This technique prevents the filling from sticking to the blade and creates those picture-perfect slices with clean edges and intact raspberry swirls.
Storage and Reheating Guidance
Store your Cheesecake Factory raspberry lemon cheesecake covered in the refrigerator for up to 5-7 days. Cover tightly with plastic wrap or aluminum foil to prevent absorbing refrigerator odors. For longer storage, freeze individual slices wrapped in plastic wrap and foil for up to 2 months; thaw overnight in the refrigerator before serving. Cheesecake is best served cold and should never be reheated.
Common Queries and FAQs Section
Here, we’ve got you covered with some common questions that people often ask
Q: Can I use frozen raspberries instead of fresh for the sauce?
A: Absolutely! Frozen raspberries work perfectly for the raspberry lemon cheesecake Cheesecake Factory sauce and are often more economical and available year-round. No need to thaw them first-add them frozen directly to the saucepan with the sugar and lemon juice. They may release slightly more liquid than fresh berries, so you might need to simmer an extra 1-2 minutes to achieve the right consistency before adding the cornstarch slurry.
Q: Why did my cheesecake crack even though I followed the recipe exactly?
A: Cracks typically result from rapid temperature changes or overbaking. Ensure you’re following the complete cooling process: 1 hour in the turned-off oven with door closed, 1 hour on the counter, then 6+ hours refrigerated. Also verify your oven temperature with an oven thermometer-many ovens run hot, which can cause overbaking. Finally, check that your eggs and cream cheese were truly at room temperature, as cold ingredients require overmixing that incorporates destabilizing air bubbles.
Q: Can I make this cheesecake without a springform pan?
A: While a springform pan is ideal for lemon raspberry cheesecake from Cheesecake Factory, you can use a regular 9-inch cake pan or deep-dish pie plate. Line the bottom and sides with parchment paper, leaving enough overhang to lift the cheesecake out after it’s fully chilled. Be aware that removing it will be trickier and the presentation might not be as pristine, but the flavor will be identical. You could also serve it directly from the pan in scooped portions.
Q: How can I tell if my cheesecake is fully set and ready to slice?
A: A properly chilled Cheesecake Factory raspberry lemon cheesecake should feel firm to the touch across the entire surface, with no soft or jiggly spots. The center should be completely set-not liquid or custardy. After at least 6 hours of refrigeration (overnight is better), press gently on the center; it should spring back slightly like a firmed custard. If it still feels very soft or liquid underneath the surface, refrigerate for an additional 2-4 hours before attempting to slice.
Q: Can I reduce the sugar to make a less sweet version?
A: You can reduce the sugar slightly, but be cautious-sugar doesn’t just provide sweetness in cheesecake; it also affects texture and structure. You can safely reduce the sugar in the filling by up to ¼ cup (reducing to ¾ cup total) without dramatically affecting texture. For the raspberry sauce, you can reduce to ¼ cup sugar if you prefer a more tart flavor. Reducing sugar more than this may result in a less creamy filling that doesn’t set properly.
Q: What’s the best way to transport this cheesecake to a party?
A: Transport your raspberry lemon cheesecake factory creation in the springform pan with the ring still attached for maximum stability. Place the pan on a flat, sturdy base like a cake board or baking sheet, then refrigerate until the last possible moment before leaving. Keep it in a cooler with ice packs if traveling more than 20 minutes. Only remove the springform ring and transfer to a serving plate once you arrive at your destination. This prevents shifting, sliding, or damage during transport.
Q: My raspberry sauce has seeds even after straining-what did I do wrong?
A: Proper straining requires patience and pressure. After pouring the cooked raspberry mixture into a fine-mesh sieve, use the back of a ladle or sturdy spoon to firmly press the solids against the mesh, working in circular motions. This extracts all the smooth pulp while leaving seeds behind. If your sieve has larger holes, you might need to strain twice through increasingly fine mesh, or use cheesecloth inside a regular strainer for the smoothest Cheesecake Factory raspberry lemon cheesecake sauce possible.
Cheesecake Factory Raspberry Lemon Cheesecake Recipe
Ingredients
Equipment
Method
- Begin your Cheesecake Factory raspberry lemon cheesecake by making the signature raspberry sauce. In a medium saucepan, combine 18 oz of fresh or frozen raspberries (no need to thaw if frozen), 1/3 cup granulated sugar, and 1 tablespoon fresh lemon juice. Place over medium heat and cook for 8-10 minutes, stirring frequently with a wooden spoon or spatula. As the mixture heats, gently break up the berries with your spoon to release their juices and create a chunky compote. The sugar will dissolve and the berries will begin to break down into a vibrant, fragrant sauce.
- In a small bowl, whisk together 1 tablespoon water and 2 teaspoons cornstarch until completely smooth with no lumps-this is your thickening slurry. Lower the heat under your raspberry mixture to medium-low, then slowly stir in the cornstarch slurry, mixing constantly to prevent clumping. Return the heat to medium and cook for an additional 1-2 minutes, stirring continuously, until the sauce noticeably thickens and becomes glossy. The consistency should coat the back of a spoon.
- Immediately remove the saucepan from heat and pour the raspberry sauce through a fine-mesh sieve set over a clean bowl. Use a spatula or spoon to press the mixture through the sieve, extracting all the smooth sauce while leaving the seeds behind. This straining step is essential for the silky texture characteristic of lemon raspberry cheesecake factory desserts. Discard the seeds and set the strained sauce aside to cool completely to room temperature, which typically takes 30-45 minutes. You can speed this process by placing the bowl in the refrigerator.
- Preheat your oven to 350°F and position a rack in the center. Lightly grease the bottom and sides of a 9-inch springform pan with butter or non-stick spray. In a medium bowl, combine 1½ cups graham cracker crumbs and ¼ cup granulated sugar, mixing until evenly distributed. Pour in 6 tablespoons of melted unsalted butter and stir thoroughly with a fork or spatula. The mixture should resemble damp sand and hold together when pressed. If it seems too dry and crumbly, add the 7th tablespoon of melted butter and mix again.
- Transfer the graham cracker mixture to your prepared springform pan. Using the flat bottom of a measuring cup or glass, firmly press the crumb mixture into an even layer across the bottom of the pan and approximately 1½ to 2 inches up the sides, creating a sturdy shell for your raspberry lemon cheesecake Cheesecake Factory filling. Apply even pressure to ensure there are no thin spots or gaps. Place the pan in your preheated 350°F oven and bake for 10-12 minutes until the crust becomes fragrant and slightly darkened in color. Remove from the oven and set aside to cool completely on a wire rack while you prepare the filling.
- Ensure your cream cheese is very soft-it should be at room temperature for at least 1 hour, or you can microwave each block for 10-15 seconds to soften slightly. In the bowl of a stand mixer fitted with the paddle attachment, combine the three 8-oz blocks of cream cheese and 1 cup granulated sugar. Beat on medium-low speed for approximately 2 minutes, scraping down the sides and bottom of the bowl halfway through. The mixture should be completely smooth, fluffy, and lump-free. This gentle mixing prevents incorporating too much air, which can cause cracks during baking.
- To your cream cheese mixture, add ½ cup sour cream, ¼ teaspoon salt, and 2 teaspoons vanilla extract. Mix on low speed just until these ingredients are fully incorporated and the batter is silky smooth, scraping the bowl as needed. The sour cream adds tanginess and creates the signature dense, creamy texture of lemon raspberry cheesecake from Cheesecake Factory, while the salt enhances all the flavors without making the dessert taste salty.
- Add the 3 room-temperature eggs one at a time, mixing on the lowest speed after each addition. Allow each egg to fully incorporate before adding the next-this should take about 20-30 seconds per egg. After all eggs are added, scrape down the sides and bottom of the bowl one final time, and give the batter a few gentle stirs with a spatula to ensure no pockets of unmixed cream cheese remain. Be careful not to overmix at this stage, as excessive beating incorporates air bubbles that can cause cracks and an uneven texture.
- Pour exactly half of your prepared cheesecake batter into the cooled graham cracker crust, spreading it gently to create an even layer. Using a spoon or squeeze bottle, drizzle ¼ cup of your cooled raspberry sauce over the surface in a random pattern-don’t worry about being too precise. Take a wooden skewer, toothpick, or the tip of a knife and gently drag it through the raspberry dollops in swirling motions, creating beautiful marbled patterns. Don’t over-swirl; 5-6 gentle strokes create the most dramatic visual effect for your Cheesecake Factory raspberry lemon cheesecake.
- Very carefully pour the remaining cheesecake batter over your first marbled layer. To prevent disturbing the swirls below, start pouring at the edges of the pan and work your way toward the center, allowing the batter to naturally spread. Use an offset spatula or the back of a spoon to gently smooth the top into an even layer. The batter should reach nearly to the top of your crust.
- Dollop small amounts of raspberry sauce (use slightly less than ¼ cup total) onto the top surface of your cheesecake in random spots-aim for 6-8 small dollops. Using your skewer or toothpick, drag gentle lines through the raspberry dollops to create elegant swirls and marbled patterns on the top. This decorative touch is part of what makes the raspberry lemon cheesecake factory presentation so stunning. Reserve the remaining raspberry sauce for serving.
- Place your assembled cheesecake in the preheated 350°F oven and bake for exactly 15 minutes-this initial higher temperature sets the crust and edges. After 15 minutes, reduce the oven temperature to 300°F without opening the door, and continue baking for an additional 30-35 minutes. The cheesecake is done when the edges are set and slightly puffed, but the center still has a slight jiggle when you gently shake the pan (about a 2-inch diameter circle in the very center). The residual heat will continue cooking the center during the cooling process.
- This gradual cooling method is absolutely crucial for preventing cracks in your lemon raspberry cheesecake Cheesecake Factory masterpiece. When baking time is complete, turn off the oven but leave the cheesecake inside with the door completely closed for 1 full hour. After this hour, open the oven door and carefully remove the cheesecake, placing it on a wire rack to sit at room temperature for another hour. This gradual temperature transition prevents the rapid contraction that causes surface cracks. Finally, cover the cheesecake loosely with plastic wrap or foil and refrigerate for at least 6 hours, though overnight (8-12 hours) is ideal for the filling to fully set.
- When completely chilled and set, run a thin knife or offset spatula around the inside edge of the springform pan to loosen the cheesecake. Carefully release and remove the springform ring. Transfer your Cheesecake Factory raspberry lemon cheesecake to a serving plate. Slice with a sharp knife dipped in hot water and wiped clean between cuts for the cleanest slices. Drizzle each slice with the reserved raspberry sauce just before serving for that authentic restaurant presentation.
Video
Notes
This Cheesecake Factory raspberry lemon cheesecake recipe transforms an iconic restaurant dessert into an achievable home baking project that’s guaranteed to impress family and guests alike. While the process requires patience-particularly during the crucial cooling stages-the result is a stunning, professionally textured cheesecake with beautiful raspberry marbling and perfectly balanced flavors. The combination of creamy, tangy filling with vibrant fruit swirls and buttery crust creates that signature lemon raspberry cheesecake factory experience right in your own kitchen. Whether you’re celebrating a special occasion or simply treating yourself to something extraordinary, this detailed recipe provides all the techniques and insights needed for dessert success. Your first slice will prove it was absolutely worth the wait!
We’d love to hear how this recipe turns out for you! Give it a try, then drop a comment below to share your thoughts and tips with us.
Also, follow along on Pinterest and Youtube for more tasty updates. Your support and thoughts mean the world!
Looks Delicious
Thanks Jana