
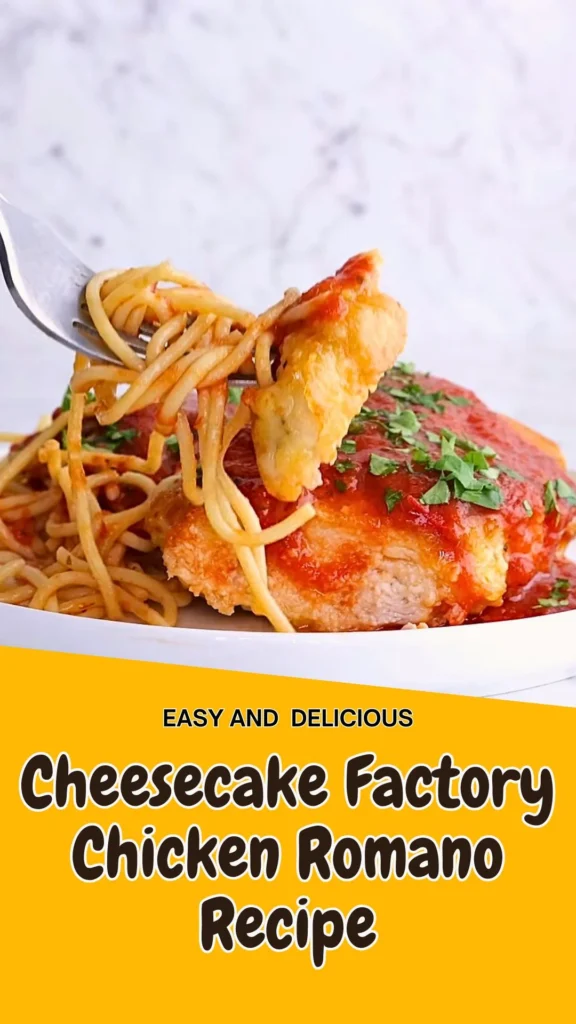
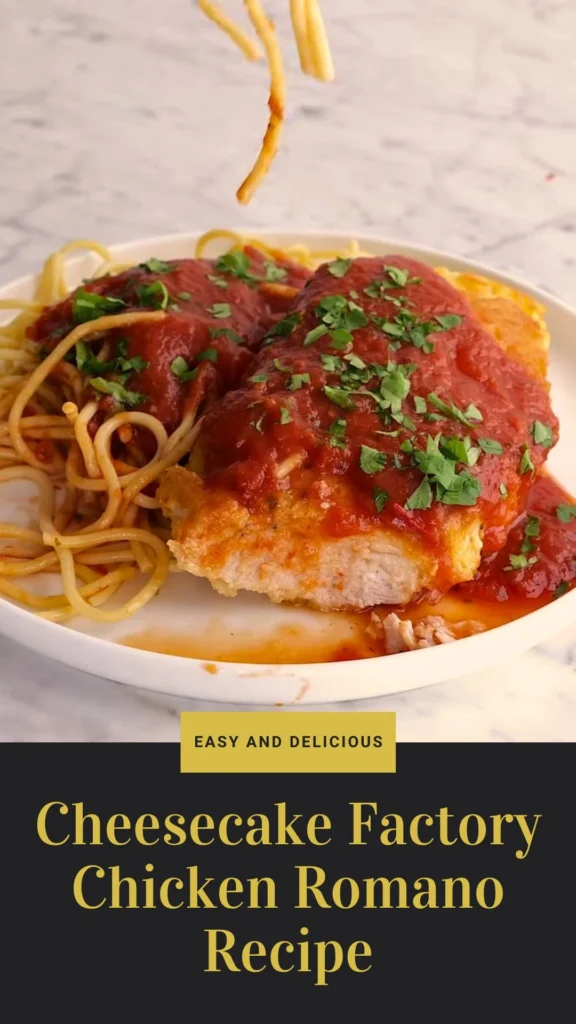
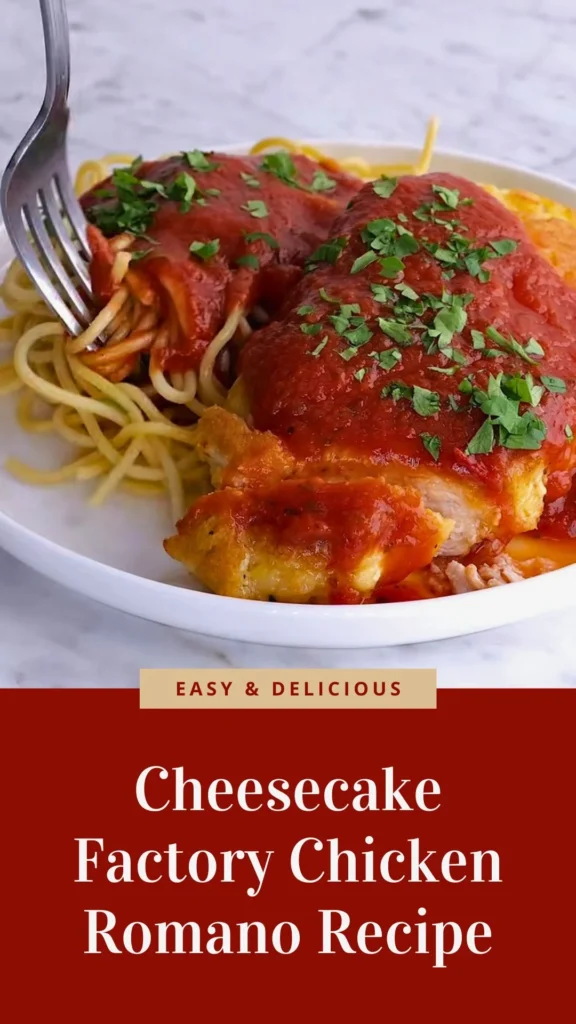
When you crave the sophisticated flavors of Cheesecake Factory chicken romano without leaving your house, this restaurant-quality recipe delivers every layer of that iconic dish. The cheesecake factory chicken romano recipe features tender chicken breasts stuffed with savory artichoke hearts and sun-dried tomatoes, coated in a golden Romano-Parmesan crust, then served over silky pasta with a bright lemon cream sauce.
This copycat Cheesecake Factory chicken romano captures the essence of the original-a harmonious marriage of Italian flavors with indulgent American portions. Whether you’re planning a romantic dinner or impressing dinner guests, this cheesecake factory chicken romano pasta recipe transforms your kitchen into a fine-dining destination.
The combination of crispy breaded exterior, succulent chicken, Mediterranean-inspired filling, and tangy cheesecake factory chicken romano sauce recipe creates an unforgettable meal that rivals any restaurant experience.
What Does It Taste Like?
Cheesecake factory chicken romano offers a symphony of complementary flavors and textures in every forkful. The chicken itself is incredibly tender and juicy, encased in a satisfyingly crispy, cheese-enriched crust that delivers nutty Romano and Parmesan notes with each bite. Inside, the stuffing provides briny, tangy bursts from artichoke hearts paired with the sweet-savory intensity of sun-dried tomatoes.
The cheesecake factory chicken romano sauce recipe brings everything together with its velvety, luxurious cream base brightened by fresh lemon juice and zest-cutting through the richness while adding aromatic citrus notes.
The pasta provides a neutral, buttery foundation that soaks up the luscious sauce. The overall experience is rich yet balanced, indulgent yet refined, with Italian herbs, sharp cheese, Mediterranean vegetables, and bright acidity creating a restaurant-worthy complexity.
Ingredients and Kitchen Utensils Lists
Ingredients
For the Chicken:
- 4 boneless, skinless chicken breasts
- ½ cup all-purpose flour
- 4 eggs, beaten
- 1 cup Italian seasoned breadcrumbs
- ½ cup grated Romano cheese
- ¼ cup grated Parmesan cheese
- 1 (14 oz) can artichoke hearts, drained and chopped
- ¼ cup sun-dried tomatoes, chopped
- Salt and pepper to taste
- Vegetable oil for frying
For the Pasta:
- 1 lb fettuccine or linguine
- 2 tablespoons butter
For the Lemon Cream Sauce:
- 2 cups heavy cream
- ½ cup grated Parmesan cheese
- Juice of 1 lemon
- Zest of 1 lemon
- Salt and pepper to taste
Kitchen Utensils
- Meat mallet or rolling pin
- Sharp knife
- Cutting board
- 3 shallow bowls or plates (for breading station)
- Large skillet (for frying)
- Baking sheet
- Medium saucepan (for sauce)
- Large pot (for pasta)
- Colander
- Whisk
- Tongs
- Toothpicks
- Meat thermometer
- Zester or microplane
- Measuring cups and spoons
Preparation and Cooking Time with Serving
Prep Time: 25 minutes
Cook Time: 30 minutes
Total Time: 55 minutes
Servings: 4 people
Difficulty Level: Intermediate to Advanced
Recipe Instructions with Steps
Step 1: Prepare the Chicken Breasts
Begin your cheesecake factory chicken romano recipe by preheating your oven to 350°F (175°C). Place each boneless, skinless chicken breast on a cutting board. Using a sharp knife, carefully butterfly each breast by slicing horizontally through the middle, cutting almost all the way through but leaving one edge attached so the breast opens like a book. Place each butterflied chicken breast between two sheets of plastic wrap or parchment paper and use a meat mallet to gently pound them to an even ¼-inch thickness throughout. This ensures even cooking and creates enough surface area for the stuffing.
Step 2: Create the Mediterranean Filling
In a small bowl, combine the drained and chopped artichoke hearts with the chopped sun-dried tomatoes. Mix these ingredients thoroughly to create your Cheesecake Factory chicken romano filling. The artichokes should be patted dry with paper towels to remove excess moisture, which prevents the stuffing from making the chicken soggy. Chop both ingredients into small, uniform pieces so they distribute evenly across the chicken breast.
Step 3: Stuff and Secure the Chicken
Lay each pounded chicken breast flat on your work surface with the inside facing up. Divide the artichoke and sun-dried tomato mixture evenly among the four chicken breasts, spreading it across one half of each butterflied breast while leaving about a ½-inch border around the edges. Sprinkle a tablespoon of grated Romano cheese over the filling on each breast. Carefully fold the empty half of the chicken back over the filling, pressing the edges together gently to seal. If the chicken doesn’t hold together well, secure it with 2-3 toothpicks inserted horizontally. Season the outside of each stuffed breast generously with salt and freshly cracked black pepper.
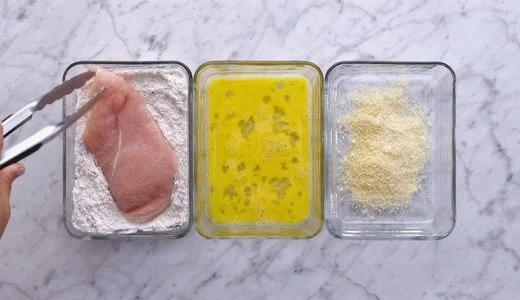
Step 4: Set Up Your Breading Station
Create a classic three-stage breading station for your copycat Cheesecake Factory chicken romano. Place the all-purpose flour in the first shallow bowl or plate. Beat the 4 eggs in the second shallow dish until well combined and slightly frothy. In the third dish, combine the Italian seasoned breadcrumbs with ½ cup grated Romano cheese and ¼ cup grated Parmesan cheese, mixing thoroughly so the cheese distributes evenly throughout the breadcrumbs. This cheese-enriched coating is what creates that signature golden, flavorful crust.
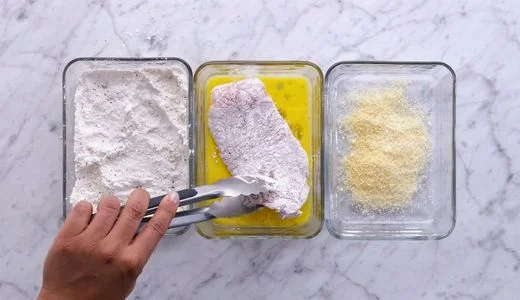
Step 5: Bread the Stuffed Chicken
Working with one stuffed chicken breast at a time, dredge it completely in flour, shaking off any excess. This initial flour coating helps the egg adhere better. Next, dip the floured chicken into the beaten eggs, ensuring every surface is coated. Allow excess egg to drip off, then transfer to the breadcrumb-cheese mixture. Press the breadcrumbs firmly onto all surfaces of the chicken, including the edges, creating a thick, even coating. Set the breaded chicken aside on a clean plate and repeat with remaining breasts. The coating should be substantial and completely cover the chicken without any gaps.
Step 6: Pan-Fry the Chicken
Pour vegetable oil into a large, heavy-bottomed skillet to a depth of about ½ inch. Heat over medium-high heat until the oil reaches approximately 350°F (test by dropping a breadcrumb in-it should sizzle immediately). Carefully place the breaded chicken breasts in the hot oil, working in batches if necessary to avoid crowding. Fry for 3-4 minutes on the first side without moving them, allowing a golden-brown crust to develop. Using tongs, carefully flip each piece and fry for another 3-4 minutes on the second side until golden and crispy. The chicken won’t be fully cooked through at this point-that’s intentional.

Step 7: Finish in the Oven
Transfer the pan-fried chicken breasts to a baking sheet lined with parchment paper or a wire rack. Place in your preheated 350°F oven and bake for 10-15 minutes, until the chicken is cooked through completely and reaches an internal temperature of 165°F when checked with a meat thermometer inserted into the thickest part. This two-stage cooking method ensures a crispy exterior without burning the breadcrumb coating while guaranteeing juicy, fully cooked chicken. Remove from oven and let rest for 5 minutes before slicing.
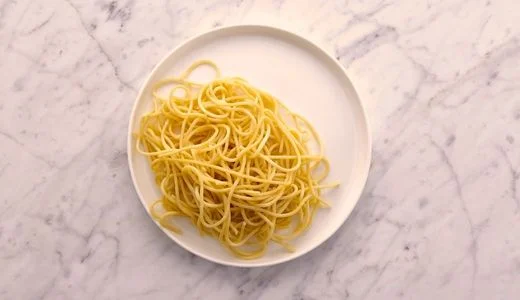
Step 8: Cook the Pasta
While the chicken bakes, bring a large pot of generously salted water to a rolling boil. Add your fettuccine or linguine and cook according to package directions until al dente-typically 8-10 minutes for dried pasta. The pasta should have a slight firmness when bitten. Drain the pasta in a colander, reserving about ½ cup of the starchy pasta water, then return the drained pasta to the pot. Toss with 2 tablespoons of butter until melted and evenly coated. Keep warm while you prepare the sauce.
Step 9: Make the Lemon Cream Sauce
In a medium saucepan, pour 2 cups of heavy cream and place over medium heat. Bring to a gentle simmer, then reduce heat slightly and continue simmering, stirring occasionally, until the cream reduces by approximately half-this takes about 10 minutes. The cream should visibly thicken and coat the back of a spoon. Stir in ½ cup grated Parmesan cheese, the juice of one whole lemon, and the zest from that same lemon. Season with salt and pepper to taste. Continue simmering for 2-3 minutes, whisking frequently, until the cheese melts completely and the cheesecake factory chicken romano sauce recipe becomes silky and cohesive. If the sauce becomes too thick, whisk in a splash of reserved pasta water or additional cream.
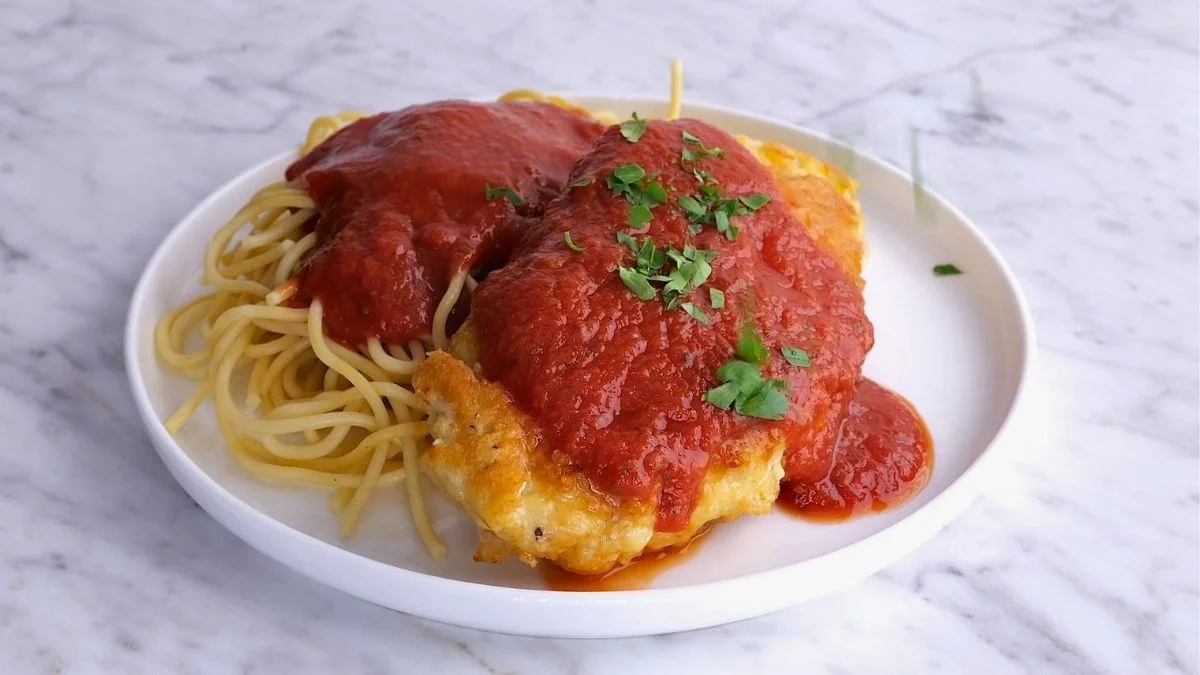
Step 10: Plate and Serve
Divide the buttered pasta among four serving plates, creating a nest or bed in the center of each plate. Remove any toothpicks from the rested chicken breasts, then slice each breast on a slight diagonal into 4-5 medallions, keeping the slices together. Carefully transfer each sliced chicken breast on top of the pasta, fanning out the slices slightly to showcase the beautiful artichoke and sun-dried tomato filling. Generously drizzle the warm lemon cream sauce over the chicken and pasta. Garnish with additional freshly grated Parmesan cheese and a sprinkle of fresh lemon zest for brightness and visual appeal. Serve immediately while everything is hot.

Customization and Pairing for Serving Ideas
1. Spinach and Mushroom Variation
Transform your cheesecake factory chicken romano pasta recipe by substituting the artichoke-tomato filling with sautéed spinach and mushrooms for an earthier flavor profile. Sauté 1 cup of chopped mushrooms (cremini, shiitake, or a mix) with 2 cups fresh spinach and a minced garlic clove in butter until the spinach wilts and mushroom liquid evaporates. Cool completely before stuffing the chicken. This variation pairs beautifully with the same lemon cream sauce and offers a more umami-forward experience while maintaining the elegant presentation.
2. Prosciutto and Fontina Enhancement
Elevate your copycat Cheesecake Factory chicken romano to new heights by adding a thin layer of prosciutto and creamy Fontina cheese to the filling. Before adding the artichoke mixture, lay 1-2 slices of prosciutto on each butterflied chicken breast, then add your artichoke-tomato mixture and top with a slice of Fontina instead of sprinkling Romano. The prosciutto adds salty, savory depth while the Fontina melts beautifully inside, creating an even more luxurious interior.
3. More Recipes to Try from Our Kitchen
If you enjoyed this Cheesecake Factory Chicken Romano Recipe, you might also love exploring other comforting dishes from our collection. The creamy Mission BBQ Mac and Cheese Recipe makes a perfect side for hearty chicken meals, adding rich, cheesy comfort to your dinner table. For something lighter yet elegant, try the Flower Child Cauliflower Risotto Recipe, which delivers a creamy, restaurant-style texture with wholesome ingredients. And if you enjoy bold dipping sauces, our Ike’s Dirty Sauce Recipe is a fantastic addition that brings tangy, savory flavor to many appetizers and chicken dishes.
4. Gluten-Free Adaptation
Create a gluten-free version of Cheesecake Factory chicken romano by making simple substitutions that maintain texture and flavor. Replace all-purpose flour with rice flour or gluten-free all-purpose blend for dredging. Use gluten-free panko breadcrumbs mixed with your Romano and Parmesan cheeses-they crisp up beautifully when fried. Swap regular pasta for your favorite gluten-free fettuccine or rice noodles. The lemon cream sauce is naturally gluten-free, so no modifications needed there. These changes accommodate dietary restrictions without compromising the dish’s signature qualities.
5. Lighter Preparation Method
For a healthier take on the cheesecake factory chicken romano recipe, bake the breaded chicken instead of pan-frying. Place the breaded, stuffed chicken breasts on a wire rack set over a baking sheet, spray lightly with olive oil cooking spray, and bake at 400°F for 25-30 minutes, turning halfway through and spraying again. The chicken won’t be quite as crispy as the fried version, but you’ll save significant calories while still enjoying the Mediterranean filling and lemon cream sauce. You can also lighten the sauce by using half-and-half instead of heavy cream.
6. Complete Italian Feast Presentation
Serve your cheesecake factory chicken romano pasta recipe as the centerpiece of an authentic Italian multi-course meal. Begin with a simple Caprese salad featuring fresh mozzarella, ripe tomatoes, and basil drizzled with balsamic reduction. Accompany the main course with garlic-roasted asparagus or sautéed broccolini for color and nutritional balance. Finish with a light lemon panna cotta or tiramisu. This progression creates a restaurant-quality dining experience that showcases the chicken romano as the star while providing complementary flavors and textures throughout.
7. Mediterranean Grain Bowl Alternative
Deconstruct the traditional Cheesecake Factory chicken romano presentation by serving it over a base of Mediterranean grains instead of pasta. Cook farro, quinoa, or orzo and toss with olive oil, lemon juice, fresh herbs, cherry tomatoes, and Kalamata olives. Top with sliced chicken romano and drizzle with the lemon cream sauce. This modern approach maintains all the signature flavors while adding whole grains, creating a trendy grain bowl presentation that’s perfect for meal prep or lighter appetites.
Tips Section
1. Mastering the Butterfly Cut
The butterfly technique is crucial for successful Cheesecake Factory chicken romano recipe execution. Start with chicken breasts of similar size for even cooking. Place your non-dominant hand flat on top of the chicken to stabilize it, then use a sharp boning or chef’s knife to make a horizontal cut through the thickest part of the breast, keeping your knife parallel to the cutting board. Cut almost all the way through, stopping about ½ inch from the opposite edge so the breast opens like a book. If you accidentally cut all the way through, don’t worry-simply overlap the two pieces slightly when stuffing. The key is creating a large, thin surface that can hold plenty of filling while cooking quickly and evenly.
2. Preventing Soggy Breading
Nothing ruins copycat Cheesecake Factory chicken romano faster than a soggy, falling-apart coating. Several techniques ensure crispy perfection: First, thoroughly pat the artichoke hearts and sun-dried tomatoes dry before stuffing to eliminate excess moisture. Second, let the breaded chicken rest for 10 minutes in the refrigerator before frying-this allows the coating to set and adhere better. Third, maintain proper oil temperature (around 350°F)-too cool and the breading absorbs oil, too hot and it burns before the chicken cooks. Finally, don’t overcrowd the pan, which drops oil temperature and creates steam that softens the crust.
3. Achieving Perfect Lemon Cream Sauce Consistency
The cheesecake factory chicken romano sauce recipe should be luxuriously thick but still pourable-coating the back of a spoon without being gloppy. The secret is proper reduction timing. Heavy cream needs to reduce by about half, which concentrates both flavor and texture. Watch for visual cues: the cream should bubble steadily but gently, and you’ll notice it coating the sides of the pan as it reduces. When you drag a spoon through it, the path should remain visible for a moment before filling back in. If your sauce becomes too thick, whisk in cream or pasta water a tablespoon at a time. Too thin? Continue simmering for a few more minutes.
4. Fresh vs. Oil-Packed Sun-Dried Tomatoes
Your choice of sun-dried tomatoes significantly impacts the Cheesecake Factory chicken romano filling’s flavor and moisture content. Oil-packed varieties are softer, more pliable, and add richness, but they also contribute extra oil that can make the filling greasy. If using oil-packed, drain them thoroughly and pat dry with paper towels. Dry-packed sun-dried tomatoes are more concentrated in flavor and won’t add moisture, but they’re tougher and may need rehydrating in hot water for 10 minutes before chopping. For best results, use oil-packed but thoroughly drained tomatoes, or rehydrate dry-packed in chicken broth for added flavor.
5. Temperature Management for Juicy Chicken
Overcooking is the enemy of tender cheesecake factory chicken romano pasta recipe chicken. Invest in an instant-read meat thermometer and check the internal temperature in the thickest part of the stuffed breast-you’re aiming for exactly 165°F. Remember that chicken continues cooking from residual heat after removing from the oven, so pull it out when it reaches 162-163°F and let it rest for 5 minutes. The resting period allows juices to redistribute throughout the meat rather than spilling out when you cut it. Slice against the grain (perpendicular to the muscle fibers) for the most tender texture.
6. Make-Ahead and Storage Strategy
You can prep components of this cheesecake factory chicken romano recipe in advance for easier entertaining. Stuff and bread the chicken breasts up to 24 hours ahead, then cover tightly and refrigerate. Bring to room temperature for 20 minutes before frying. The lemon cream sauce can be made 2 hours ahead and reheated gently, whisking in a splash of cream if it thickens too much. However, avoid cooking the pasta more than 30 minutes ahead-it continues absorbing moisture and becomes mushy. If you must prep pasta early, undercook slightly, toss with oil, and reheat in boiling water for 30 seconds before serving.
7. Scaling the Recipe for Crowds
When preparing Cheesecake Factory chicken romano for larger gatherings, work smart rather than hard. You can butterfly and stuff up to 8 chicken breasts at once, but fry in batches to maintain oil temperature-crowding drops the temperature dramatically and results in greasy, soggy breading. Keep finished fried chicken warm on a wire rack in a 200°F oven while you complete batches, then finish all pieces together in a 350°F oven. Double or triple the lemon cream sauce recipe as needed-it holds well on very low heat. Cook pasta in larger batches using a bigger pot, as pasta needs plenty of room to move freely for even cooking.
Storage and Reheating Guidance
Store leftover cheesecake factory chicken romano pasta recipe components separately for best results. Refrigerate sliced chicken in an airtight container for up to 3 days; pasta and sauce should also be stored separately. Reheat chicken in a 350°F oven for 10-12 minutes to maintain the crispy coating-microwaving makes it soggy. Warm sauce gently on the stovetop, adding cream to restore consistency. Refresh pasta by tossing in boiling water for 30-60 seconds, then drain and combine with butter.
Common Queries and FAQs Section
Here, we’ve got you covered with some common questions that people often ask
Q: Can I use chicken thighs instead of chicken breasts?
A: While chicken breasts are traditional for Cheesecake Factory chicken romano, boneless, skinless chicken thighs can work if you prefer darker meat. Thighs have more fat and flavor but also more connective tissue. Pound them thinner than breasts (about ⅛ inch) and increase baking time by 3-5 minutes to ensure they reach 165°F. The richer flavor of thighs pairs beautifully with the tangy lemon cream sauce and can actually be more forgiving if slightly overcooked.
Q: What’s the best way to prevent the filling from leaking out?
A: Filling leakage is a common issue with stuffed chicken recipes. To prevent this in your copycat Cheesecake Factory chicken romano, leave a ½-inch border around the edges when spreading filling, press the edges firmly together after folding, and secure with toothpicks if needed. Make sure your filling isn’t too wet-drain artichokes and tomatoes thoroughly. The breading also acts as a seal, so ensure complete coverage with no gaps. Finally, don’t overstuff-less is more when it comes to keeping everything contained.
Q: Can I freeze this dish before or after cooking?
A: You can freeze cheesecake factory chicken romano recipe chicken at different stages. For best results, freeze the stuffed, breaded (but uncooked) chicken breasts on a baking sheet until solid, then transfer to freezer bags for up to 2 months. Fry and bake directly from frozen, adding 5-7 minutes to the oven time. Freezing after cooking isn’t ideal as the breading becomes soggy upon thawing, and the lemon cream sauce can separate. If you must freeze cooked chicken, reheat from frozen in a 375°F oven without thawing.
Q: Why did my lemon cream sauce curdle or separate?
A: Sauce separation in the cheesecake factory chicken romano sauce recipe typically occurs from either overheating or adding cheese to cream that’s too hot. Heavy cream is more stable than milk but can still break if boiled vigorously. Keep your heat at a gentle simmer-bubbles should break the surface but not roll aggressively. When adding Parmesan, remove the pan from direct heat for a moment and whisk the cheese in gradually. If your sauce does break, try blending it with an immersion blender or whisking in a tablespoon of cold cream.
Q: What can I substitute for artichoke hearts if I don’t like them?
A: While artichokes are signature to authentic Cheesecake Factory chicken romano, several alternatives work beautifully. Roasted red peppers provide sweetness and color, sautéed mushrooms add earthiness and umami, or you could use a combination of fresh spinach and roasted garlic for a more traditional stuffed chicken profile. Hearts of palm offer a similar texture to artichokes with a milder flavor. Whatever you choose, ensure it’s thoroughly drained and patted dry to prevent excess moisture in the filling.
Q: How do I know when the oil is the right temperature for frying?
A: Proper oil temperature is critical for crispy cheesecake factory chicken romano pasta recipe breading. The ideal range is 350-375°F. If you don’t have a thermometer, test by dropping a breadcrumb into the oil-it should sizzle immediately and turn golden in about 60 seconds. If the breadcrumb sinks without sizzling, the oil is too cool; if it instantly burns and smokes, it’s too hot. Maintain temperature by not overcrowding the pan and adjusting heat as needed between batches.
Q: Can I make this dish dairy-free?
A: Creating a dairy-free version of Cheesecake Factory chicken romano requires several substitutions but is definitely possible. Use dairy-free breadcrumbs and nutritional yeast instead of Romano and Parmesan for the coating. For the lemon cream sauce, substitute full-fat coconut cream or cashew cream for heavy cream, and use additional nutritional yeast for the cheesy flavor. The texture and flavor will differ from the original, but you’ll still have a delicious stuffed chicken with a creamy, tangy sauce that accommodates dairy restrictions.
Cheesecake Factory Chicken Romano Recipe
Ingredients
Equipment
Method
- Begin your cheesecake factory chicken romano recipe by preheating your oven to 350°F (175°C). Place each boneless, skinless chicken breast on a cutting board. Using a sharp knife, carefully butterfly each breast by slicing horizontally through the middle, cutting almost all the way through but leaving one edge attached so the breast opens like a book. Place each butterflied chicken breast between two sheets of plastic wrap or parchment paper and use a meat mallet to gently pound them to an even ¼-inch thickness throughout. This ensures even cooking and creates enough surface area for the stuffing.
- In a small bowl, combine the drained and chopped artichoke hearts with the chopped sun-dried tomatoes. Mix these ingredients thoroughly to create your Cheesecake Factory chicken romano filling. The artichokes should be patted dry with paper towels to remove excess moisture, which prevents the stuffing from making the chicken soggy. Chop both ingredients into small, uniform pieces so they distribute evenly across the chicken breast.
- Lay each pounded chicken breast flat on your work surface with the inside facing up. Divide the artichoke and sun-dried tomato mixture evenly among the four chicken breasts, spreading it across one half of each butterflied breast while leaving about a ½-inch border around the edges. Sprinkle a tablespoon of grated Romano cheese over the filling on each breast. Carefully fold the empty half of the chicken back over the filling, pressing the edges together gently to seal. If the chicken doesn’t hold together well, secure it with 2-3 toothpicks inserted horizontally. Season the outside of each stuffed breast generously with salt and freshly cracked black pepper.
- Create a classic three-stage breading station for your copycat Cheesecake Factory chicken romano. Place the all-purpose flour in the first shallow bowl or plate. Beat the 4 eggs in the second shallow dish until well combined and slightly frothy. In the third dish, combine the Italian seasoned breadcrumbs with ½ cup grated Romano cheese and ¼ cup grated Parmesan cheese, mixing thoroughly so the cheese distributes evenly throughout the breadcrumbs. This cheese-enriched coating is what creates that signature golden, flavorful crust.
- Working with one stuffed chicken breast at a time, dredge it completely in flour, shaking off any excess. This initial flour coating helps the egg adhere better. Next, dip the floured chicken into the beaten eggs, ensuring every surface is coated. Allow excess egg to drip off, then transfer to the breadcrumb-cheese mixture. Press the breadcrumbs firmly onto all surfaces of the chicken, including the edges, creating a thick, even coating. Set the breaded chicken aside on a clean plate and repeat with remaining breasts. The coating should be substantial and completely cover the chicken without any gaps.
- Pour vegetable oil into a large, heavy-bottomed skillet to a depth of about ½ inch. Heat over medium-high heat until the oil reaches approximately 350°F (test by dropping a breadcrumb in-it should sizzle immediately). Carefully place the breaded chicken breasts in the hot oil, working in batches if necessary to avoid crowding. Fry for 3-4 minutes on the first side without moving them, allowing a golden-brown crust to develop. Using tongs, carefully flip each piece and fry for another 3-4 minutes on the second side until golden and crispy. The chicken won’t be fully cooked through at this point-that’s intentional.
- Transfer the pan-fried chicken breasts to a baking sheet lined with parchment paper or a wire rack. Place in your preheated 350°F oven and bake for 10-15 minutes, until the chicken is cooked through completely and reaches an internal temperature of 165°F when checked with a meat thermometer inserted into the thickest part. This two-stage cooking method ensures a crispy exterior without burning the breadcrumb coating while guaranteeing juicy, fully cooked chicken. Remove from oven and let rest for 5 minutes before slicing.
- While the chicken bakes, bring a large pot of generously salted water to a rolling boil. Add your fettuccine or linguine and cook according to package directions until al dente-typically 8-10 minutes for dried pasta. The pasta should have a slight firmness when bitten. Drain the pasta in a colander, reserving about ½ cup of the starchy pasta water, then return the drained pasta to the pot. Toss with 2 tablespoons of butter until melted and evenly coated. Keep warm while you prepare the sauce.
- In a medium saucepan, pour 2 cups of heavy cream and place over medium heat. Bring to a gentle simmer, then reduce heat slightly and continue simmering, stirring occasionally, until the cream reduces by approximately half-this takes about 10 minutes. The cream should visibly thicken and coat the back of a spoon. Stir in ½ cup grated Parmesan cheese, the juice of one whole lemon, and the zest from that same lemon. Season with salt and pepper to taste. Continue simmering for 2-3 minutes, whisking frequently, until the cheese melts completely and the cheesecake factory chicken romano sauce recipe becomes silky and cohesive. If the sauce becomes too thick, whisk in a splash of reserved pasta water or additional cream.
- Divide the buttered pasta among four serving plates, creating a nest or bed in the center of each plate. Remove any toothpicks from the rested chicken breasts, then slice each breast on a slight diagonal into 4-5 medallions, keeping the slices together. Carefully transfer each sliced chicken breast on top of the pasta, fanning out the slices slightly to showcase the beautiful artichoke and sun-dried tomato filling. Generously drizzle the warm lemon cream sauce over the chicken and pasta. Garnish with additional freshly grated Parmesan cheese and a sprinkle of fresh lemon zest for brightness and visual appeal. Serve immediately while everything is hot.
Video
Notes
This Cheesecake Factory chicken romano recipe transforms your home kitchen into an upscale Italian restaurant, delivering impressive flavors and presentation without professional culinary training. The combination of crispy cheese-crusted chicken, savory Mediterranean filling, silky pasta, and bright cheesecake factory chicken romano sauce recipe creates a meal that’s both comforting and sophisticated. Whether you’re making this copycat Cheesecake Factory chicken romano for a special occasion or simply craving restaurant-quality comfort food, the detailed techniques and customization options ensure success every time. With practice, you’ll master the butterfly cut, perfect the breading technique, and create that signature lemon cream sauce with confidence. Your family and guests will be amazed that this cheesecake factory chicken romano pasta recipe came from your own kitchen—and you’ll save money while enjoying the satisfaction of restaurant-quality cooking at home!
We’d love to hear how this recipe turns out for you! Give it a try, then drop a comment below to share your thoughts and tips with us.
Also, follow along on Pinterest and Youtube for more tasty updates. Your support and thoughts mean the world!